Explore All
BROWSE BY CATEGORY
Interior
Exterior
Home Essentials
Homeowner Tools
Blogs & Guides
Find a Pro
Book Your Appointment Now
Home Essentials
About Renovize Home
Explore All
BROWSE BY CATEGORY
Interior
Exterior
Home Essentials
Homeowner Tools
Blogs & Guides
Find a Pro
Book Your Appointment Now
Home Essentials
About Renovize Home
Last Updated 2025-12-11
Resealing windows is one of the simplest and most cost-effective ways to restore comfort, stop drafts, and prevent energy loss in your home. Over time, window seals can weaken, crack, or separate from the frame, allowing outside air, moisture, dust, and noise to seep through gaps that might not always be visible. When this happens, your home becomes harder to heat in the winter and harder to cool in the summer, significantly affecting overall comfort.
By properly resealing your windows, you can strengthen insulation, improve energy efficiency, and protect your home from long-term moisture damage. Fresh window seals create a tight, airtight barrier, blocking unwanted air movement and preventing water from seeping into the sill or frame. Whether you’re dealing with aging caulk, broken glazing seals, or shifting frames, resealing restores your windows' original barrier, keeping your home quieter, healthier, and more comfortable throughout the year.
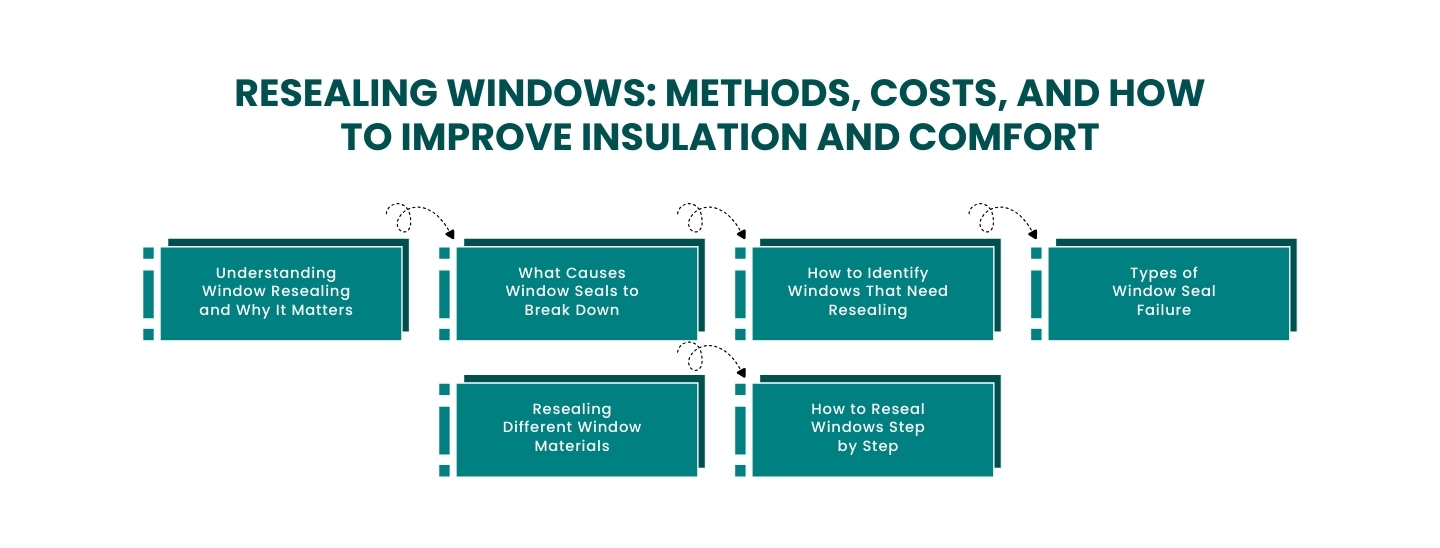
Table of Contents
Understanding Window Resealing and Why It Matters
What Causes Window Seals to Break Down
How to Identify Windows That Need Resealing
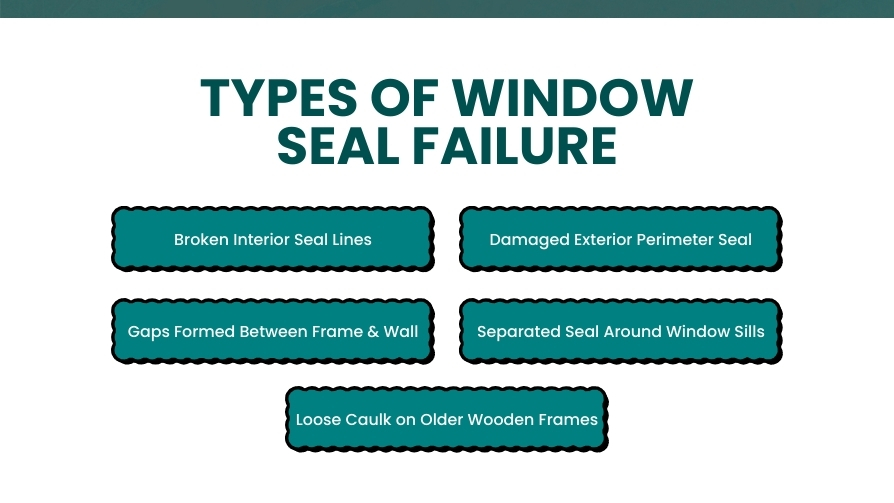
Types of Window Seal Failure and Matching Repairs
Resealing Different Window Materials
Resealing Different Window Materials
Resealing Old or Aging Windows
Resealing Old or Aging Windows
Resealing Double Pane and Thermopane Windows
Resealing RV, Camper, and Mobile Windows
Resealing Windows From Inside vs Outside
How to Reseal Windows
Tools and Materials Needed for Proper Resealing
When Resealing Will Not Fix the Problem
Cost to Reseal Windows
DIY vs Professional Window Resealing
Preventing Seal Failure in the Future
Final Thoughts
Window resealing involves restoring the airtight and watertight barrier that surrounds the window frame. As windows age, the original caulk begins to shrink, crack, or separate from the wall.
Glazing along the glass edge may dry out or loosen, especially in older wood windows. Seasonal expansion and contraction widen these gaps even more, allowing outside air, moisture, and heat to sneak indoors. Resealing closes these openings and rebuilds the window’s protective shield so the home stays comfortable and energy efficient.
When a window loses its seal, the frame can no longer block outside conditions the way it was designed to. Even tiny invisible gaps can create cold drafts, hot spots, rising utility bills, and moisture problems. Water entering through the frame can damage the sill, soften wood, stain drywall, and encourage mold growth, all of which become expensive repairs if ignored.
Resealing reinforces the window’s weather barrier, helps maintain stable indoor temperatures, reduces energy waste, and protects the structure around the window from long-term damage. It’s a simple repair that delivers big benefits without the cost of full replacement.
A window’s seal is responsible for blocking unwanted air movement between outdoors and indoors. When the old caulk cracks or pulls away, cold winter air and hot summer air can leak into the home. These drafts force your heating and cooling system to work harder, leading to uneven room temperatures and noticeably higher energy bills.
Resealing restores a continuous, airtight boundary around the frame. Fresh caulk closes gaps where air previously slipped through, and new glazing seals around the glass to stop drafts near the sash edges. As a result, rooms stay warmer in winter, cooler in summer, and far more comfortable year-round, without relying heavily on HVAC systems.
Moisture is one of the main reasons window frames deteriorate. When sealant cracks or pulls away, rainwater slips into the gaps around the frame. This water doesn’t stay on the surface, it travels downward into the sill, trim, insulation, and even the wall cavity. Over time, this leads to wood rot, swollen sills, peeling paint, bubbling drywall, and hidden mold growth.
Resealing creates a waterproof barrier that blocks rain and condensation from entering these sensitive areas. Fresh silicone or latex caulk repels moisture, while new glazing prevents water from creeping between the glass and sash. This protection keeps the window structure dry, healthy, and stable, especially during storms or humid seasons.
When windows remain unsealed, constant exposure to moisture, temperature fluctuations, and air leaks weakens both the frame and the glass assembly. Wood becomes soft, vinyl warps, aluminum corrodes, and hardware loosens over time.
Resealing strengthens the window by restoring its protective layer. With proper sealing, the frame experiences less expansion stress, fewer drafts, and no moisture infiltration, all of which slow down natural wear. By resealing at the right time, homeowners can extend the window’s lifespan by several years, delaying the need for costly frame replacements or new units.
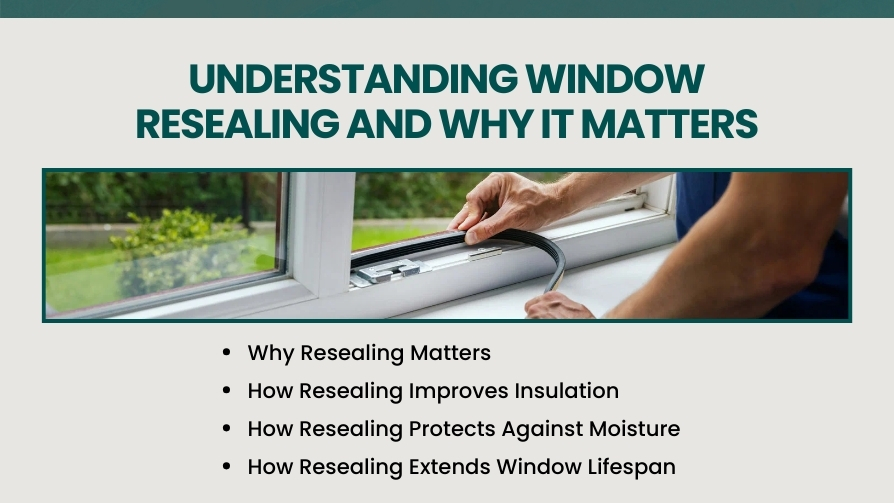
Window seals gradually weaken over time, creating gaps that let in air, moisture, and noise. As sealant ages or reacts to environmental changes, it loses its flexibility and begins pulling away from the frame. This leads to reduced insulation, increased drafts, and a higher long-term risk of rot and water damage inside the home. Understanding the causes of seal breakdown helps homeowners recognize when it’s time to reseal and prevent further damage.
As caulk ages, it loses elasticity, hardens, and begins to shrink. These shrinking seals create small gaps along the window edges, which gradually widen, allowing air to pass through. Homes that are older often experience this type of seal failure, especially in windows with original caulking.
Direct sunlight can break down the chemical structure of the caulk. UV rays cause fading, cracking, and brittleness, particularly on south-facing windows. Over time, the sealant can begin to crumble or peel away entirely, exposing the window frame to the weather and increasing the risk of damage.
Windows naturally expand when heated and contract when cooled. These constant cycles of temperature change stretch the sealant beyond its limits. When the window frame moves but the sealant does not, cracks form along the edges, allowing air and moisture to infiltrate the home.
Continuous exposure to rain, condensation, or high humidity weakens the adhesion of the caulk at the sealant’s edges. Water loosens the bond and softens the caulk, causing it to separate from the frame or crumble when touched. This is especially problematic for windows in areas with high moisture levels, such as bathrooms or kitchens.
Not all sealants are designed for use around window frames. Low-quality or incorrect caulk dries too quickly, shrinks excessively, or loses adhesion within a few months. When the wrong sealant is used, early gaps and seal failures are almost inevitable. It’s essential to use high-quality, window-specific sealant to ensure a long-lasting, effective barrier.
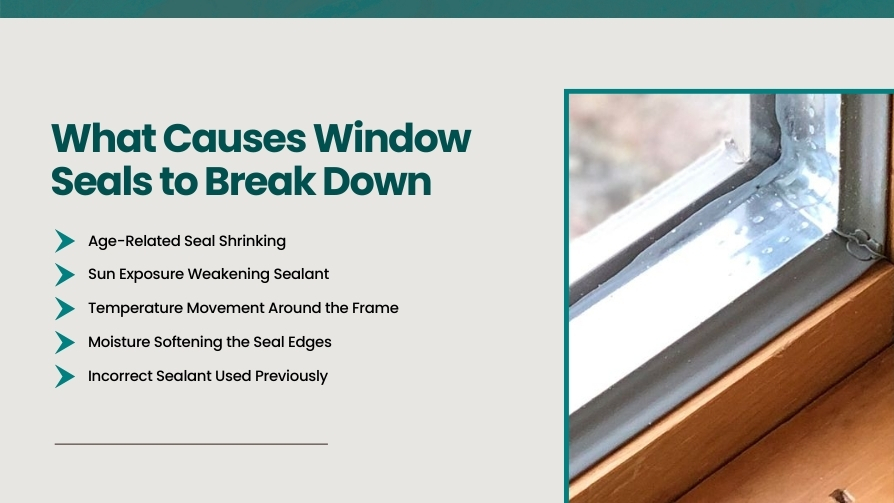
Identifying failing window seals early is crucial for preventing moisture damage, saving energy, and ensuring that the window continues to function properly. Most warning signs develop gradually, so homeowners need to carefully examine the window frame and glass for subtle changes. Early identification allows resealing before the frame deteriorates or the wall absorbs moisture.
If you feel a draft when running your hand around the window frame, it's a strong indication of seal failure. Drafts often become noticeable during windy weather or when the HVAC system is running. Even a slight temperature difference or gentle air movement suggests the seal is no longer providing an airtight boundary and should be resealed.
Cracked, split, or peeling caulk is one of the most obvious signs that a window needs resealing. These cracks may begin as thin lines but can quickly widen as the caulk dries out and loses flexibility. Once cracked, the seal no longer blocks airflow effectively, allowing moisture and drafts to enter the home.
If you notice dampness, discoloration, or swelling around the sill or walls near the window, this is a clear sign that water is entering through broken seals. Moisture doesn’t stay in one spot, it moves inside the frame and can saturate nearby materials. Catching this issue early and resealing the window can prevent further moisture infiltration, which could lead to rot or mold.
If you hear rattling or vibrating noises when the window is closed, the seal is no longer holding the sash tightly against the frame. A loose seal decreases insulation, allows noise transfer, and indicates that outside air is freely slipping through the edges. This is a sign that resealing is necessary to restore the window's functionality.
A rise in your heating or cooling bills can often signal air leaks around the window. When seals fail, conditioned air escapes while outside air enters, forcing the HVAC system to work harder. If energy costs increase without a clear explanation, resealing the windows may be the solution to restore insulation and reduce energy loss.
Each type of seal failure requires a specific repair approach to restore the window’s airtight and watertight protection. Using the right method and sealant ensures that the window performs optimally, stays protected from moisture, and remains energy-efficient for years.
Interior seal failures typically appear as small cracks along the trim or sash edges. These cracks break the airtight barrier inside the home. To repair them, remove the old caulk and apply a flexible latex caulk that blends with the interior finishes. This creates a smooth, paintable line that effectively blocks indoor drafts and restores insulation.
Exterior seals are exposed to rain, sun, and temperature fluctuations, so they require durable, weatherproof silicone. Silicone resists UV rays and remains flexible longer than other sealants. Resealing the exterior perimeter ensures rainwater and outside air are kept out, protecting the wall assembly from potential damage.
Larger gaps often occur when homes settle or the window frame shifts slightly over time. These openings need to be filled with backer rods or insulation-safe sealants before applying caulk. Properly filling the gap ensures the sealant can stretch properly and maintain long-term adhesion, preventing drafts and moisture infiltration.
Window sills are frequently exposed to moisture, making them particularly vulnerable to fast deterioration. When the seal around the sill separates, it’s crucial to use mold-resistant caulk to prevent rot and moisture damage. This specialized caulk restores a strong, waterproof barrier around the sill, protecting it from further damage.
Wooden frames expand and contract more than vinyl or aluminum, causing standard caulks to fail sooner. Wooden frames require premium, wood-compatible sealants that bond deeply with porous surfaces. This ensures the seal remains flexible and intact, even with seasonal movement, offering better long-term performance.
Every window material reacts differently to temperature changes, moisture, and caulk adhesion. As a result, the type of sealant and method used must match the material to avoid cracks, peeling, or premature failure. Choosing the correct sealant ensures long-lasting flexibility, stronger adhesion, and better insulation.
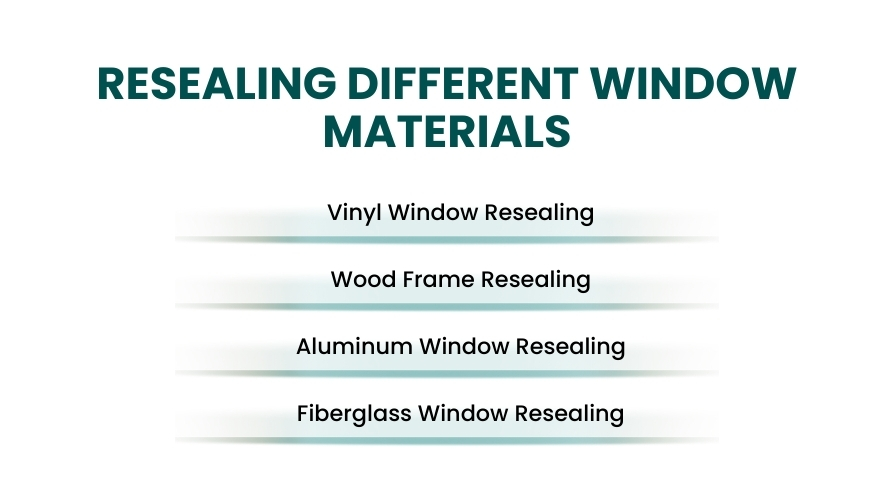
Every window material reacts differently to temperature changes, moisture, and caulk adhesion. As a result, the type of sealant and method used must match the material to avoid cracks, peeling, or premature failure. Choosing the correct sealant ensures long-lasting flexibility, stronger adhesion, and better insulation.
Vinyl frames expand and contract more than other materials, especially during hot summer days. To prevent cracking or separation, flexible silicone sealant is the best option because it stretches with the frame rather than pulling away. Additionally, silicone resists UV damage, meaning the new seal holds strong even on sun-exposed vinyl windows.
Wood frames naturally absorb moisture, swell, and shrink throughout the year. Latex or hybrid caulk works best for wood windows because it adheres deeply into wood pores and remains flexible enough to move with the frame. These sealants also help protect the wood from rot, mildew, and moisture-related damage, which are common issues in older wooden windows.
Aluminum conducts heat, causing frames to expand quickly in warm temperatures and contract just as quickly in cold weather. Temperature-stable, high-performance sealants are necessary for aluminum frames because they maintain elasticity under extreme temperature shifts. Special care is taken to avoid thermal bridging and prevent condensation around the seal. Key considerations include:
Fiberglass frames have minimal movement but require strong adhesion due to their smooth, rigid surface. High-adhesion silicone or hybrid caulks create a secure bond that stays intact during seasonal changes. Fiberglass allows for very clean resealing lines, making it ideal for modern homes that require a neat finish.
Older windows require more careful and detailed resealing due to deep cracks, worn trim, or multiple layers of old caulk. Proper restoration helps preserve their structure, improves insulation, and saves you from replacing the entire unit. Here’s how you can address these issues:
Older windows require more detailed resealing due to deep cracks, worn trim, or multiple layers of old caulk. Proper resealing helps preserve the window structure, enhances insulation, and prevents the need for full unit replacement, which can be costly.
Old windows often have dried, cracked, or layered caulk that no longer adheres. It's crucial to remove all old sealant to prevent further cracking. Using modern, flexible sealants ensures a better bond and longer-lasting protection. This not only restores the seal but also improves energy efficiency by preventing drafts and moisture from entering.
Historic and older window frames often develop wider gaps due to decades of shifting and settling. To ensure the new sealant adheres properly, these gaps should be filled with backer rods or other padding material. Properly filling these gaps helps maintain long-term adhesion and prevents the caulk from sinking or splitting.
Older trim often becomes loose as nails or old adhesives degrade. This movement can cause the seal to break repeatedly unless corrected. Before resealing, the trim must be secured, and in some cases, shimmed or reinforced. Securing and reinforcing the trim ensures a stable, lasting seal and improves insulation.
Double-pane and thermopane windows consist of two layers of glass with a sealed air or gas pocket between them. This airtight center is what gives these windows their insulation value. Since the insulated glass unit (IGU) is factory-sealed, homeowners can only reseal the outer perimeter where the window meets the frame, not the internal glass seal itself. Understanding what can and cannot be repaired is crucial to avoid ineffective fixes.
For double-pane and thermopane windows, resealing is limited to the outer frame, not the internal glass seal. Applying fresh caulk around the perimeter helps block drafts, prevents rainwater from entering, and maintains proper insulation.
This repair restores the window’s ability to stabilize indoor temperatures and prevents moisture from seeping into the wall cavity. However, it won’t fix internal fogging or condensation between the panes, as this issue lies deeper inside the unit.
Fog or moisture trapped between the two glass layers is a clear sign that the insulated glass unit (IGU) has failed. The internal seal that holds the gas between the panes cannot be repaired with caulk or exterior resealing.
Once this seal breaks, outside air enters the IGU and causes permanent condensation. The only long-term solution is to replace the IGU, or in some cases, replace the entire sash if the glass cannot be separated. While resealing the exterior may slow down further moisture entry, it won’t clear internal fog.
Thermopane windows often develop small gaps where the glass unit meets the surrounding frame. Edge resealing focuses on restoring this contact point using durable, flexible silicone to reinforce the perimeter. This prevents air infiltration, improves frame stability, and enhances temperature control.
Although edge resealing won’t rebuild the internal IGU seal or restore lost insulating gas, it helps protect the window from further outer-frame failures and improves short-term energy efficiency.
RV and camper windows experience extreme movement due to road vibration, speed pressure, and constant temperature swings. Unlike home windows, the entire frame flexes while traveling, which breaks down standard caulk quickly. Resealing mobile windows requires flexible materials and methods that tolerate vibration, shifting, and outdoor exposure.
Butyl tape is the gold standard for resealing RV windows because it never fully hardens. Instead, it stays soft and flexible, allowing it to stretch and compress as the frame vibrates on the road. It molds to irregular surfaces, fills tiny gaps, and creates a strong, waterproof seal that lasts far longer than traditional caulk. This flexibility prevents leaks caused by motion, weather, and frame pressure.
Many RV and camper windows sit inside metal flanges that attach to the vehicle body. These flanges are especially prone to leaks because road vibration loosens screws and shifts the frame over time. Resealing these areas requires applying new butyl tape or RV-grade sealant under and around the flange. This prevents wind-driven rain and pressure from forcing water into the vehicle’s interior walls.
Older camper windows often require full removal before resealing. Technicians take out the screws, gently lift the entire frame away from the wall, clean off the old sealant or putty, and apply fresh butyl tape or sealant. Reinstalling the window with new compression creates a tight, vibration-resistant seal. This process restores the original watertight barrier and stops ongoing leaks caused by aging materials.
Not every leak originates from the same side of the window. Some gaps create interior drafts, while others allow rainwater to enter from the outside. Identifying the source of the leak helps determine whether the seal needs to be applied indoors, outdoors, or both.
Interior resealing focuses on gaps between the window frame, sill, and interior trim. These cracks often develop due to frame movement or settling, creating cold drafts throughout the home. Applying latex or hybrid caulk on the inside edges blocks air movement and restores insulation. This repair not only improves comfort but also reduces strain on the heating and cooling system. Steps for interior resealing:
Exterior resealing addresses rainwater entering around the outside of the window. Weatherproof silicone is applied to the outer perimeter, where the window meets the siding, stucco, or brick. This creates a durable barrier that prevents water from creeping into the wall cavity, which can lead to window rot, mold, and sill deterioration.
In more severe cases, leaks can affect both the interior and exterior sides of the frame. This happens when the old caulk has failed completely or when shifting structures create gaps on both sides. A full perimeter reseal addresses both the inside and outside edges to stop air leaks, moisture intrusion, rattling, and insulation loss. A dual-sided reseal provides the most comprehensive and long-lasting solution. The steps involved are:
This step-by-step resealing process guides homeowners through the exact method professionals use to restore airtight edges. Each stage focuses on preparing the surface properly, ensuring the new sealant bonds strongly and lasts for years.
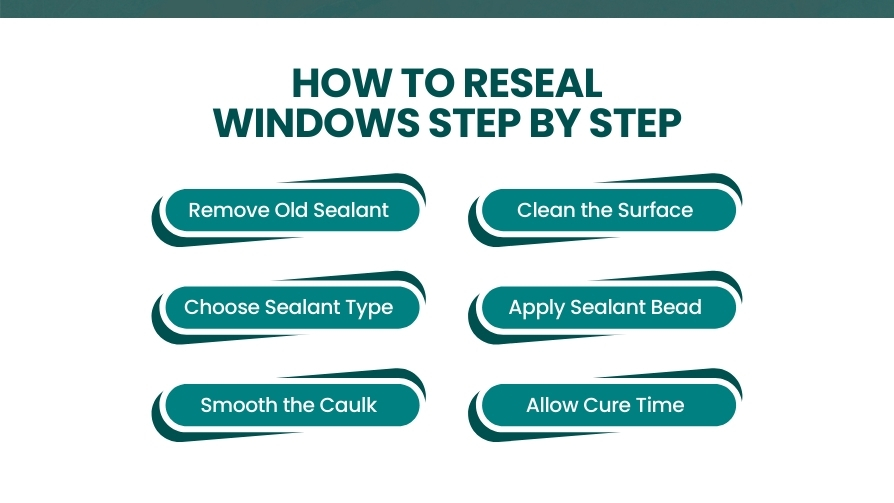
Start by cutting and scraping away all the old caulk around the window’s perimeter. Any hardened, cracked, or peeling sealant must be fully removed, or the new sealant will not adhere correctly. Use a utility knife, scraper, or caulk remover to loosen stubborn sections. This step also helps reveal hidden gaps that were previously covered by old sealant. Once all residue is removed, the joint should be smooth and ready for new material.
After removing the old caulk, clean the frame and surrounding areas thoroughly. Dust, oils, and moisture prevent sealant from bonding properly, leading to early failure. Use a mild cleaning solution or rubbing alcohol to wipe the edges clean. Allow the surface to dry completely before moving forward. A clean base ensures your sealant forms a strong, long-lasting bond.
Selecting the right sealant is crucial for the durability and performance of your reseal. Silicone sealant is best for exterior areas because it resists water, UV light, and temperature fluctuations. Latex sealant is ideal for interior trim as it can be painted and blends well with indoor finishes. Choosing the correct sealant ensures a durable, long-lasting bond and prevents cracking or shrinking over time. This decision directly affects how long the reseal will last.
Once you have the caulk gun loaded, apply a smooth, steady bead around the frame. Ensure the bead touches both sides of the joint so it seals the entire gap. Avoid stopping mid-line; continuous flow prevents weak points where air or water might enter. Take your time to work evenly around the perimeter. A precise bead is the foundation of a strong seal.
Use your finger or a caulk-smoothing tool to press the caulk firmly into the joint. This step eliminates air pockets and ensures the sealant fully bonds to both surfaces. Smoothing also improves the appearance and creates a tighter barrier. A well-shaped bead prevents future leaks and gives the window frame a clean, finished look. Do not skip this step, as proper shaping directly impacts performance.
Every sealant has a specific curing period, typically between 12–48 hours. During this time, avoid opening the window or putting pressure on the seal, as movement can break the fresh seal. Silicone may take longer to dry in humid conditions, while latex dries faster but still needs time to set before painting. Allowing full cure time ensures a durable, long-lasting seal.
Using the right tools ensures that the resealing job is clean, strong, and long-lasting. Each tool plays a unique role in preparing the frame, applying the sealant smoothly, and preventing gaps that could lead to future leaks.
A caulk gun allows for controlled, steady pressure so the sealant flows out evenly without sudden bursts. This helps maintain a smooth bead, especially around corners or tight edges. A good-quality gun also reduces hand fatigue and prevents accidental drips. With a stable flow, the sealant bonds better and forms a stronger protective barrier. This tool is essential for achieving a clean, professional result.
Silicone sealant is ideal for exterior areas because it remains flexible, waterproof, and resistant to heat and UV rays. Latex caulk, on the other hand, is preferred indoors because it can be painted and blends smoothly with interior trim. Both sealants serve different functions, and choosing the wrong one can lead to early cracking. Using high-quality materials ensures your reseal lasts longer and maintains proper insulation. Matching the sealant to the window material is also important for adhesion.
Old caulk is often stubborn and hardened, so proper removal tools make the job much easier. Utility knives help cut through thick sealant, while scrapers lift loose pieces without damaging the frame. For extra-tough sealant, chemical softeners can break down the old bead for easy removal. Thorough removal ensures the new sealant bonds properly instead of sitting on top of decaying material. These tools help prepare a smooth, clean joint for resealing.
Dust, oil, and dirt prevent sealant from sticking, so cleaning tools are a must. Soft brushes loosen debris from cracks and corners, while microfiber cloths wipe the area clean. Removing moisture is just as important, because wet surfaces weaken adhesion. A clean frame ensures the new sealant bonds tightly and creates a long-lasting seal. Proper cleaning reduces the risk of early peeling or shrinking.
Some leaks and window issues go far beyond superficial sealant problems. In these cases, resealing only covers the symptom, not the source. Understanding these situations helps homeowners avoid wasting money and ensures long-term repair.
If the window frame or sill has already absorbed water, resealing the edges won’t stop ongoing decay. Water trapped inside the material keeps expanding, softening, and feeding mold. These areas must be dried, repaired, or replaced before any new sealant is applied. Otherwise, the rot continues growing beneath the surface. Resealing over damaged wood only hides the problem temporarily.
A warped or bent frame creates uneven surfaces where sealant cannot bond properly. Large gaps form when the window shifts from age, shrinking wood, or structural settling. Caulk cannot fill oversized or unstable openings, and it will crack again within days or weeks. These issues require realignment, carpentry repair, or full frame replacement. Resealing is ineffective when the structure itself is compromised.
If fog, condensation, or moisture appears between the two panes of glass, it means the internal insulated glass seal has failed. No exterior caulk can fix or reseal the inside of a sealed glass unit. The window requires IGU replacement or full sash replacement. Exterior resealing may improve drafts, but it will not clear internal fogging or moisture.
Window resealing is one of the most budget-friendly ways to improve comfort and energy efficiency. Costs vary based on window size, sealant type, accessibility, and location.
The average cost to reseal a standard window ranges from $45 to $90. This includes removing old caulk and applying a new sealant to the interior or small sections of the exterior. It’s the most affordable repair option because it requires basic materials and minimal labor. Larger windows or complex shapes may cost slightly more. Regular resealing prevents future drafts and moisture issues.
Full exterior resealing is more expensive due to the need for weatherproof, UV-resistant materials. Costs typically range from $80 to $150 per window, especially if old caulk is thick or difficult to remove. Exterior work also takes longer because the seal must be continuous and weather-tight. This service significantly improves water protection. It’s recommended for homes in rainy or windy climates.
Resealing around a double-pane window to improve insulation costs around $90 to $160. The process involves detailed cleaning, surface prep, and applying high-performance sealants. This improves energy efficiency but does not fix internal condensation. It’s useful when the perimeter seal is cracked or allows drafts.
RV and camper windows require flexible materials that can handle constant vibration and road movement. Resealing these windows costs $120 to $250, depending on size and location. Butyl tape and RV-safe sealants are used to prevent leaks from rain or wind pressure. Proper resealing is essential because campers experience more stress on joints than houses.
If the structural damage around a window is severe, resealing alone isn’t effective or economical. When repair costs exceed $300–$500, full frame replacement usually makes more sense. Rotten frames, shifting structures, and deep water damage require rebuilding rather than sealing. Choosing replacement prevents repeated issues and future repair costs. It also improves energy efficiency significantly.
Resealing costs vary depending on the window type, damage severity, and materials used. The table below gives homeowners a clear idea of what to expect based on common resealing scenarios.
| Resealing Type | What It Includes | Typical Cost Range |
|---|---|---|
| Standard Window Resealing | Removing old caulk + applying new sealant to interior/exterior edges | $45 – $90 per window |
| Full Exterior Perimeter Resealing | Weatherproof silicone, full removal, outdoor sealing prep | $80 – $150 per window |
| Double-Pane Boundary Resealing | Specialized perimeter seal (does not fix fog inside glass) | $90 – $160 per window |
| RV / Camper Window Resealing | Butyl tape + RV-safe sealant for vibration resistance | $120 – $250 per window |
| Severe Damage / Full Frame Replacement | When resealing is not effective due to rot or structural gaps | $300 – $500+ per window |
DIY window resealing works well for small cracks, visible gaps, or simple interior caulk replacement. But when leaks, moisture intrusion, or exterior seal failures are involved, a professional ensures proper sealing, long-lasting protection, and prevents hidden damage.
Homeowners can easily reseal small interior cracks, minor air leaks, or visible gaps in trim. DIY resealing typically involves removing old caulk and applying a simple bead of new sealant. It’s ideal when the frame is still strong, dry, aligned, and structurally sound. DIY work also saves money and can be completed quickly with basic tools. As long as there is no water damage, it’s safe to do it yourself.
A professional is needed for leaks involving water intrusion, exterior sealing, or large perimeter gaps. Experts identify hidden problems such as rot, failed flashing, or structural shifting that homeowners might overlook. They use commercial-grade sealants that last longer and bond better than hardware-store options. Professionals also handle double-pane issues, damaged frames, and RV resealing. Hiring an expert ensures the root cause is solved, not just covered.
Proper maintenance keeps seals flexible, weather-tight, and resistant to cracking over time. By paying attention to early warning signs, homeowners can prevent costly leaks and extend the life of every window.
Annual inspections help catch shrinkage, cracking, or peeling before major air or water leaks develop. Look closely at the top edges, lower corners, and places where caulk meets siding or trim. Early detection makes resealing easier and more affordable. Preventive inspections can extend the life of both the sealant and the window frame.
Dirt and moisture weaken caulk and cause early deterioration. Cleaning the frame regularly helps prevent mildew, mold, or moisture buildup. Dry surfaces bond better with sealant and stay stronger over time. Proper maintenance slows down wear and reduces long-term repair needs.
High-pressure water can blow sealant loose or push water behind the frame. This creates hidden leaks and leads to rot or staining over time. Gentle cleaning methods are safer for preserving the sealant’s integrity. Avoid spraying directly at window seams or caulk lines.
Sun exposure is one of the biggest causes of seal failure. UV rays break down low-quality caulk, causing it to harden, crack, and separate from the frame. Using UV-resistant silicone helps the sealant stay flexible and strong for years. This small upgrade dramatically improves lifespan and performance.
Resealing your windows may seem like a small repair, but it makes a big difference in how comfortable and protected your home feels. When seals break down, air leaks, drafts, and moisture issues start to appear, all of which can grow worse if ignored. By taking the time to reseal worn edges, fill gaps, and restore the weather barrier, you strengthen insulation, reduce energy waste, and stop water from entering places it doesn’t belong.
Whether you choose a quick DIY touch-up or get help from a professional, fixing seal problems early protects your windows, walls, and overall home structure. It’s an easy, affordable upgrade that brings long-lasting comfort and peace of mind.
Yes, resealing windows is a cost-effective solution if the frame and glass are in good condition. Resealing restores the performance of the window by filling any gaps or cracks in the sealant, preventing air and water leaks. However, if the window frame is severely damaged or the glass is foggy, replacement may be necessary for long-term performance.
Resealing is effective for addressing leaks around the window frame caused by worn-out caulk or sealant. This process can stop drafts and water infiltration. However, if the leak is due to a failure in the window's internal seal (like between double-paned glass), resealing will not fix the problem, and window replacement may be required.
Most window seals last between 5 to 10 years, depending on the climate and weather conditions. In harsher climates with extreme temperature changes or heavy rainfall, resealing might be necessary more frequently. Regular inspections can help detect early signs of wear and prevent energy loss or water damage.
Yes, resealing from the inside can help address draft issues, as it will fill gaps along the window frame. However, if water leaks are present, external resealing is usually required as well to fully prevent moisture from entering. It’s important to address both internal and external seals for comprehensive protection.
Yes, resealing windows can significantly reduce noise by eliminating gaps and cracks through which sound can enter. Tight seals create a more soundproof barrier, making your home quieter, especially if you live near a busy street or noisy environment. While it may not block all noise, resealing can provide noticeable sound reduction.
Join our mailing list for exclusive updates, expert tips, and special offers tailored to your needs. Be the first to know about the latest in home services.

Renovize Home is a platform that supports homeowners from planning to renovation. Whether it’s Renovize AI for guidance or a one-on-one call with Pro Finder, we understand your project and match you with local contractors tailored to your needs.
Who We Are
About Renovize HomeGet in TouchHomeownwer Support:
Coming Soon!
General Inquiries:
support@renovizehome.com
Head Office:
24 Greenway Plaza, STE 1800M, Houston, TX 77046.