Explore All
BROWSE BY CATEGORY
Interior
Exterior
Home Essentials
Homeowner Tools
Blogs & Guides
Find a Pro
Book Your Appointment Now
Home Essentials
About Renovize Home
Explore All
BROWSE BY CATEGORY
Interior
Exterior
Home Essentials
Homeowner Tools
Blogs & Guides
Find a Pro
Book Your Appointment Now
Home Essentials
About Renovize Home
Last Updated 2025-12-12
Removing old siding is an important part of keeping your home protected, energy-efficient, and looking its best. Worn siding can let in moisture, increase energy loss, and lower curb appeal. Taking it off the right way ensures your home is ready for a safe and durable new installation that improves long-term comfort and home value.
Table of Contents
What Old Siding Removal Really Involves
Key Reasons to Remove Old Siding Before Installing New
How Professionals Inspect a Home Before Removing Siding
How To Remove Old Siding
Removing Different Types of Old Siding
What Happens After Old Siding Is Removed
Advantages of Removing Old Siding Instead of Covering It
Tools Needed for Removing Old Siding
Common Issues Found After Siding Removal
Cost To Remove Old Siding
DIY vs Professional Siding Removal
When a Professional Is Necessary
Final Thoughts
Old siding removal is more than just taking panels off a wall. It is a step-by-step process that exposes the home’s exterior, checks for hidden problems, and prepares the surface for new siding. Each part of the removal plays an important role in protecting the home’s long-term durability.
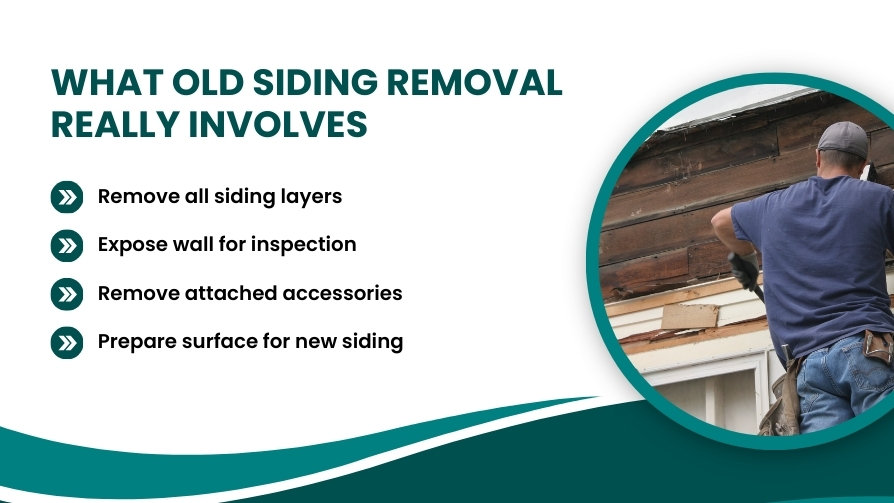
The removal process begins with carefully detaching the siding panels, trim pieces, starter strips, and corner posts. Specialized siding removal tools, such as pry bars, are used to avoid damaging the underlying sheathing.
Every nail, screw, and fastener must be fully removed to expose the wall for inspection. This step is crucial as it prepares the surface for the next phases of inspection and repair.
Once the siding is removed, the home's sheathing becomes visible, and this is where hidden issues often surface. Moisture stains, mold, rot, pest damage, or soft wood can be identified and repaired.
These problems are often trapped behind the old panels and could remain unnoticed if the siding was not fully removed. Addressing these issues before installing new siding ensures that your home remains structurally sound and protected from long-term damage.
Old siding removal also includes detaching any connected accessories, such as:
These items must be removed so the siding can be taken off cleanly and the new siding can be installed properly. Failing to remove these accessories may cause interference with the new siding, affecting the overall installation process.
After the old siding and connected accessories are removed, the next step is preparing the surface for the new siding. This involves cleaning the exposed wall, replacing any damaged sheathing, and installing a new moisture barrier or house wrap.
These steps ensure that the new siding will adhere properly, remain dry, and stay protected from water damage. Proper preparation also helps improve energy efficiency and extends the lifespan of the new siding.
Once the surface is ready for new siding, a final inspection is conducted to ensure that everything is in order. Any remaining issues are addressed, and the area is cleaned up of debris. This final step ensures that the new siding will be installed on a smooth, secure foundation, giving your home the protection it needs.
While it might seem like a time-saving shortcut to install new siding over old layers, this approach can lead to significant long-term issues. Properly removing the old siding ensures the new panels are securely attached, sealed correctly, and perform optimally for years to come. Here are the key reasons why old siding should always be removed before new installation:
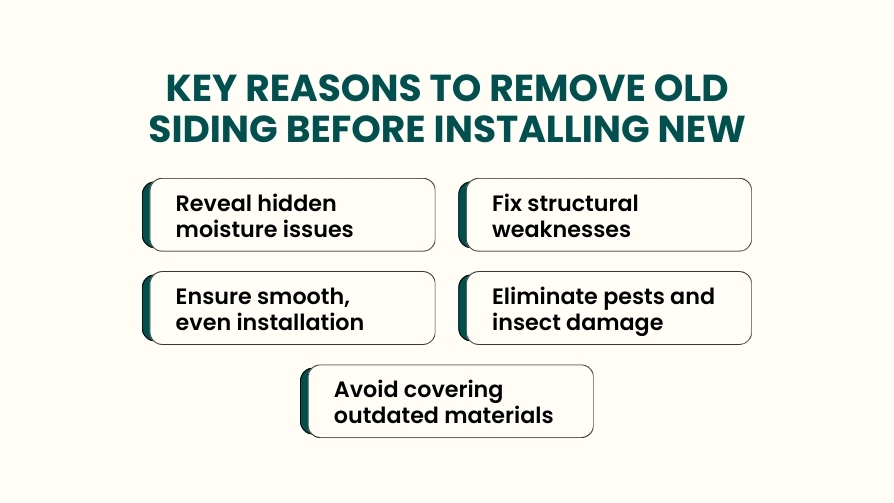
Moisture can sneak behind old siding through cracks, loose edges, or deteriorating caulking, causing rot, mold, and mildew to thrive. These moisture problems often remain hidden until the old siding is removed. If you simply cover the issues with new siding, you risk trapping moisture, which accelerates further damage to the structure and leads to costly repairs.
Old siding materials such as warped, buckled, or deteriorated panels cannot provide the support needed for new siding. By removing the old materials, contractors can replace weakened sheathing, ensuring a solid and stable foundation for the new siding. This step helps prevent structural issues that could arise from the failure of the old materials.
Layering new siding over old siding can result in bulges, gaps, and an uneven surface. This not only affects the alignment of the panels but also reduces the effectiveness of the water protection. A smooth, clean surface ensures that the new siding fits properly, locks tightly, and provides better insulation, while also enhancing the home’s curb appeal.
Older siding often hides infestations of termites, carpenter ants, or other pests. These insects can continue to cause damage to the wall structure if the siding is not removed. Removing the old siding allows for proper pest control and prevents further damage to the home’s foundation and interior.
Certain materials, such as Masonite, older wood siding, or thin aluminum, often fail when left underneath new layers. They may crack, warp, or degrade over time, causing the new siding to fail prematurely as well. Removing these outdated materials ensures the new siding has a strong foundation and reduces the risk of early failure.
Before any siding is taken off, professionals perform a detailed inspection to understand the home’s condition and plan a safe, efficient tear-off. This assessment helps identify the type of siding, the health of the wall underneath, and any risks that could affect removal. A careful inspection ensures the process goes smoothly and prevents accidental damage to the home’s structure.
Professionals check for hidden moisture, structural weakness, insulation issues, and potential hazards such as asbestos or lead paint. They also study how the siding is fastened, how panels lock together, and how accessories are attached. This preparation allows them to remove the old siding without breaking components or harming the sheathing.
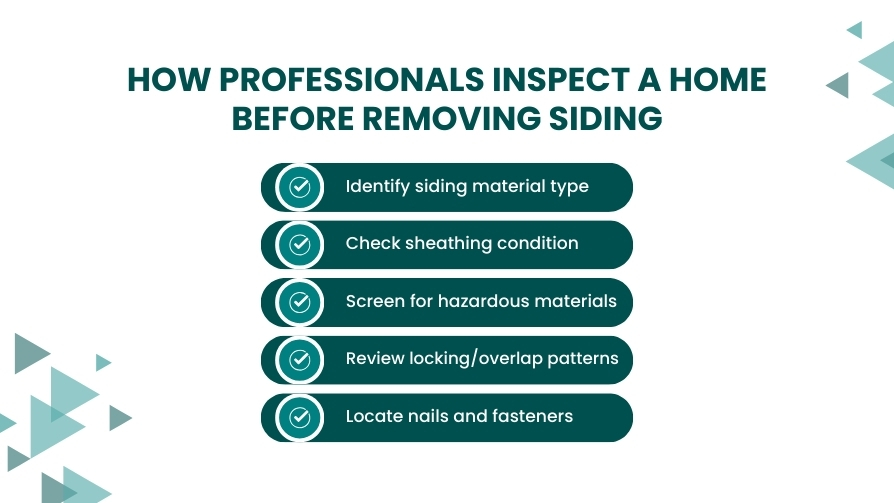
Different siding types require different removal techniques, so professionals always start by identifying the material. Vinyl siding unlocks with a special tool, wood siding is pried off carefully to avoid cracking the boards, fiber cement requires more force and protection due to its weight, and aluminum siding needs precise handling to avoid bending the metal.
Knowing the material helps contractors choose the right tools and removal method. It also reveals what kind of fasteners, trim pieces, and accessories are likely behind the panels.
Professionals gently press and inspect the sheathing behind the siding to check for soft spots, moisture damage, warping, or rot. Even before the full tear-off begins, small clues such as bubbled paint, sagging panels, or mildew odor can signal deeper problems.
Detecting weak sheathing early helps contractors plan necessary repairs once the siding is removed. This ensures the new siding has a strong, dry, and stable surface to attach to.
Homes built before the 1980s may contain lead-based paint or asbestos-based siding products. These materials require special handling, safety gear, and disposal methods to avoid health risks.
Professionals check for warning signs such as old cement shingles, thick fiber panels, or heavy paint layers. If hazardous materials are discovered, contractors follow required safety procedures before continuing removal.
Vinyl and aluminum siding panels interlock in a specific pattern, and removing them in the wrong order can cause damage. Professionals examine how the panels clip together, where the seams overlap, and which direction the panels were originally installed.
This helps determine the correct sequence for unlocking each row. Proper sequencing prevents broken panels and ensures smooth access to the wall behind.
Different siding types use different fastening methods, and locating these fasteners is important for clean removal. Wood siding often has deeper nails hidden beneath overlapping boards, while fiber cement uses sturdy nails driven directly into the studs.
Professionals map out nail lines, screw placements, and concealed fasteners before beginning the tear-off. This reduces the risk of damaging sheathing and prevents unnecessary force during removal.
Removing old siding is a careful, organized process that keeps your home protected while preparing it for new materials. Whether you are removing old siding from a full house or working on one section, the steps stay the same: unlock, detach, inspect, and prepare. These steps also apply to different materials, including:
Each requires specific tools and techniques. Following the right order prevents structural damage and makes the new installation stronger and longer-lasting.
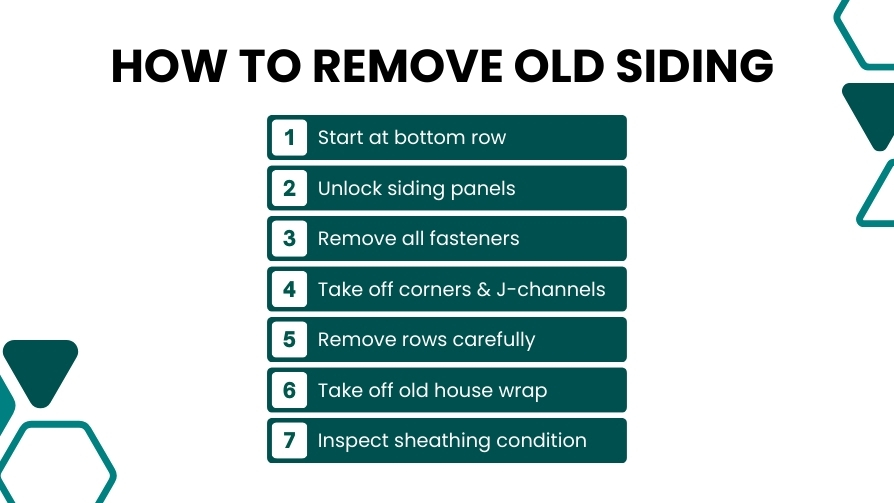
Professionals always begin at the lowest section of the wall because this is where panels lock into each other. Vinyl and aluminum siding have a bottom lip that must be released first before moving upward. For wood siding, the lowest board is carefully loosened with a pry bar so the overlapping boards above do not crack. This starting point sets the sequence for the entire tear-off.
Vinyl and aluminum siding panels lock together through a horizontal lip. A siding removal tool, often called a zip tool, is used to unhook the bottom edge. Once unlocked, the panel can be gently lifted to expose the nails or screws underneath. For aluminum siding, extra care is taken to avoid bending or creasing the metal. Wood and fiber cement siding do not interlock but are removed one board at a time.
After unlocking each row, contractors remove the fasteners holding the siding to the wall. Vinyl typically uses nails under the nailing hem, while aluminum may use either nails or screws. Wood siding boards generally have deeper nails that must be pried out slowly to avoid splintering. Removing fasteners completely ensures the panels come off smoothly and the wall isn’t damaged in the process.
Trim pieces like corner posts, J-channels, and starter strips must be taken off to free the edges of the siding. These components hold panels in place and often hide additional nails or screws. Once removed, the entire wall becomes accessible, making it easier to continue removing the siding panels row by row.
With the bottom rows and trim removed, contractors move upward, unlocking and detaching each row in sequence. Vinyl and aluminum are lifted gently to avoid tearing the nailing hem. Wood and fiber cement boards are pried off in small sections so the wall underneath is not damaged. Working upward helps maintain panel alignment and prevents sudden drops or breakage.
Once all siding is off, the house wrap or underlayment becomes visible. Any sections that are torn, moldy, water-stained, or brittle must be removed and replaced. A fresh barrier is essential for keeping moisture out and improving the performance of your new siding system. This step restores the home’s weather protection before new materials are installed.
With everything exposed, contractors inspect the sheathing closely for soft areas, large holes, pest damage, or signs of moisture intrusion. Any damaged sections must be repaired or replaced before new siding goes up. A strong sheathing layer ensures proper fastening, smooth alignment, and long-term durability for the new siding.
Every siding material requires a different removal approach because each type attaches, fastens, and deteriorates in its own way. Professional siding removal methods are adjusted to protect the sheathing underneath and keep the wall structurally safe during the process.
Understanding how different siding materials are removed helps homeowners know what to expect, why timelines vary, and why some materials demand more care than others.
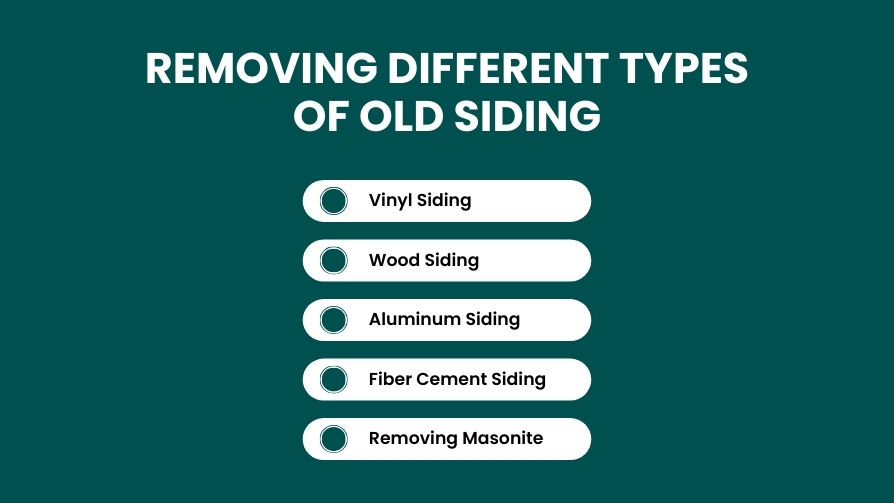
Vinyl siding is one of the easiest materials to remove because it hangs on the wall through an interlocking system rather than being permanently fixed. Contractors use a siding zip tool to unhook the bottom edge of each panel. Once unlocked, the panel is lifted to reveal the nails securing it to the wall. These are the steps:
Vinyl siding is generally affordable to remove, but extra caution is needed as the panels can become brittle with age, potentially causing damage to the sheathing.
Wood siding removal takes more time because boards are typically nailed deeply into the sheathing. Each board must be loosened carefully by sliding a pry bar underneath the edge. Here’s how it’s done:
Wood siding removal requires more patience, especially with older homes, as layers of paint or caulk may need to be cut before the wood can be removed safely.
Aluminum siding panels interlock similarly to vinyl but are thinner and more prone to bending. These panels require extra care during removal to avoid damage. The process involves:
Aluminum siding removal is slightly more expensive than vinyl due to the need for snips or metal cutters to handle complex cuts and the interlocking edges.
Fiber cement siding is heavy, rigid, and labor-intensive to remove. Due to the weight of the material, two people are typically required. The steps include:
Fiber cement is the most labor-intensive siding to remove, requiring extra care to handle the heavy material and prevent damage to both the siding and the sheathing.
Masonite and hardboard siding absorb moisture over time, causing them to weaken and deteriorate. This requires delicate removal to avoid damaging the sheathing. Here’s the method:
Removing Masonite or hardboard siding can be slow and challenging due to moisture damage, but it's essential for exposing any hidden issues beneath the material.
Once the old siding is removed, the wall is fully exposed, and this stage focuses on preparing the home for the installation of new siding. It involves crucial steps to ensure the new siding adheres correctly, protects against moisture, and improves energy efficiency. Here's what happens next:
Any damaged plywood or OSB (oriented strand board) panels are replaced during this stage to restore the structural integrity of the wall. Soft or rotted sheathing must be removed and replaced to provide a solid foundation for the new siding. This ensures that the new siding has the necessary support and won't be compromised by underlying damage.
A breathable, waterproof house wrap is installed to act as a moisture barrier, protecting the home’s sheathing from water infiltration. House wrap allows moisture to escape while keeping rain and wind out, preventing rot, mold, and mildew from developing behind the new siding. This step is essential for maintaining the longevity of both the siding and the home’s structure.
Flashing tape and seals are applied around windows and doors to prevent water leaks at these vulnerable points. Proper sealing ensures that moisture cannot seep into the gaps around openings, which could cause wood rot, mold growth, and damage to the interior walls. This extra layer of protection helps ensure the home remains dry and energy-efficient.
In some cases, rigid foam boards can be installed over the sheathing before the new siding is placed. This optional step helps improve the home’s energy efficiency by providing an additional layer of insulation. It helps regulate the internal temperature, reducing heating and cooling costs and making the home more comfortable year-round.
Removing the old layers creates a safer, stronger, and longer-lasting installation. Whether you’re replacing wood siding with vinyl or upgrading to a new material, a full tear-off ensures better protection and better results. Covering old siding may look easier, but it traps problems underneath and reduces the lifespan of the new siding.
Removing old siding ensures a smooth, even surface for new siding, avoiding bulges and misalignments caused by overlapping or warped panels.
Removal allows for the identification and repair of leaks, rot, or water damage, preventing moisture from being trapped behind new siding and protecting against mold growth and structural damage.
A clean tear-off provides a stable base for the new siding, ensuring a stronger attachment. Covering old siding weakens the fasteners, reducing the new siding’s durability and lifespan.
Removing old siding gives full access to the wall cavity, making it easier to repair damage, replace rotted sheathing, add insulation, or install new house wrap, which can improve energy efficiency and overall wall strength.
Proper siding removal and installation enhances the exterior look of your home, boosting curb appeal and potentially increasing its market value.
Removal ensures that underlying problems like pests, moisture damage, or structural issues are addressed before the new siding is installed, preventing long-term issues.
With the opportunity to add insulation or replace existing barriers, the home can be better insulated, leading to reduced heating and cooling costs.
The new siding will be attached directly to the sheathing, providing a more secure and lasting bond, which improves its performance in extreme weather conditions.
Removing old siding requires the right tools to ensure a safe, clean, and efficient tear-off. Each tool is chosen based on the siding material, fastening system, and removal method. Having the proper equipment helps prevent damage to the wall, avoids unnecessary breakage, and protects whoever is doing the work. The following tools are the ones professionals rely on for different siding types.
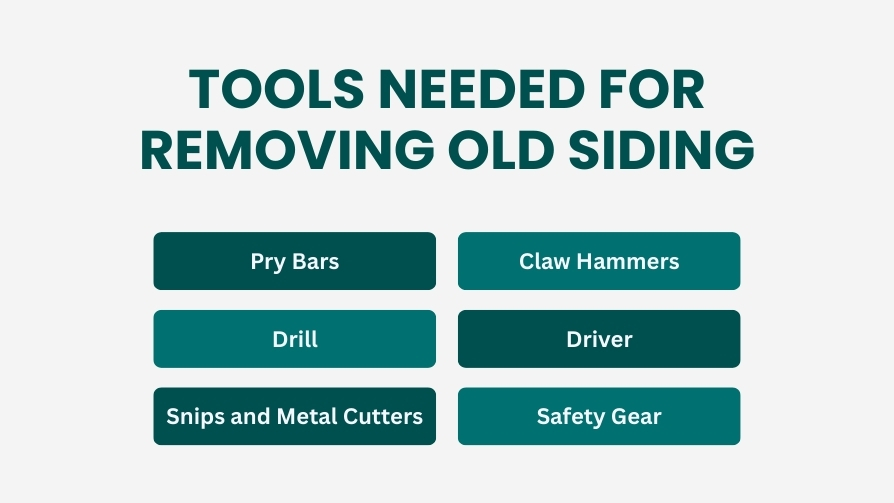
A siding zip tool is essential for unlocking vinyl siding panels. It slides under the bottom edge of a panel and gently releases the interlocking lip. This allows the panel to be lifted without tearing the nailing hem. Without this tool, vinyl is difficult to unhook cleanly, especially on older homes where the material may be brittle.
Wood siding, fiber cement boards, and older composite materials often use deep, hidden nails. Pry bars and claw hammers are used to lift boards and loosen the nails without damaging the sheathing beneath. Contractors use controlled pressure to avoid cracking the boards or pulling off chunks of sheathing. These tools are especially important when removing heavy or tightly fastened siding.
Aluminum siding and some types of wood siding are attached with screws instead of nails. A drill or driver removes these screws quickly and cleanly. Using a drill prevents stripping the screw heads and helps detach panels in full pieces. This is important when working around windows, corners, or areas where the fastening pattern is tight.
When removing aluminum siding, snips or metal cutters are needed to cut through edges, trim pieces, and tightly clipped sections. Aluminum bends easily but does not break cleanly, so cutting tools help create smooth edges and prevent jagged metal that could cause injury. Snips are also useful for removing small sections around fixtures or vents.
Removing siding exposes sharp edges, hidden nails, and splintered materials. Gloves protect hands from cuts, goggles shield eyes from falling debris, and long sleeves help prevent scrapes. Safety gear is especially important when working with metal siding or older materials that may break unpredictably. This simple protection ensures the tear-off process is safe from start to finish.
| Tool | Best Used For | Purpose / Benefit |
|---|---|---|
| Siding Zip Tool | Vinyl siding | Unlocks panel edges without cracking the material |
| Pry Bars | Wood, fiber cement, and trim | Lifts boards and exposes deep nails safely |
| Claw Hammer | Wood and composite siding | Removes nails and loosens older boards |
| Drill/Driver | Aluminum and screw-fastened wood siding | Removes screws cleanly without damaging sheathing |
| Snips / Metal Cutters | Aluminum siding | Cuts edges cleanly and prevents sharp metal hazards |
| Safety Gear | All siding types | Protects hands, eyes, and skin during tear-off |
Once old siding is removed, hidden problems that were covered for years often become visible. These issues can weaken the home’s structure, allow moisture into the walls, or damage insulation. Identifying and repairing these problems before installing new siding is essential for long-term performance, better weather protection, and a safer home. The issues listed below are the ones professionals find most frequently during a tear-off.
Water damage is one of the most common discoveries after siding removal. This usually happens when the house wrap has failed or when siding was not properly sealed around edges and joints. Moisture seeps behind the panels, travels down the wall, and slowly affects the sheathing. Signs include dark stains, swollen wood, or soft areas on the wall. Addressing water damage early prevents further deterioration and helps the new siding perform correctly.
Rot and mold develop when moisture has been trapped behind the siding for long periods. Mold may appear as black, green, or white patches on the sheathing, while rot creates soft or crumbling spots in the wood. Both conditions weaken the structure and need immediate repair. Contractors cut out the damaged sections and replace them with new panels to restore the wall’s strength before installing the new siding.
Old siding often hides pest activity such as termites, carpenter ants, or carpenter bees. These insects burrow into wood, create tunnels, and compromise the strength of the sheathing. Signs of infestation include small holes, sawdust-like debris, or hollow-sounding wood. Once detected, contractors remove the damaged areas, treat the infestation, and seal the wall properly to prevent pests from returning.
Windows, doors, and other wall openings rely on flashing to keep water out. When flashing becomes loose, corroded, or improperly installed, leaks begin to form behind the siding. After removal, professionals often find warped or rusted flashing that no longer protects the home. Replacing the flashing at this stage prevents future leaks and ensures the new siding works with a properly sealed wall system.
Removing old siding is typically charged per square foot, and the price varies depending on factors such as the material, labor difficulty, and any hidden wall damage discovered during the removal process. In 2025, homeowners can expect to pay between $0.50 and $4.50 per square foot for removal alone, with additional charges for repairs if needed. The following breakdown provides an estimate of the typical costs homeowners can expect based on the type of siding being removed.
Vinyl siding is the easiest and fastest to remove, thanks to the panels' design that allows them to unlock with a siding zip tool. The panels detach without requiring heavy force, and labor costs remain low. Additionally, the panels often come off in full lengths, making the process quicker.
Vinyl siding removal is one of the most affordable options for homeowners preparing for new siding installation.
Wood siding removal is more labor-intensive. Each board is typically nailed deeply into the sheathing, and older boards may be fragile, requiring extra care during removal. Contractors must pry out the boards one at a time to avoid damaging the wall.
The higher cost reflects the extra labor for nail extraction, handling overlapping boards, and addressing the potential for moisture damage beneath the wood.
Aluminum siding panels interlock, like vinyl, but need to be handled carefully to avoid bending sharp edges. The panels are lightweight, but cutting around fixtures with snips or metal cutters adds to the cost.
Complex cuts and interlocking edges make aluminum removal slightly more expensive than vinyl.
Fiber cement siding is heavy and rigid, often requiring two people for removal. The boards are fastened tightly with strong nails or screws, and improper removal can crack the material. Specialized tools and dust protection further increase labor costs.
Fiber cement is the most labor-intensive material to remove, which places it at the top of the cost range.
Hidden damage behind old siding can significantly impact the overall cost of removal. These repairs are crucial to ensure the wall is strong enough for new siding installation. The common add-on repair costs include:
These additional repairs are necessary for the long-term performance of the new siding and help prevent premature failure of the installation.
| Siding Type | 2025 Cost per Sq Ft | Difficulty Level |
|---|---|---|
| Vinyl | $0.50 – $1.00 | Easy |
| Aluminum | $1.00 – $2.00 | Moderate |
| Wood | $1.50 – $3.00 | Moderate to Hard |
| Fiber Cement | $2.50 – $4.50 | Hard (Heavy Material) |
Homeowners often ask whether they can remove old siding themselves or if it’s safer to hire a professional. The answer depends on the type of siding, the height of the home, and the condition of the walls underneath.
Siding removal looks simple on the surface, but many homes hide moisture damage, old wiring, pests, or weak sheathing that require trained handling. Understanding when DIY is realistic and when professional help is essential ensures the project stays safe and prevents expensive mistakes.
DIY siding removal can be appropriate for small, easy-access structures such as sheds, garages, or single-story homes with lightweight vinyl siding. Vinyl panels unlock with a zip tool, making them one of the simplest materials to take off. If the panels are in good condition and the wall shows no signs of rot or moisture, a homeowner with basic tools and safety gear can manage the tear-off.
DIY may also be reasonable when:
These situations carry minimal risk and allow homeowners to save on labor costs while preparing the surface for new materials.
Professional siding removal becomes essential when the home has conditions that increase risk or complexity. Older homes often hide rot, mold, pest activity, or outdated insulation that need expert repair. Multiple-story homes require ladders, scaffolding, and safety measures the average homeowner does not have. Removing siding from tall walls or steep rooflines can lead to serious accidents without proper equipment.
Professional help is strongly recommended when removing:
Hiring a professional ensures the walls are inspected thoroughly, damaged areas are repaired correctly, and new siding will attach securely to a safe, stable surface.
Removing old siding is one of the smartest steps a homeowner can take when upgrading their exterior. A proper tear-off exposes hidden moisture, strengthens the wall system, and gives your new siding a clean, reliable foundation. It improves long-term durability, energy efficiency, and overall home value. When done correctly, it prevents future leaks, eliminates rot, reduces pest risks, and ensures your new siding performs exactly the way it should.
Whether you’re replacing vinyl, wood, aluminum, or fiber cement, the key to a successful project is a safe, organized removal process followed by proper repairs and wall preparation. This blog walked through every stage clearly from inspection to tear-off to repairs so homeowners understand exactly what happens and why each step matters.
If you're planning a siding upgrade, always start with a full removal. It leads to better results, smoother installation, and years of worry-free protection.
Yes, removing the old siding creates a flat surface, exposes hidden damage, and prevents moisture from getting trapped behind the new panels. This helps the vinyl last longer and stay properly aligned.
It can, but it’s not recommended. Wood siding often hides rot, insect activity, or moisture problems. Removing it first ensures the wall is solid and gives the new siding a reliable base.
Most homes take one to two days for full removal. The exact time depends on the size of the house, the type of siding, and whether hidden damage is found during the tear-off.
Only with proper safety gear. Aluminum siding has sharp edges and tight interlocking seams that can cause cuts or injuries. Professionals are preferred for full-house removal or multi-story homes.
The problems continue underneath the new siding. Moisture, rot, and pest damage spread through the wall, weakening the structure and shortening the lifespan of the new installation.
Join our mailing list for exclusive updates, expert tips, and special offers tailored to your needs. Be the first to know about the latest in home services.

Renovize Home is a platform that supports homeowners from planning to renovation. Whether it’s Renovize AI for guidance or a one-on-one call with Pro Finder, we understand your project and match you with local contractors tailored to your needs.
Who We Are
About Renovize HomeGet in TouchHomeownwer Support:
Coming Soon!
General Inquiries:
support@renovizehome.com
Head Office:
24 Greenway Plaza, STE 1800M, Houston, TX 77046.