Explore All
BROWSE BY CATEGORY
Interior
Exterior
Home Essentials
Homeowner Tools
Blogs & Guides
Find a Pro
Book Your Appointment Now
Home Essentials
About Renovize Home
Explore All
BROWSE BY CATEGORY
Interior
Exterior
Home Essentials
Homeowner Tools
Blogs & Guides
Find a Pro
Book Your Appointment Now
Home Essentials
About Renovize Home
Last Updated 2025-12-15
Installing moisture barriers is one of the smartest ways to protect a home from hidden water damage, mold, and structural decay. These barriers sit behind walls, under floors, around basements, or beneath roofing materials and act as a shield against unwanted moisture. Their job is simple yet powerful to stop water and humidity from getting inside where they can silently ruin wood, insulation, drywall, and indoor air quality.
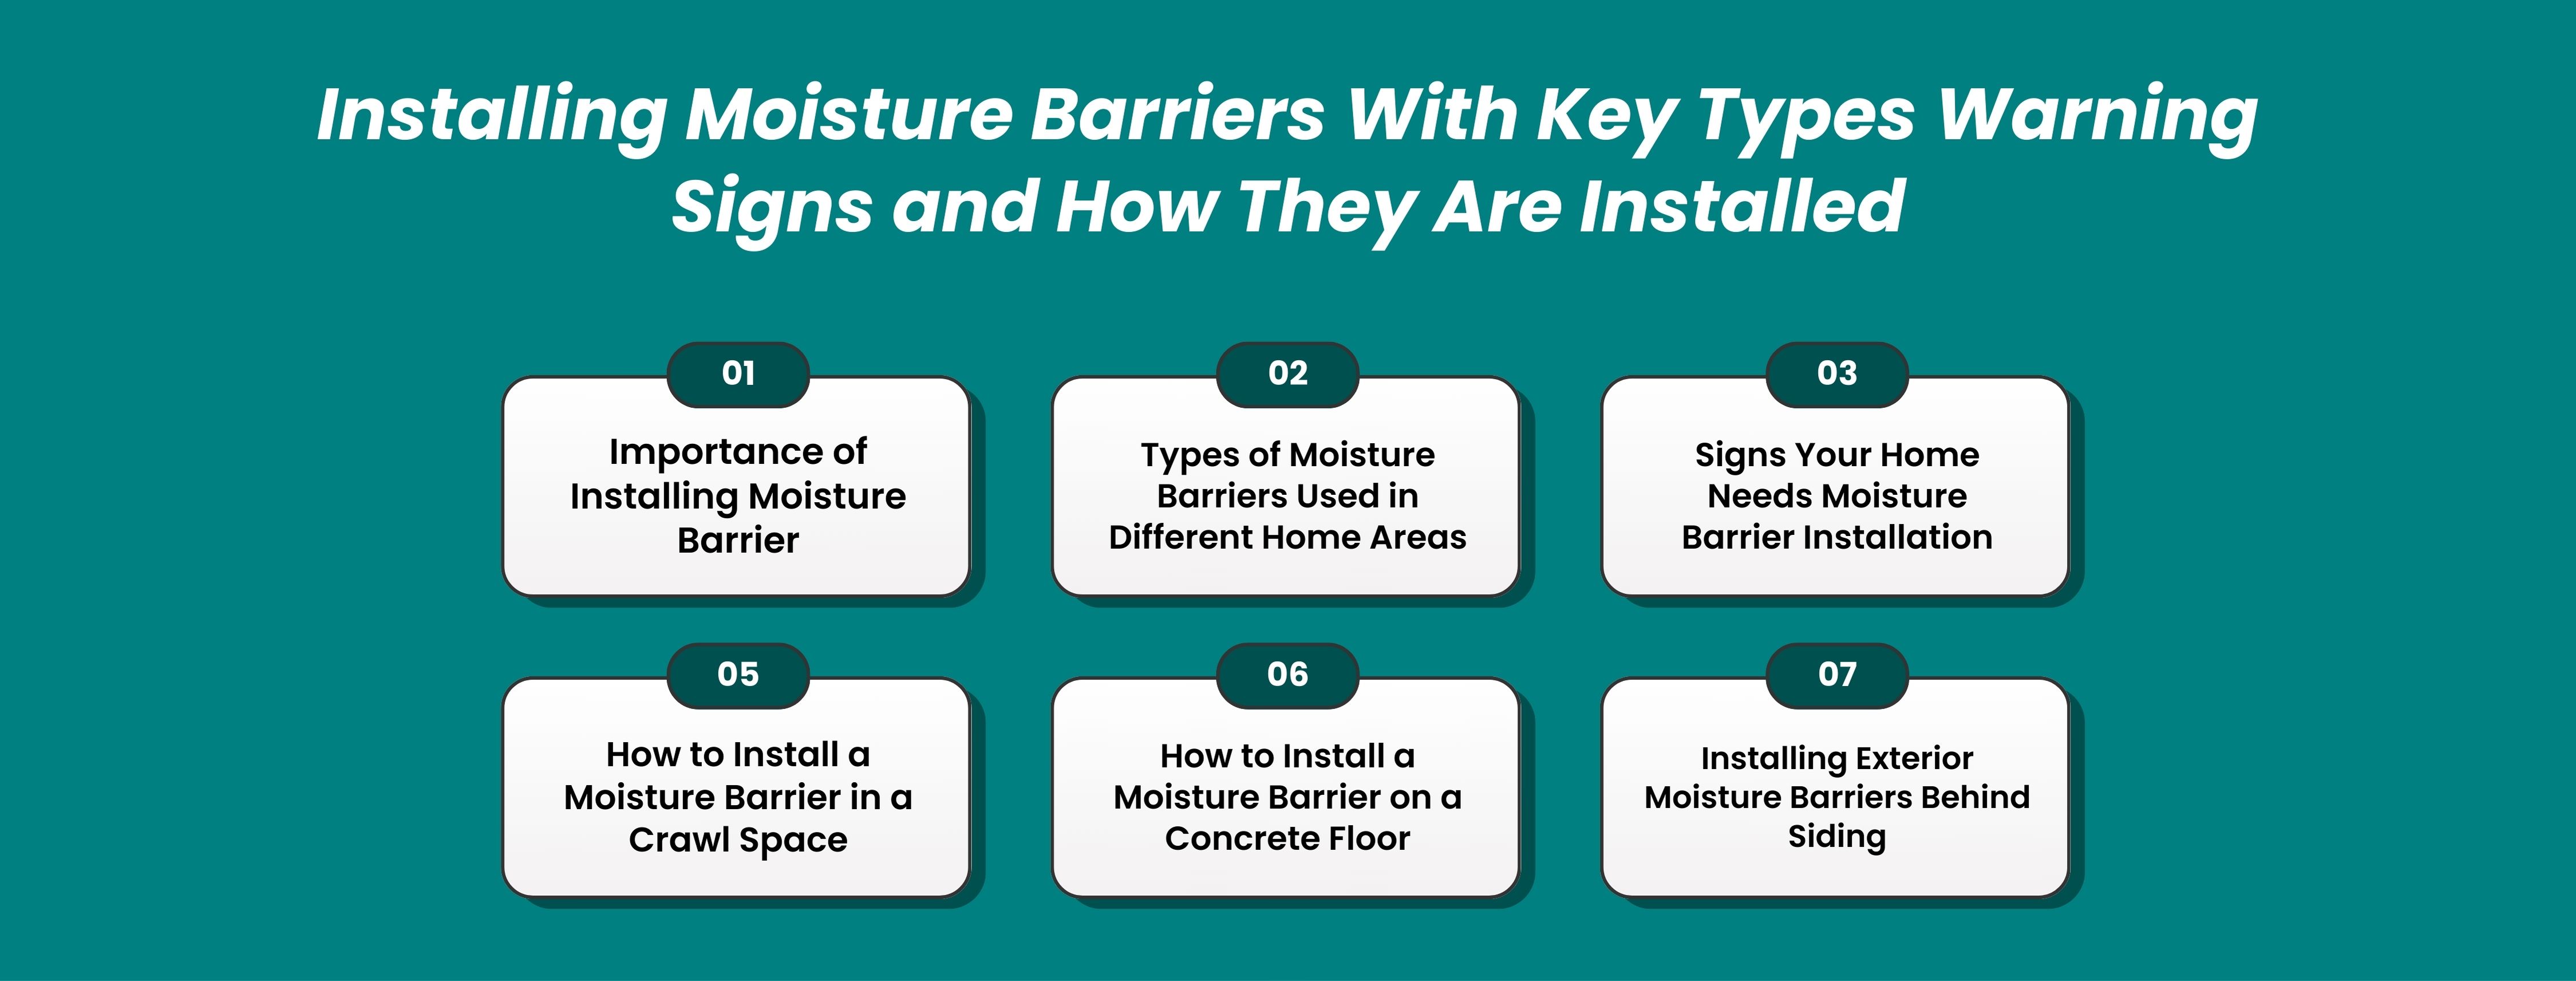
Table of Contents
Importance of Installing a Moisture Barrier
Types of Moisture Barriers Used in Different Home Areas
How to Install Moisture Barriers in a Crawl Space
How to Install a Moisture Barrier on a Concrete Floor
How to Install a Moisture Barrier in Basements
Installing Exterior Moisture Barriers Behind Siding
Professional Moisture Barrier Installation Services
Moisture Barrier Installation Costs
Professional Moisture Barrier Installation Services
Preventing Future Moisture Problems After Installation
Final Thoughts
A moisture barrier is a protective layer installed behind walls, under flooring, or around foundation areas to keep unwanted dampness out of your home. It blocks water vapor, ground moisture, and outside humidity, helping protect wood framing, insulation, and interior finishes from long-term damage.
Even 1–2% excess moisture in building materials can trigger problems over time. Without a moisture barrier, small moisture exposure can slowly lead to mold growth, musty odors, peeling paint, warped flooring, and structural decay. Once moisture damage sets in, repairs often cost 5–10× more than preventive protection.
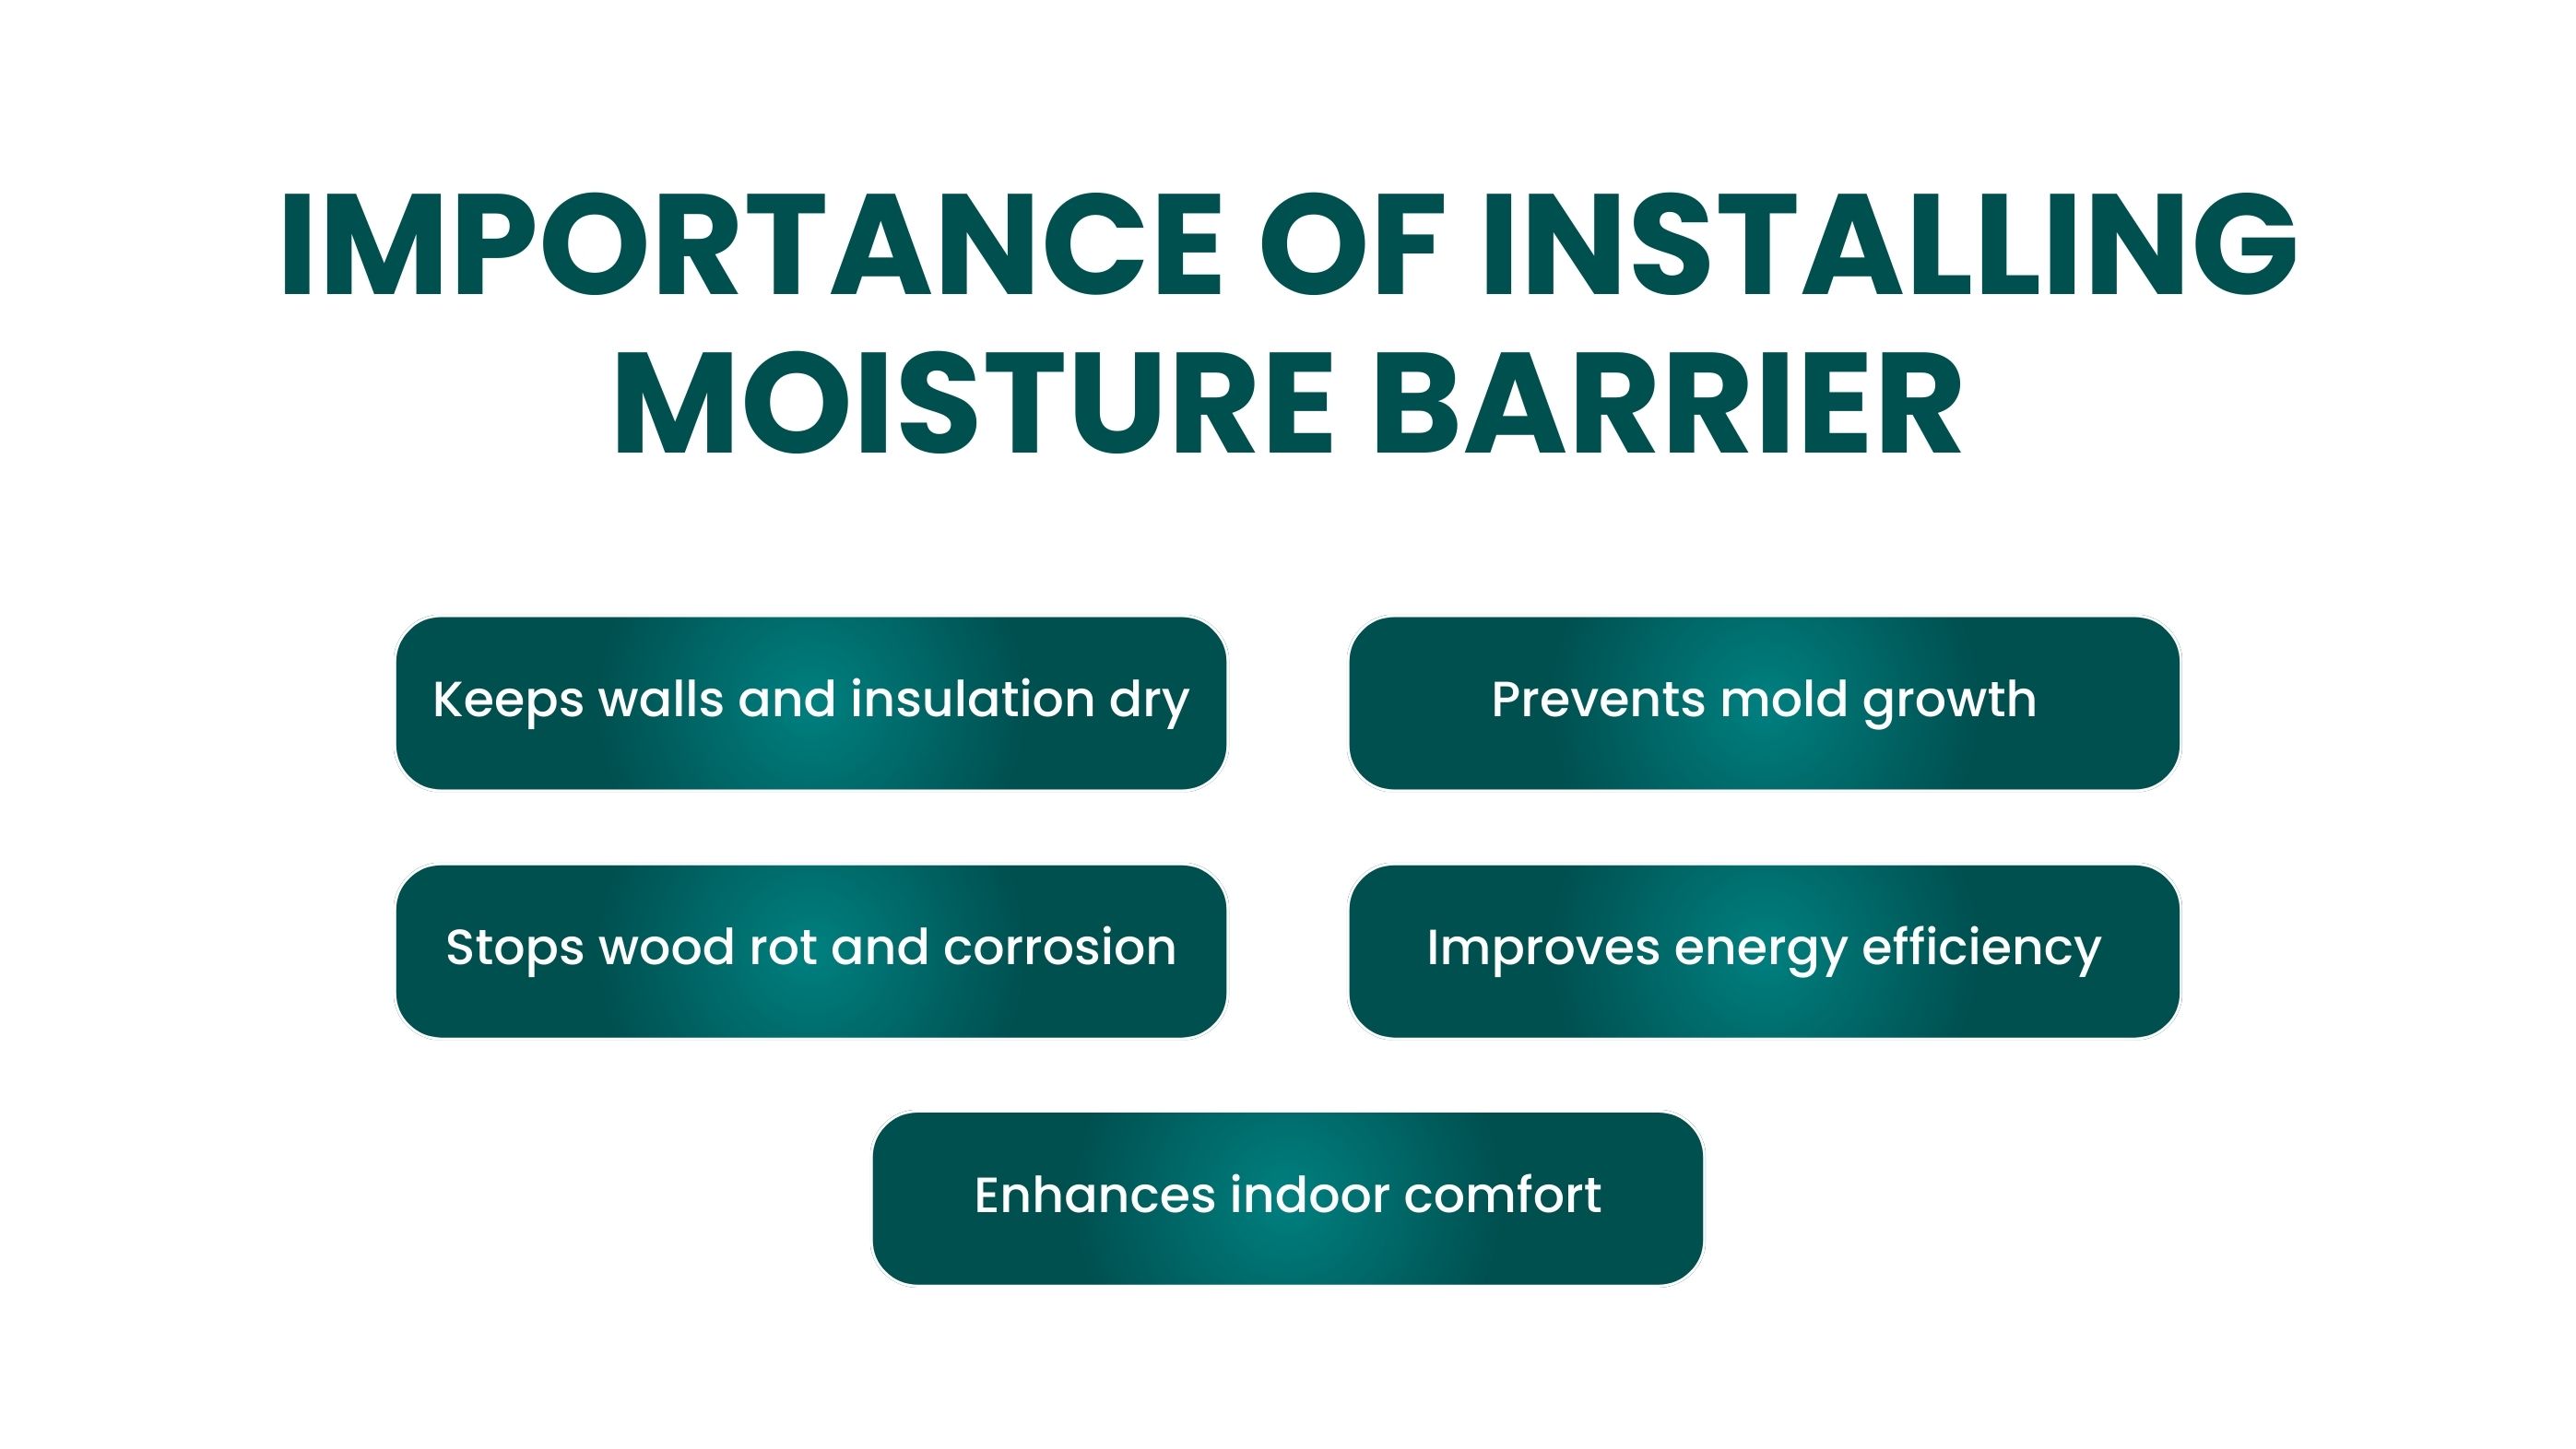
A well-installed moisture barrier plays a measurable role in home performance and longevity:
Moisture barriers are especially important in:
Whether installed under new siding, in crawl spaces, behind stucco, or beneath hardwood floors, moisture barriers act as a long-term defense system. Most high-quality barriers last 20–50 years when properly installed.
For homeowners planning upgrades or renovations, installing a moisture barrier is not just an add-on—it is a critical protective step. In many cases, a moisture barrier represents less than 5% of total renovation cost but protects 100% of the structure behind it, helping homes stay dry, healthy, and durable for decades.
Different parts of a home face different moisture challenges, which is why choosing the right moisture barrier for each area is critical. The material, thickness, and placement vary depending on whether the barrier is protecting soil, concrete, framing, or exterior walls. When properly matched to the space, moisture barriers help improve indoor air quality, extend structural lifespan, and reduce the risk of costly moisture-related damage over time.
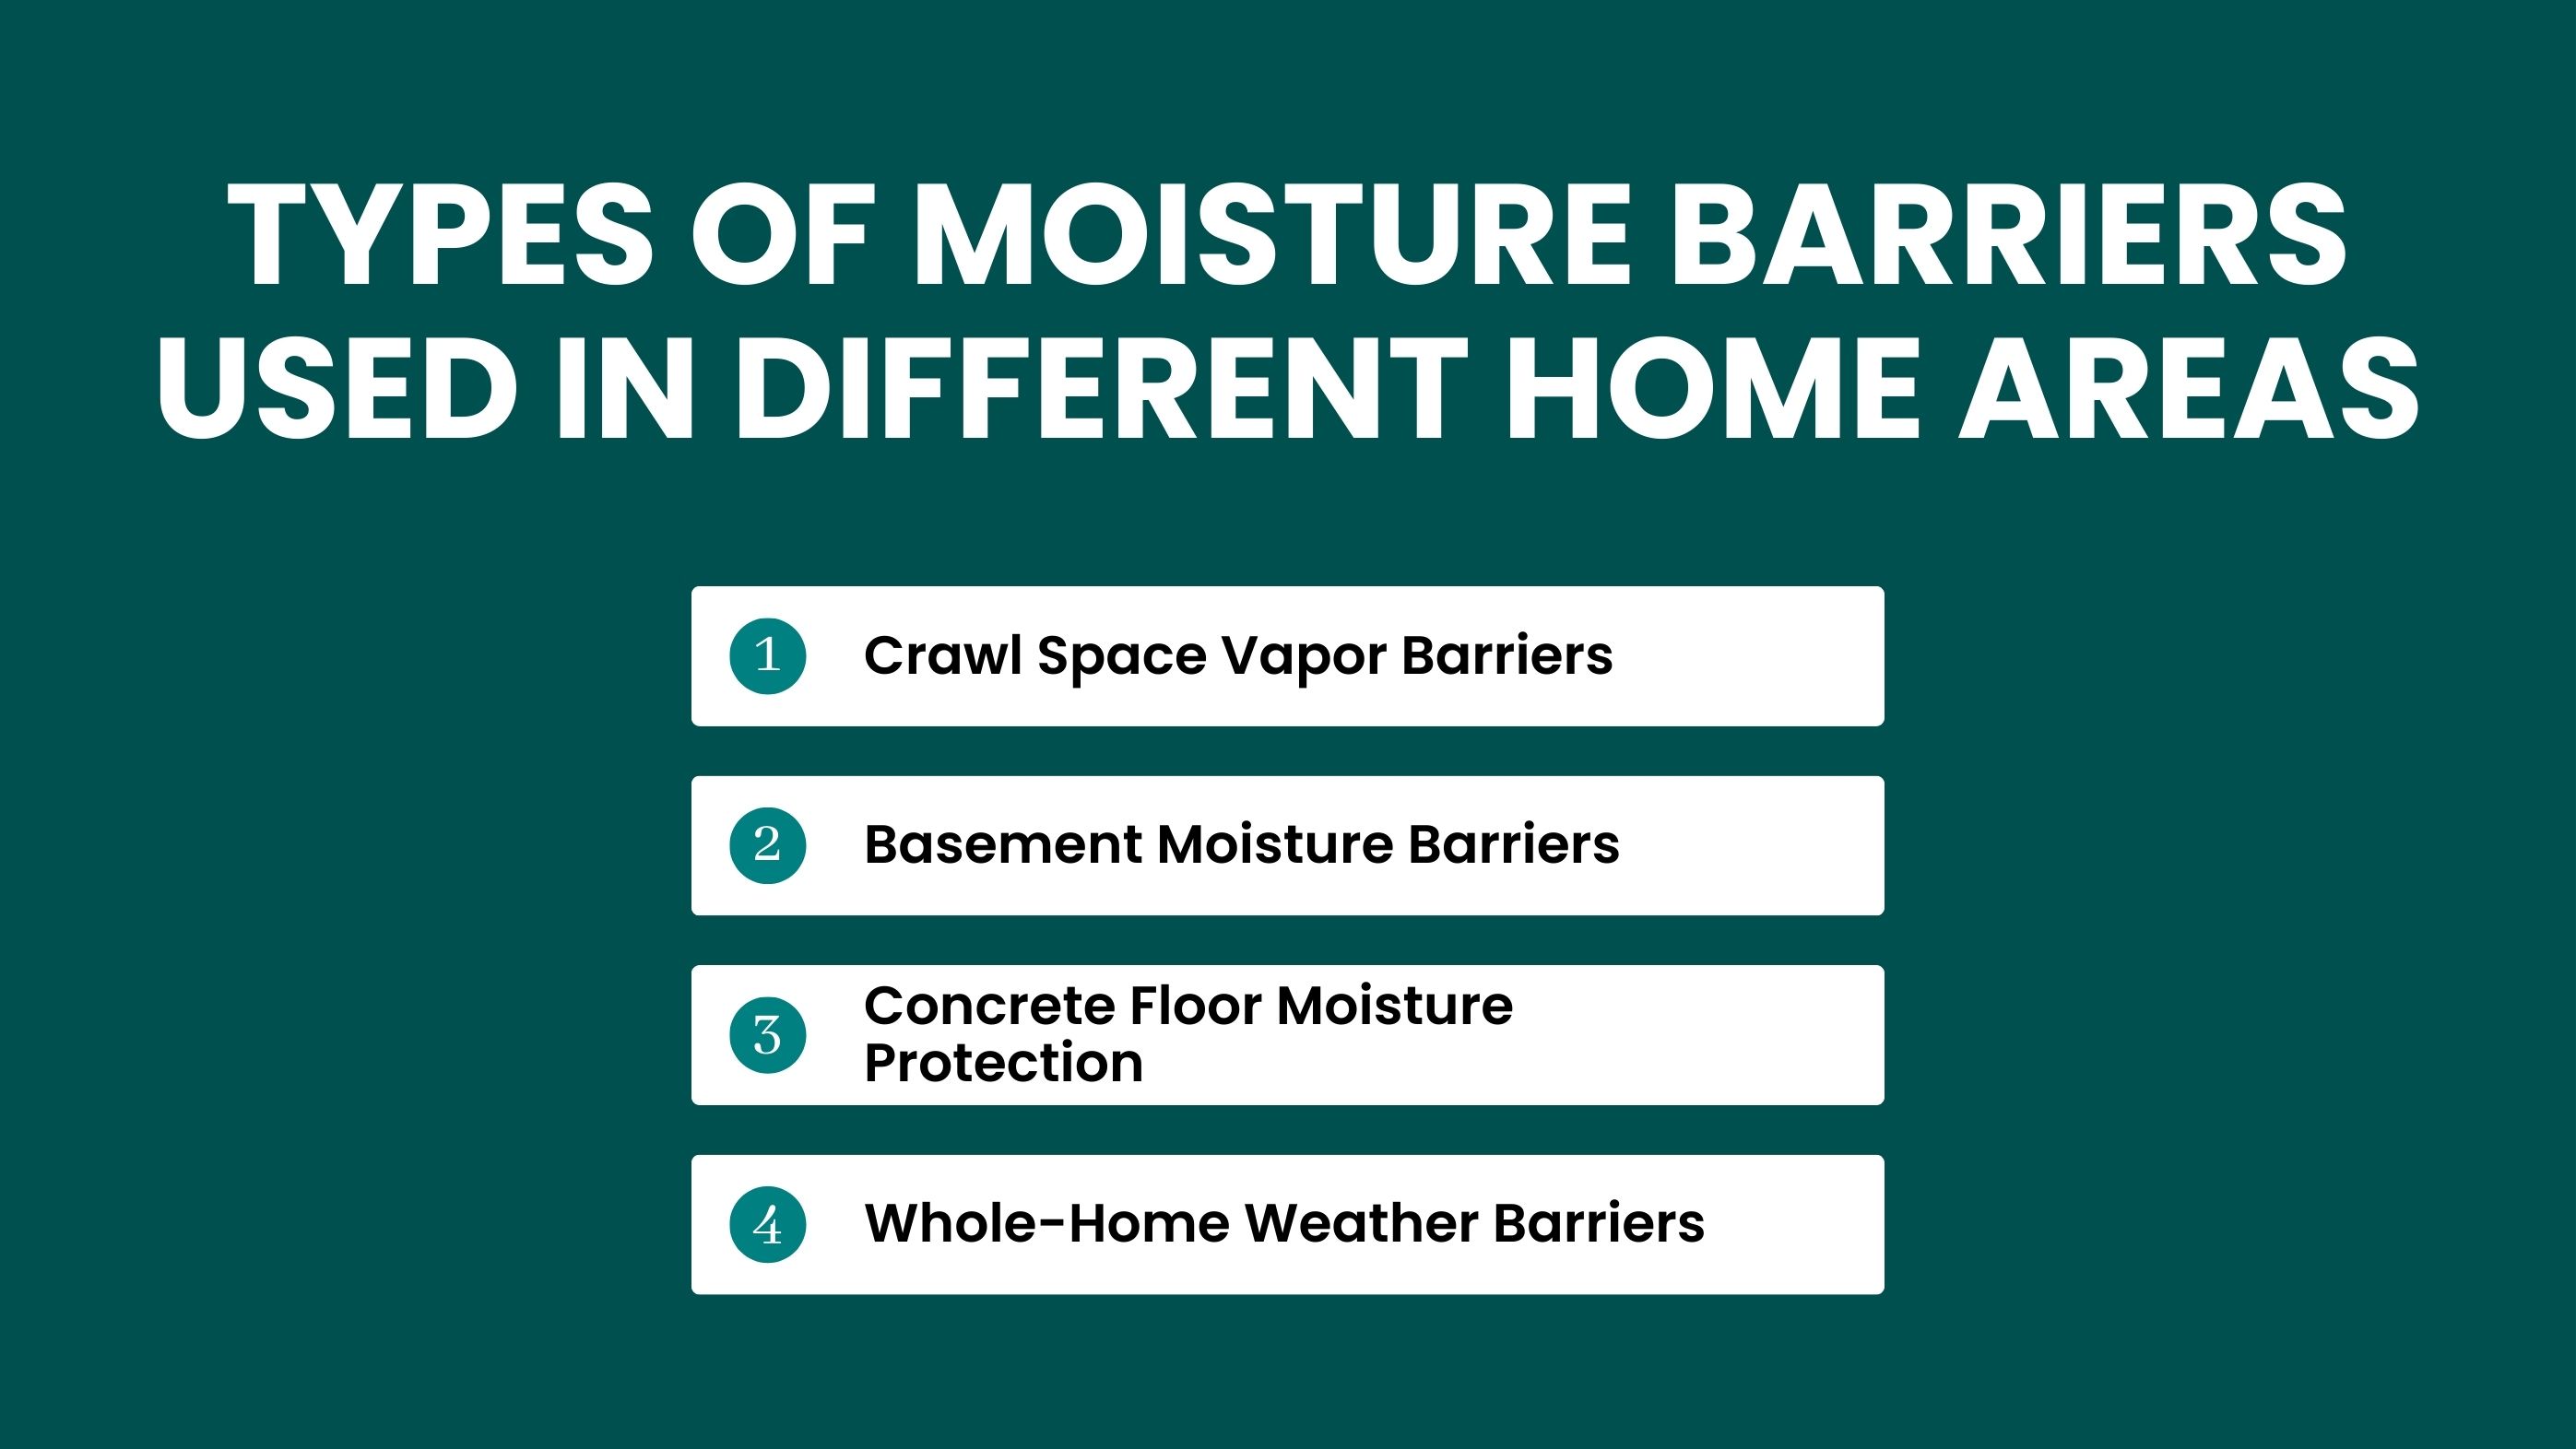
Crawl spaces pull moisture upward from exposed soil, allowing damp air to spread into floor framing and living areas above. Vapor barriers designed for crawl spaces are typically 6–20 mil thick plastic liners or reinforced polyethylene sheets installed across the ground and sealed along foundation walls.
Once properly secured, they significantly reduce ground moisture, helping prevent wood rot, pest activity, musty odors, and excessive humidity beneath the home. In many homes, crawl space vapor barriers can lower moisture levels by up to 80%, creating a drier and more stable foundation environment.
Basements sit below ground level, where concrete naturally absorbs surrounding soil moisture. Basement moisture barriers include polyethylene sheeting, roll-on waterproof membranes, or brush-applied sealants installed on walls, floors, or both before finishing the space.
These systems block moisture from migrating into insulation, drywall, and flooring materials, helping basements stay drier and healthier. When properly installed, basement barriers can reduce dampness and mold risk by 60–90%, making the space more comfortable and suitable for long-term use.
Concrete slabs continuously wick moisture upward, which can damage laminate, carpet, vinyl, or hardwood flooring over time. To prevent this, a thin moisture barrier—usually 6–10 mil plastic film or a specialized underlayment membrane—is installed beneath the finished flooring system.
This protective layer blocks moisture movement without adding noticeable floor height, improving flooring durability and preventing warping, staining, or mold growth beneath the surface.
Exterior walls require a dedicated defense against rain, wind-driven moisture, and outdoor humidity. Weather-resistant barriers (WRBs) are installed behind siding to protect wall cavities while still allowing trapped vapor to escape.
These breathable membranes are designed to last 30–50 years when properly installed and play a critical role in keeping insulation dry, preventing rot, and maintaining the structural integrity of exterior walls throughout the life of the home.
Moisture barrier installation varies by location, but the goal is always the same: stop water vapor movement, protect building materials, and create a dry, stable environment. Below is a clear, step-by-step crawl space installation approach, since crawl spaces are one of the most common sources of hidden moisture problems in homes.
A properly sealed crawl space barrier helps control humidity, prevent structural rot, and support healthier indoor air throughout the home.
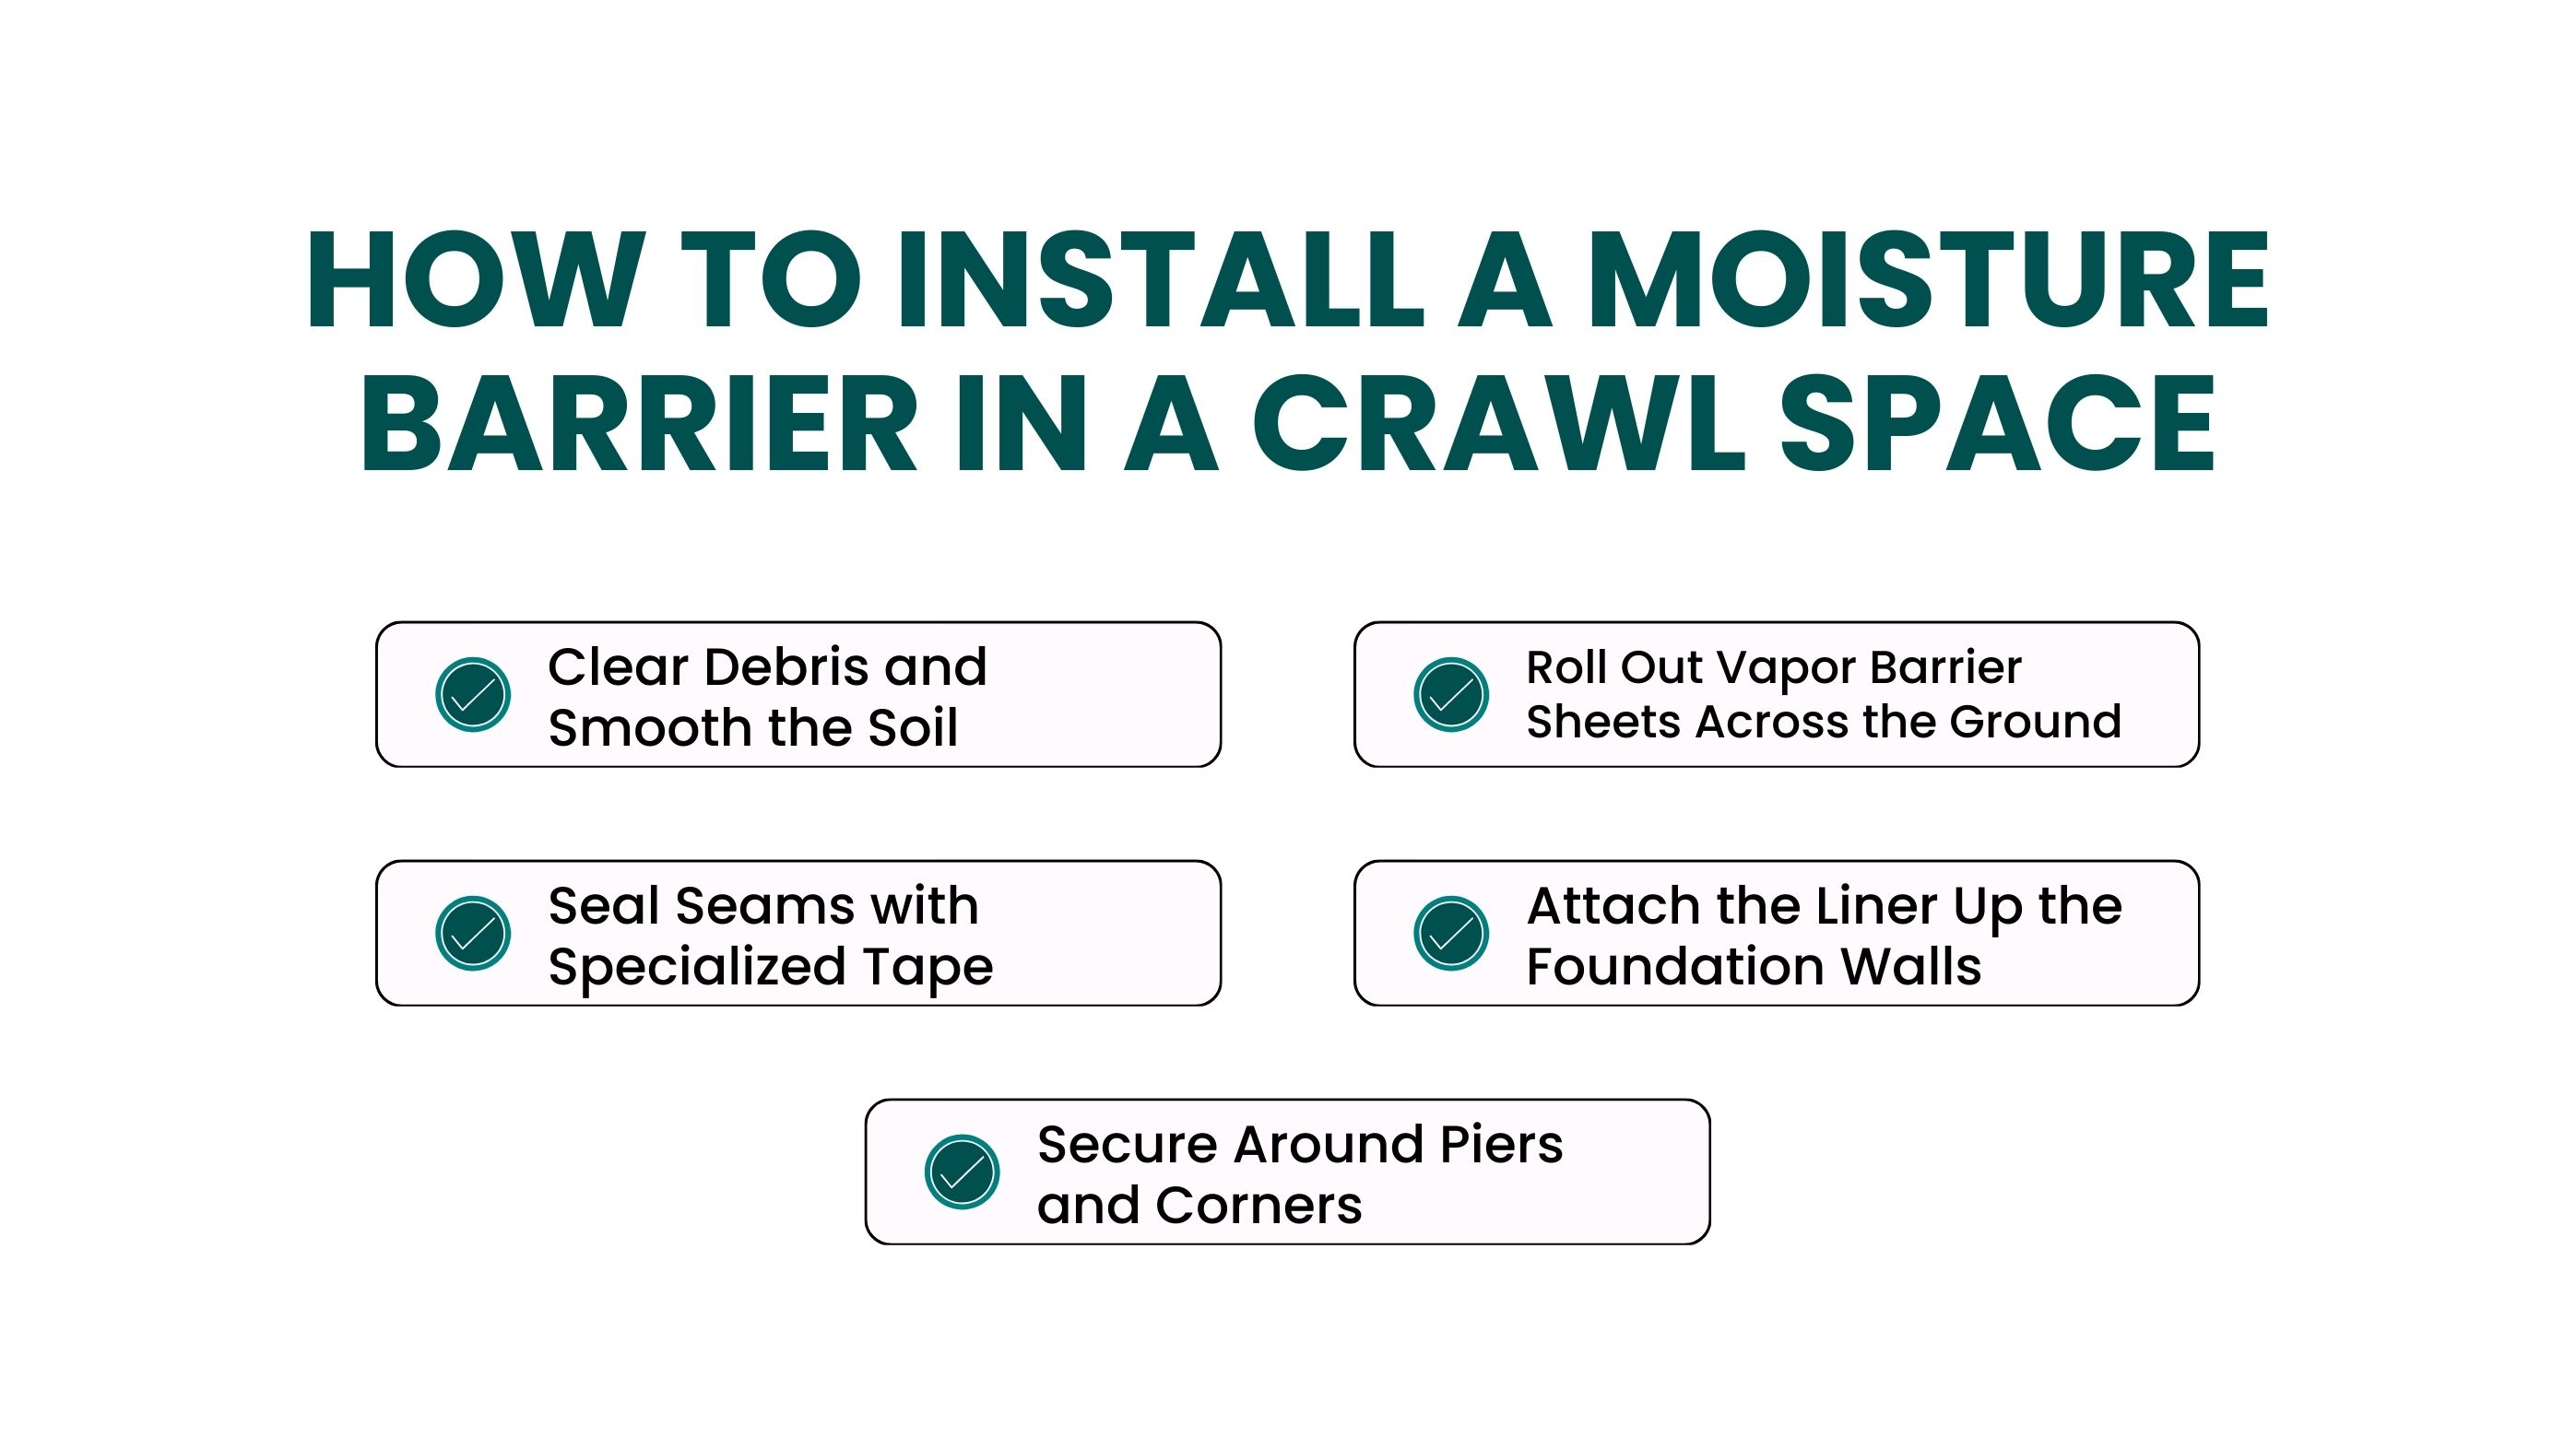
Begin by clearing the crawl space floor of rocks, loose wood, plastic scraps, and sharp objects that could puncture the liner. Lightly rake and smooth the soil so the barrier sits flat and maintains full contact with the ground.
Roll out thick polyethylene vapor barrier sheets across the soil surface. Most crawl spaces use 6–20 mil material, depending on moisture levels and durability needs. Sheets should overlap by 6–12 inches to ensure no exposed ground remains.
Seal all overlapping sections using moisture-resistant seam tape designed for vapor barriers. This step is critical, as unsealed seams allow ground vapor to escape and reduce the effectiveness of the entire system.
Extend the vapor barrier 6–12 inches up the foundation walls and secure it using double-sided tape, adhesive, or mechanical fasteners. Attaching the liner to the walls seals edge gaps and prevents moisture from escaping at wall-to-ground joints.
Carefully cut and fit the barrier around support piers, posts, and tight corners. Tape these areas tightly to maintain continuous coverage. Proper sealing around penetrations prevents vapor from bypassing the barrier.
Concrete floors naturally absorb moisture from the ground below. Without a moisture barrier, that moisture can rise into flooring materials and cause warping, mold growth, odors, and early flooring failure. Installing a moisture barrier creates a protective layer that blocks vapor movement and improves long-term flooring durability.
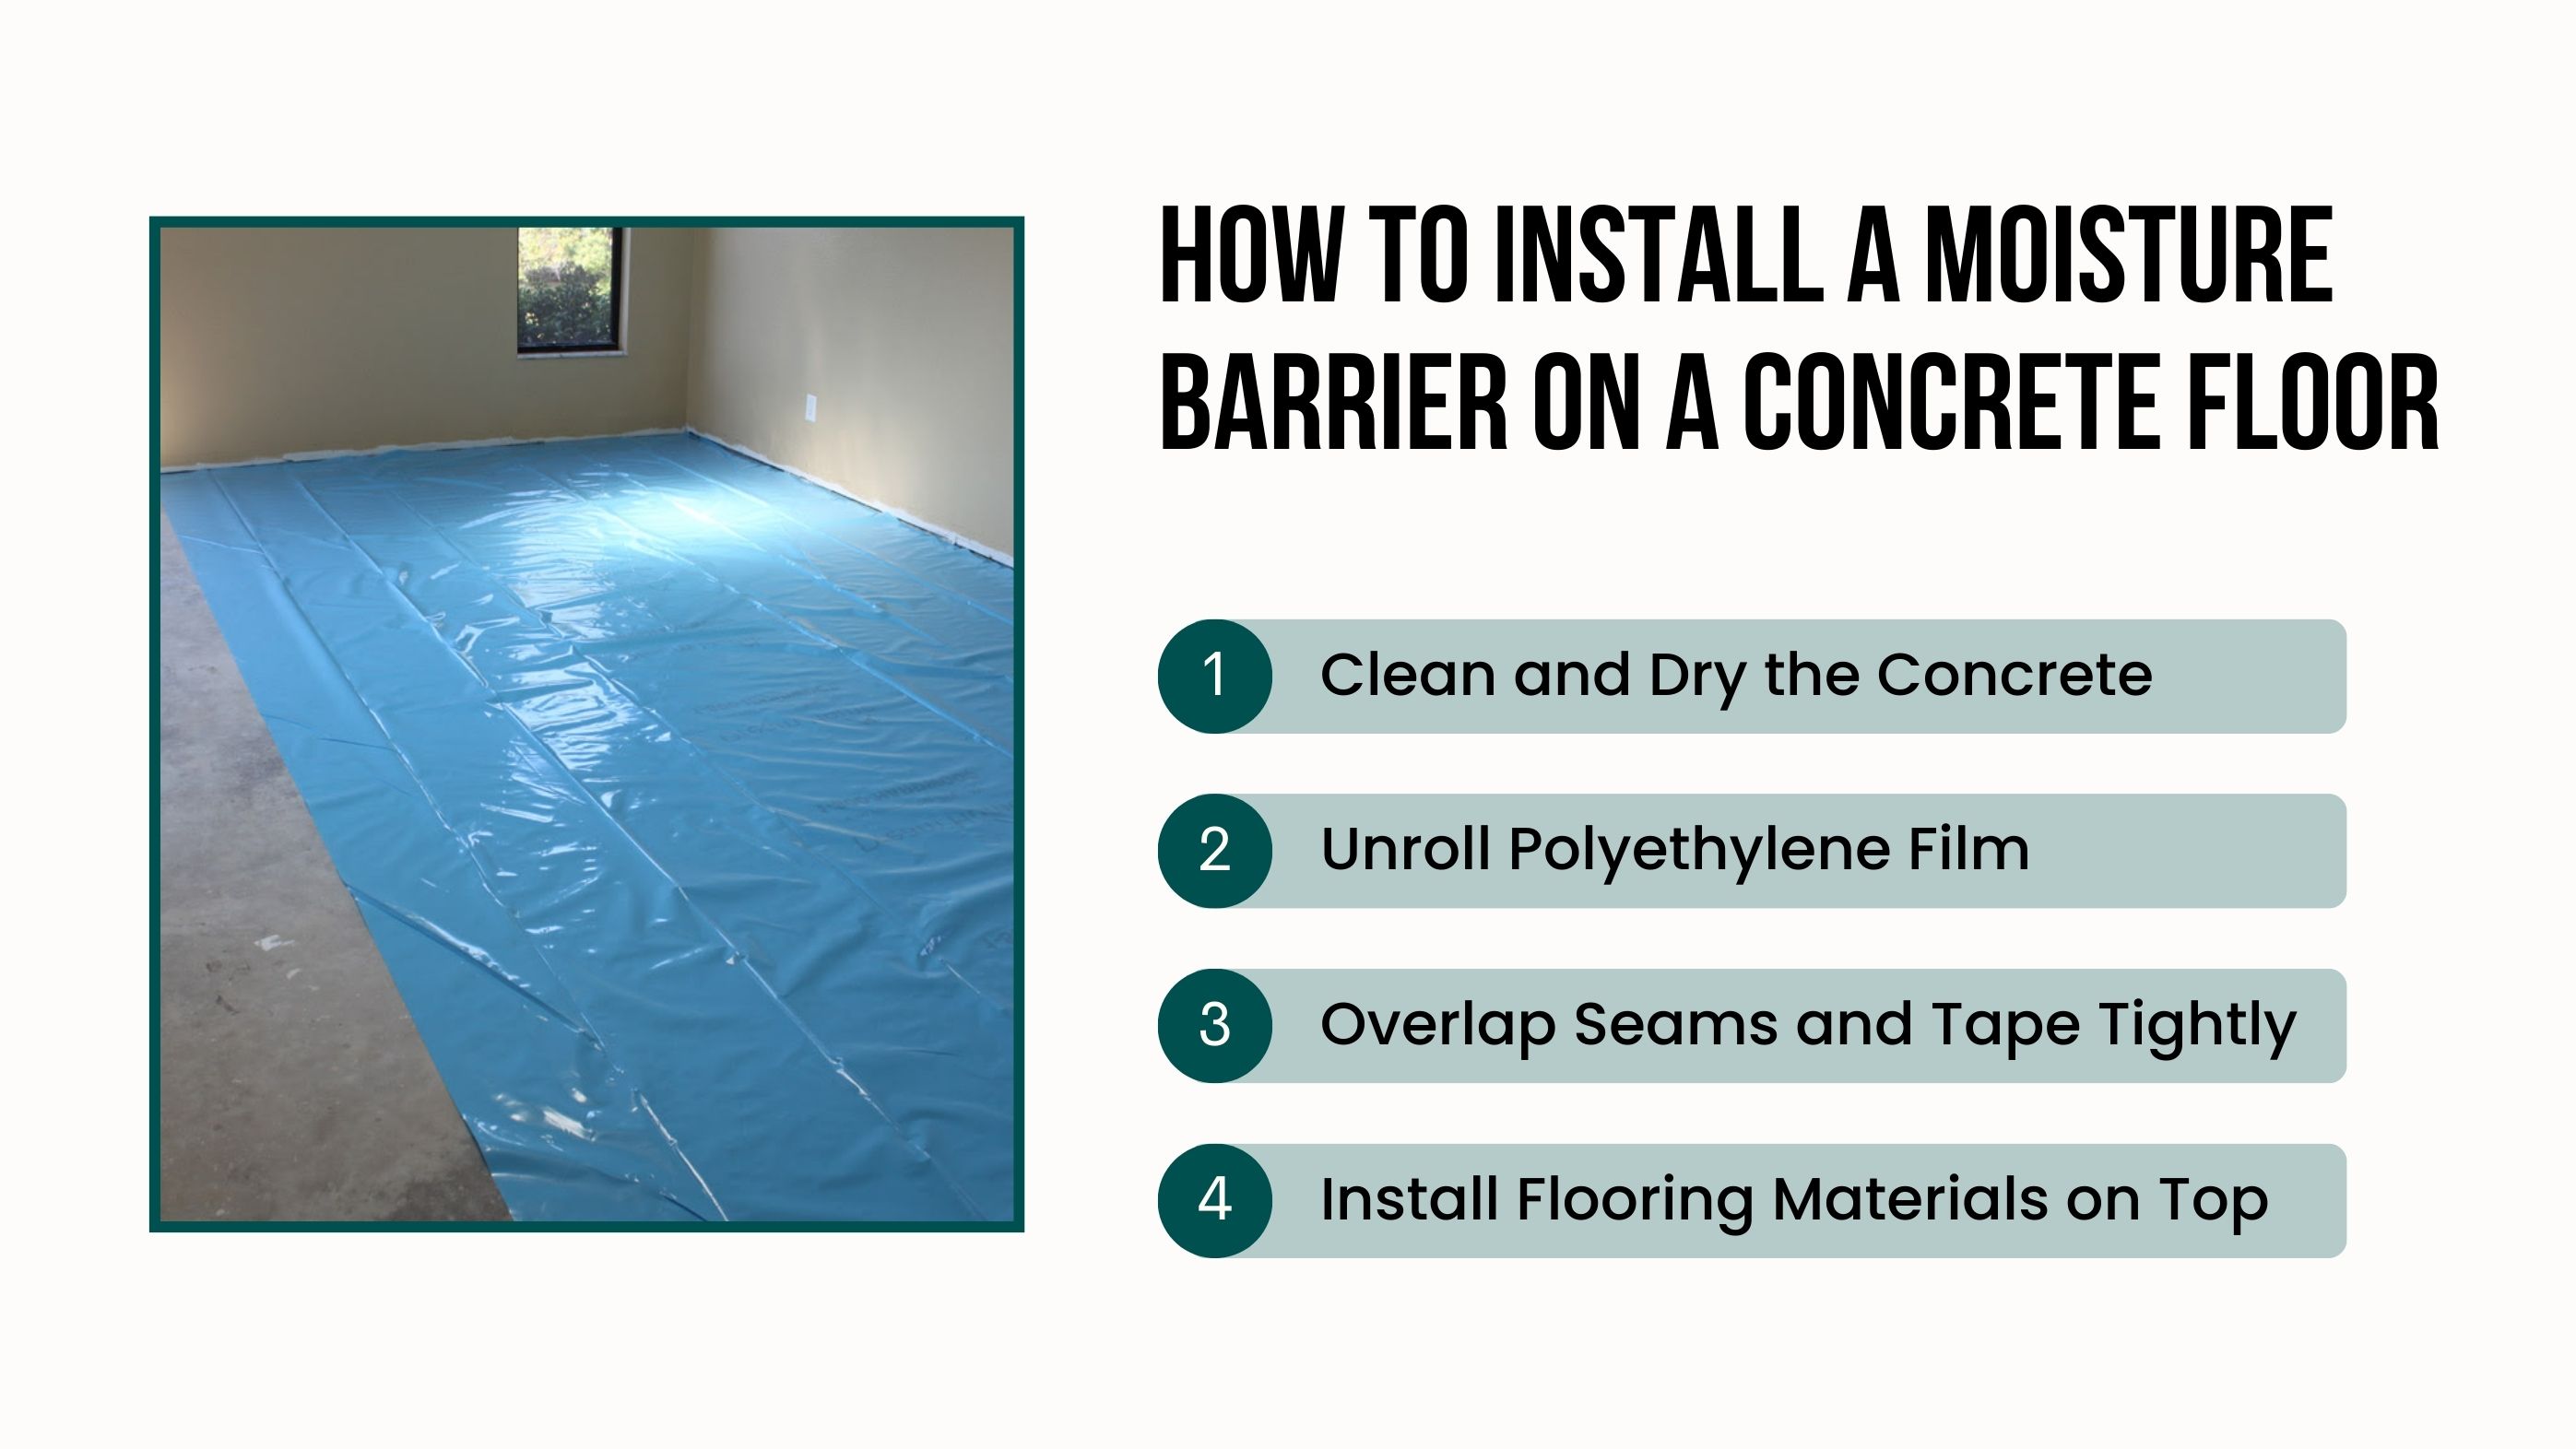
Start by sweeping and vacuuming the concrete to remove dust, dirt, and debris. The surface must be smooth and completely dry before installation. Any trapped moisture or loose particles can prevent the barrier from sealing properly and may cause issues later.
Unroll a continuous sheet of polyethylene plastic across the entire concrete floor. A 6–10 mil vapor barrier is commonly recommended for residential flooring because it resists tearing and blocks moisture more effectively. Lay the sheet flat without stretching or bunching.
Where sheets overlap, allow at least 6 inches of overlap. Seal all seams using moisture-resistant construction tape. Press firmly to eliminate gaps, as even small openings can allow moisture to pass through and compromise the system.
Extend the moisture barrier 2–4 inches up the walls before trimming. This step prevents moisture from entering at the floor edges, which is one of the most common problem areas in concrete floor installations.
Once the barrier is fully sealed, install any required underlayment, followed by the finished flooring. The moisture barrier now serves as a long-term shield between the concrete slab and flooring materials such as laminate, vinyl, engineered wood, tile, or carpet.
Basements are especially vulnerable to moisture intrusion because they sit below ground level, where soil pressure and groundwater constantly push dampness toward foundation walls. Without a proper moisture barrier, this moisture can enter insulation and wall cavities, leading to mold growth, musty odors, peeling finishes, and long-term structural issues. A correctly installed barrier creates a protective layer that keeps basements dry, usable, and healthier year-round.
Start by cleaning basement walls and floors thoroughly. Remove dust, loose paint, efflorescence, and any flaking materials that could prevent proper adhesion. Hairline cracks or minor gaps should be filled before installation, and the surface must be completely dry. Installing a barrier over damp concrete can trap moisture and reduce its effectiveness.
Choose a moisture barrier based on how the basement will be used. Polyethylene sheeting works well for unfinished basements and foundation protection, while roll-on waterproof coatings or rigid membranes are better suited for finished or living spaces. Each option is designed to block moisture while working with different wall and flooring systems.
Apply the chosen barrier evenly across basement walls, floors, or both. Plastic sheeting should be secured tightly without sagging, while liquid-applied membranes should be rolled or brushed on in consistent layers. Coverage must be continuous to prevent moisture from slipping through weak points in the system.
Seal all seams, corners, and transitions carefully using moisture-resistant tape or sealant. Extra attention should be given to areas around pipes, wiring, sump discharge lines, and utility penetrations. These small openings are common moisture entry points and must be sealed to keep the barrier effective.
Once the moisture barrier is fully installed and sealed, interior materials such as insulation, framing, and drywall can be added. With the barrier in place, these materials are protected from hidden moisture, helping prevent mold growth and material breakdown behind finished walls.
A properly installed basement moisture barrier can reduce dampness by 60–90%, improve indoor air quality, and help finished basements remain comfortable throughout the year. Most high-quality systems are designed to last 20–40 years, making them a long-term solution rather than a temporary fix.
Exterior walls are constantly exposed to rain, wind, snow, and airborne moisture. Without a proper barrier behind the siding, water can slip into wall cavities and cause rot, insulation damage, and long-term structural problems. Installing a moisture barrier behind siding creates a critical protective layer that keeps exterior walls dry while still allowing trapped vapor to escape.
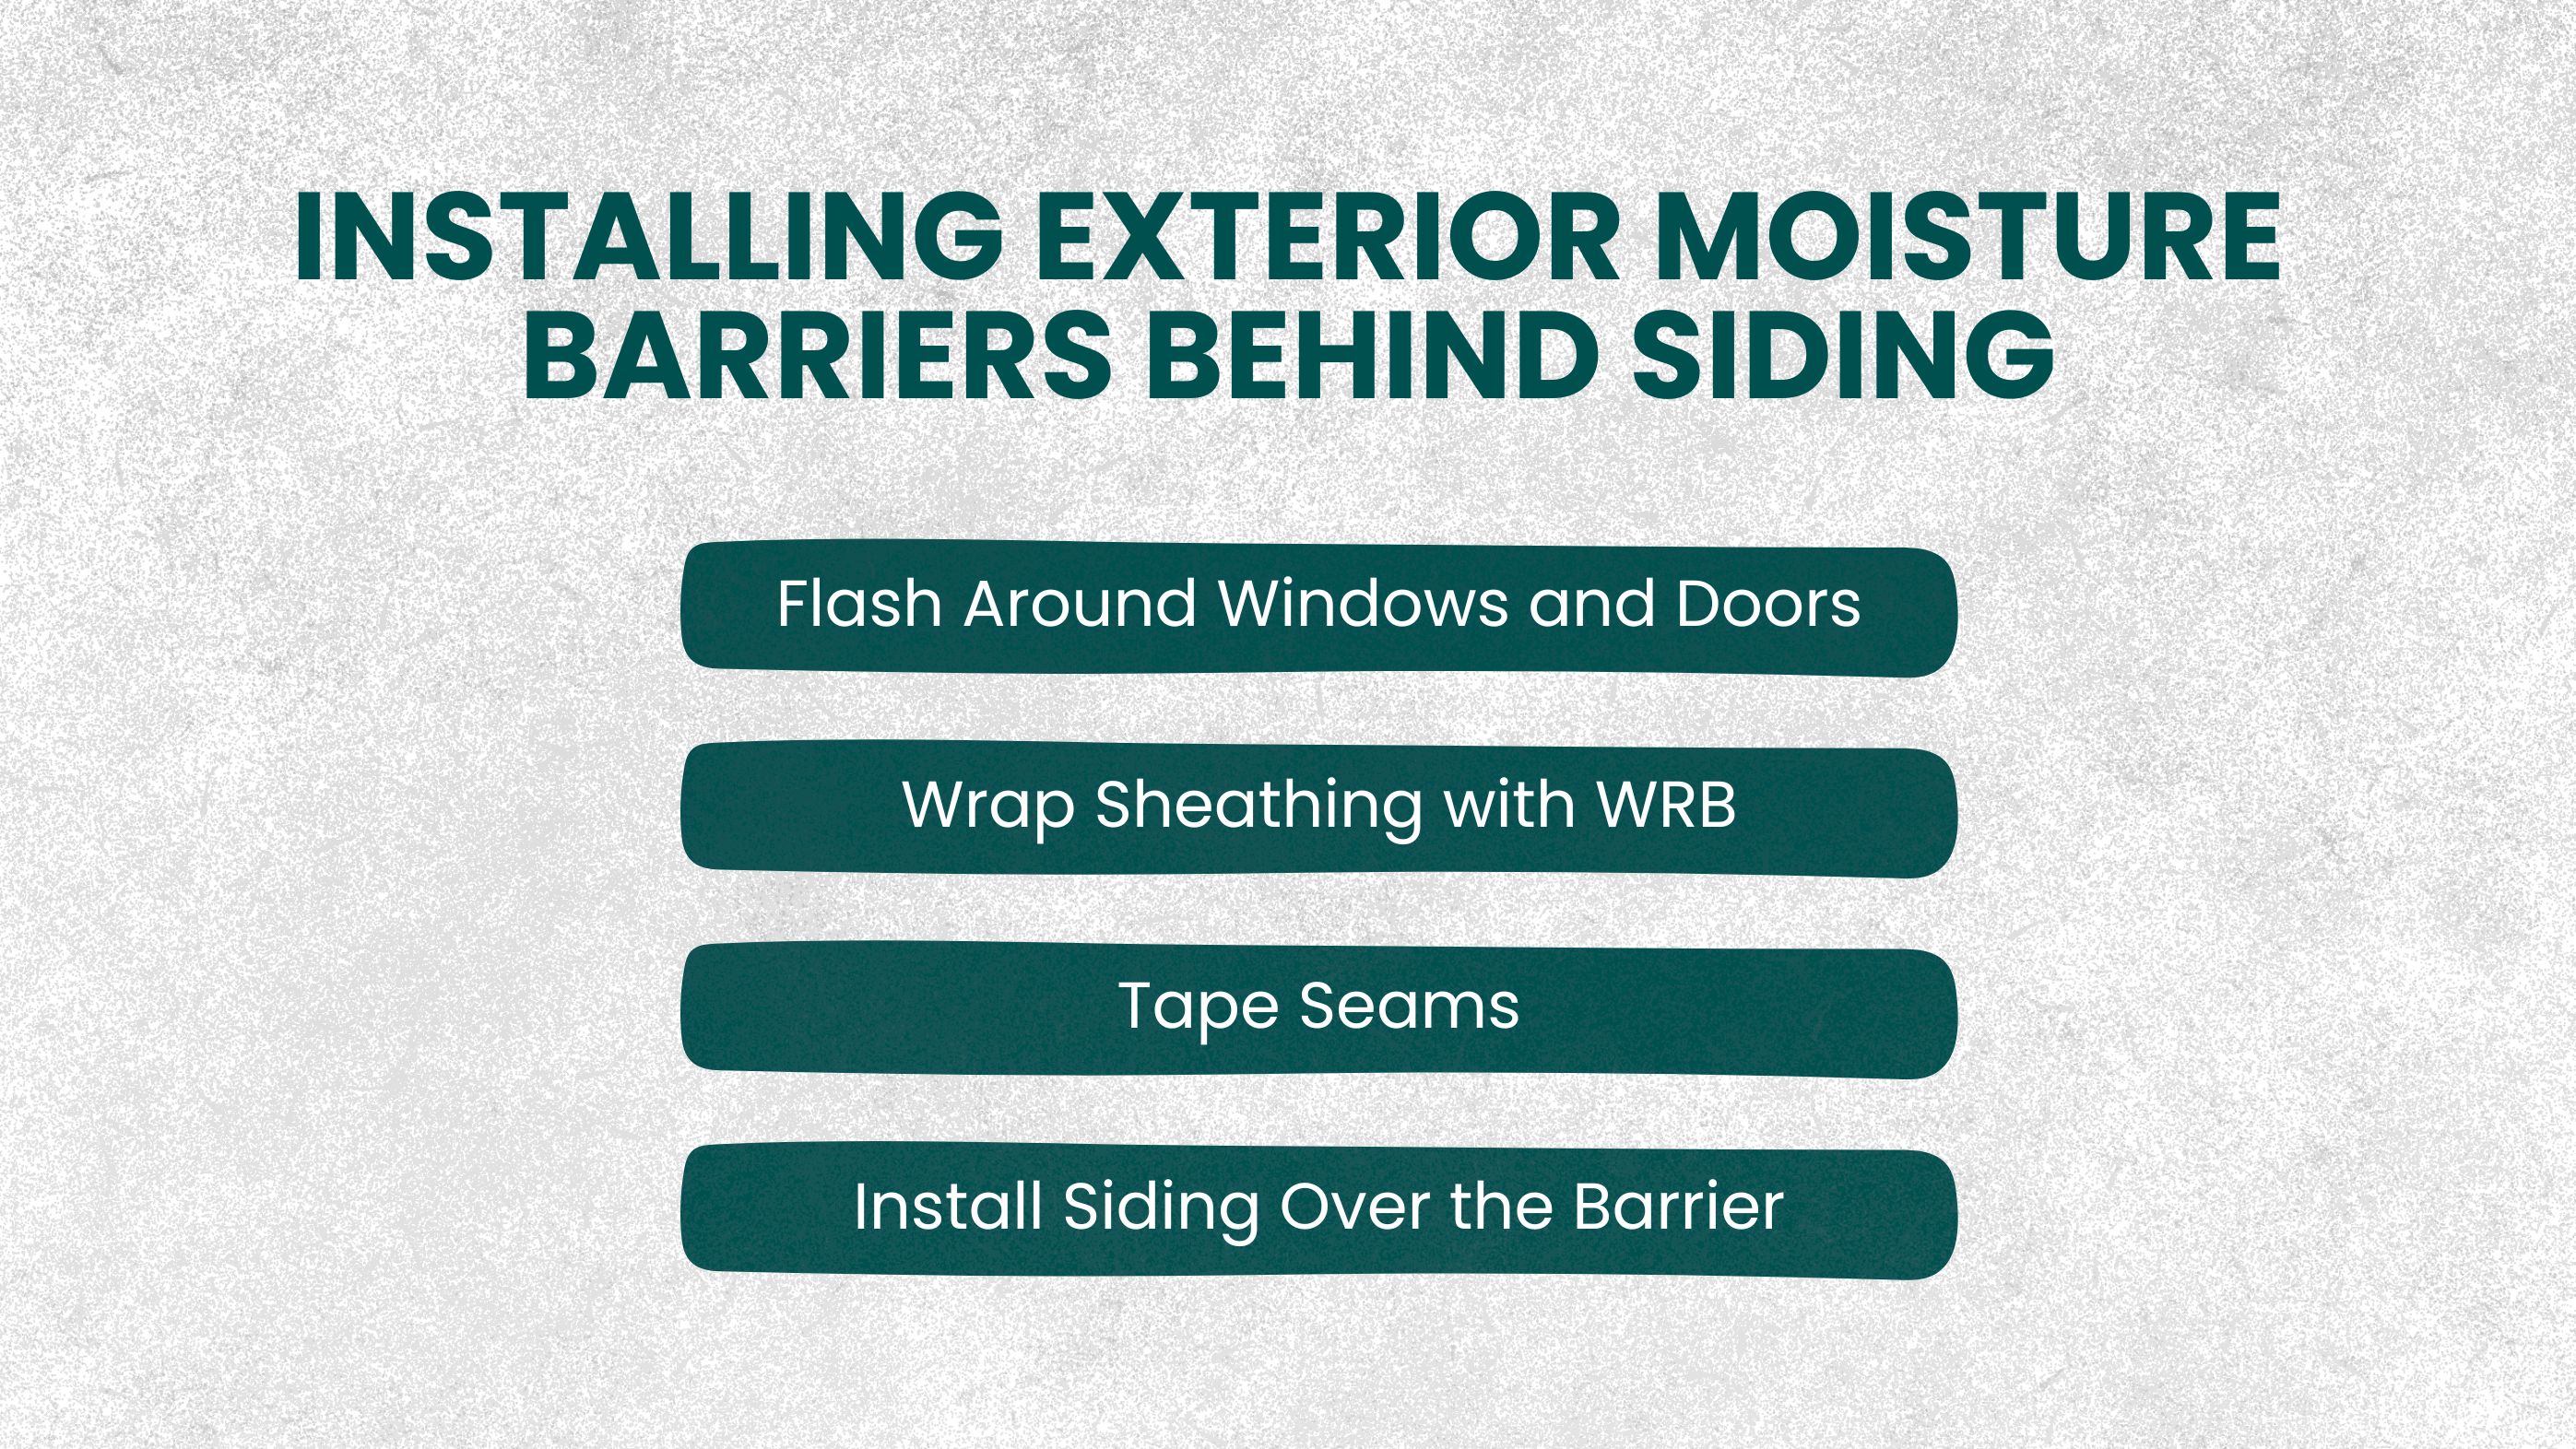
Begin by wrapping the wall sheathing with a weather-resistant barrier (WRB), such as house wrap or moisture-resistant building paper. The material should be installed flat and smooth, without wrinkles or gaps, so water can drain downward rather than collect behind the siding. Proper coverage ensures the entire wall system is protected from wind-driven moisture.
Seal all overlapping seams using manufacturer-approved exterior tape. Seams should be pressed firmly to maintain a continuous barrier and prevent water from being forced behind the wrap during storms. Well-sealed seams also improve air control, helping reduce drafts and heat loss through exterior walls.
Windows and doors are the most common points of water entry. Apply flashing tape or metal flashing around all openings, directing moisture outward and away from the wall cavity. Proper flashing works together with the WRB to guide water safely down and out of the exterior system.
Once the moisture barrier and flashing are fully installed, siding panels can be placed over the WRB. The barrier remains hidden but continues to protect the framing, insulation, and interior finishes from moisture intrusion throughout the life of the siding.
When properly installed, exterior moisture barriers can last 30–50 years, significantly extend siding lifespan, and reduce the risk of rot, mold, and insulation damage. This layered system helps keep exterior walls dry, structurally stable, and energy-efficient in all weather conditions.
Moisture control is one of those projects where mistakes can become expensive. When sealing is incomplete or materials are used incorrectly, issues like mold, rot, and indoor humidity continue to grow. Professional installation ensures the barrier is installed with correct materials, airtight seams, and long-term protection so your home stays dry and structurally sound
Crawl space specialists know how ground vapor behaves and how it rises into living areas. They level soil, apply thick liners, seal seams tightly, and fasten barriers to foundation walls. Their work stabilizes humidity, prevents wood decay under the home, and supports healthier indoor air.
Basements need a different approach because moisture often enters through concrete walls or slabs. Professionals apply high-performance coatings, plastic membranes, or drainage layers designed to stop seepage and condensation. They also inspect for cracks, repair them, and ensure the barrier works with insulation and framing.
Exterior moisture barriers protect the entire wall system behind siding. Trained installers wrap sheathing, tape seams, flash openings, and prepare drainage paths. Their work keeps rain and wind-driven moisture out, extending siding life and protecting structural framing from hidden water damage.
These pros bring experience, correct material selection, and installation skills that help homeowners avoid costly repairs and enjoy a dry, long-lasting home.
Moisture barrier pricing varies because every home has different needs, access conditions, and moisture levels. Costs depend on square footage, labor difficulty, liner thickness, and whether the work is in a crawl space, basement, under flooring, or behind siding. Materials range from thin polyethylene film to reinforced vapor liners, and the more protection required, the higher the investment.
The cost to install a moisture barrier in a crawl space typically ranges from $1,500 to $4,000. Pricing depends on how tight the crawl space is, the thickness of the liner, and overall accessibility. Larger crawl spaces and reinforced liners increase material and labor costs. Homes with uneven soil, standing water, or debris require extra prep work, which adds to the total investment.
Basement moisture barrier installation generally costs between $2,000 and $6,000. The final price depends on whether only the walls are sealed or both walls and floors are protected. Wall membranes, coatings, and seam taping are more labor-intensive than simple floor film installation. Severe moisture issues may require crack repairs or drainage solutions, increasing the overall cost.
Moisture barriers for concrete floors are usually the most affordable option, with costs ranging from $0.50 to $2.00 per square foot, or $300 to $1,500 for most rooms. Thin-film barriers under laminate or vinyl flooring require minimal sealing and equipment. However, premium subfloor membranes or thicker vapor films raise costs when added protection is needed.
Whole-home moisture barriers installed behind siding usually cost $4,000 to $10,000+. These systems cover large exterior areas and require skilled labor. Contractors install WRB over sheathing, tape seams, and flash around windows and doors before siding goes back on. The scope, materials, and equipment involved make this the most expensive barrier option.
Moisture barrier installation costs rise when hidden problems are discovered during prep work. Mold remediation, rotted joist repairs, grading corrections, or drainage upgrades must be addressed before barrier installation. While these repairs increase upfront cost—often by $500 to $3,000+—they are essential for long-term moisture protection and preventing future damage.
Moisture control is one of those projects where small mistakes can become expensive over time. When barriers are poorly sealed or the wrong materials are used, problems like mold growth, wood rot, and persistent indoor humidity often continue beneath the surface. Professional installation ensures the moisture barrier is placed correctly, sealed thoroughly, and designed to protect your home for the long term.
Crawl space professionals understand how ground moisture rises into floor framing and living areas. They prepare and level the soil, install thick vapor liners, seal seams tightly, and secure barriers to foundation walls. This process helps stabilize humidity levels, prevent wood decay beneath the home, and improve overall indoor air quality.
Basement moisture requires a different approach because dampness often enters through concrete walls or slabs. Professionals apply high-performance membranes, plastic barriers, or waterproof coatings designed to stop seepage and condensation. They also inspect for cracks, seal weak points, and ensure the barrier works properly with insulation and wall framing to avoid trapping moisture behind finished surfaces.
Whole-home exterior moisture barriers protect the entire wall system behind siding. Trained installers wrap wall sheathing, tape seams, flash windows and doors, and create proper drainage paths. This layered system keeps rain and wind-driven moisture out, extending siding lifespan and protecting structural framing from hidden water damage.
Installing a moisture barrier is only the first line of defense. Long-term protection depends on a few simple habits that keep water away from your home’s structure and stop hidden humidity from building up again.
These preventive habits extend the life of your barrier, protect indoor air quality, and ensure your home stays dry, safe, and structurally sound.
Moisture barriers aren’t just another upgrade; they are a silent protector that keeps homes healthier, sturdier, and more energy efficient for years. Whether placed under flooring, behind siding, inside crawl spaces, or across basement walls, their job is simple but critical: stop hidden dampness before it becomes mold, decay, or expensive repairs.
When installed correctly and paired with good drainage, routine inspections, and humidity control, these barriers create a stable, comfortable environment that homeowners rarely notice because problems never appear. Investing in a moisture barrier today is one of the smartest ways to protect your home’s value, improve indoor comfort, and safeguard the structure for the future.
Crawl spaces are often the dampest areas in a home due to exposed soil, limited airflow, and constant ground vapor rising upward. A properly installed moisture barrier placed over the soil—typically crawl space vapor sheeting—blocks up to 80–90% of ground moisture from entering the structure. This protection keeps floor joists and insulation dry, helping prevent wood rot, mold growth, and sagging floors. By stabilizing crawl space humidity, moisture barriers can also reduce indoor humidity levels by 5–15%, which helps eliminate musty odors and allows HVAC systems to operate more efficiently year-round.
Basements sit below grade, where concrete walls and floors naturally absorb moisture from surrounding soil. When a moisture barrier is applied to these surfaces, it stops dampness from penetrating inward and damaging finished materials. This protection helps prevent mold odors, bubbling paint, warped flooring, and deteriorating drywall. In many homes, basement moisture barriers reduce surface dampness by 60–90%, making basements noticeably drier, more comfortable, and safer for long-term storage or living space use.
Even high-quality siding cannot fully block wind-driven rain or condensation. That’s why a weather-resistant barrier (WRB) is installed beneath siding systems. This hidden layer redirects moisture downward and outward instead of allowing it to soak into wall cavities. WRBs are designed to last 30–50 years and play a critical role in preventing rot, insulation damage, and structural swelling. By keeping exterior walls dry, WRBs extend siding lifespan and help maintain mold-free interior walls.
Yes, exposed soil releases moisture continuously. Without a barrier, that vapor migrates into the home, increasing humidity, encouraging mold growth, and causing hidden wood decay over time.
Most moisture barriers last 10–25 years, depending on thickness, material quality, and exposure. Reinforced liners and professionally installed systems often last 20–30 years or more.
A moisture barrier prevents mold by removing the moisture conditions mold needs to grow. While it does not remove existing mold, it significantly reduces the risk of future growth.
Yes, installing a moisture barrier first protects insulation, drywall, and flooring from hidden moisture and can prevent repairs that often cost thousands of dollars later.
Join our mailing list for exclusive updates, expert tips, and special offers tailored to your needs. Be the first to know about the latest in home services.

Renovize Home is a platform that supports homeowners from planning to renovation. Whether it’s Renovize AI for guidance or a one-on-one call with Pro Finder, we understand your project and match you with local contractors tailored to your needs.
Who We Are
About Renovize HomeGet in TouchHomeownwer Support:
Coming Soon!
General Inquiries:
support@renovizehome.com
Head Office:
24 Greenway Plaza, STE 1800M, Houston, TX 77046.