Explore All
BROWSE BY CATEGORY
Interior
Exterior
Home Essentials
Homeowner Tools
Blogs & Guides
Find a Pro
Book Your Appointment Now
Home Essentials
About Renovize Home
Explore All
BROWSE BY CATEGORY
Interior
Exterior
Home Essentials
Homeowner Tools
Blogs & Guides
Find a Pro
Book Your Appointment Now
Home Essentials
About Renovize Home
Last Updated 2026-02-04
Replacing old kitchen flooring is a practical upgrade that improves durability, safety, and visual appeal in one of the most used spaces in a home. Over time, worn floors develop cracks, loose tiles, moisture damage, or uneven surfaces that affect daily use. Understanding how kitchen floor replacement works helps homeowners choose the right materials, plan the process, and avoid common mistakes.
Old kitchen floors often struggle to handle daily foot traffic, spills, dropped utensils, and heavy appliances that can weigh 300–600 pounds. Replacing outdated flooring strengthens the surface, improves slip resistance, and creates a safer cooking environment. New flooring materials are designed to handle moisture, heat, and constant movement without breaking down quickly.
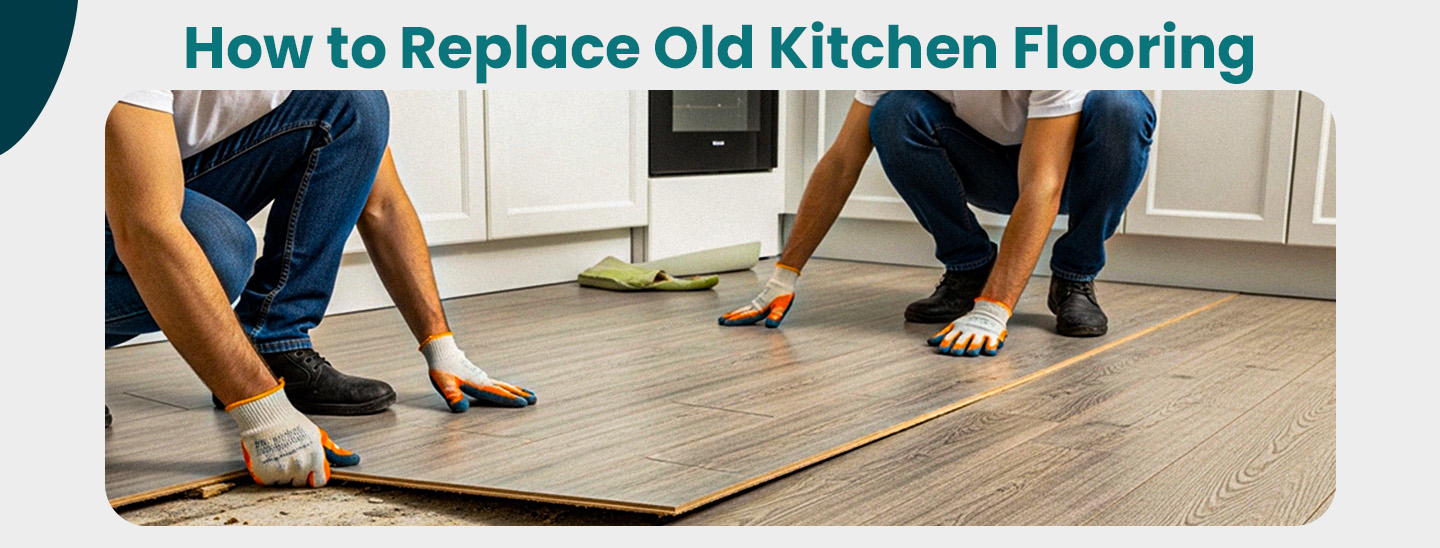
Table of Contents
Why Kitchen Floor Replacement Is Often Needed
How the Kitchen Floor Replacement Process Works
Replacing Kitchen Flooring Without Removing Cabinets
Kitchen Flooring Replacement Options
Why Replacing Your Kitchen Flooring is Important?
Final Thoughts
Kitchen floors endure more stress than most areas in the home. Daily foot traffic, water exposure, heat, and heavy appliances gradually break down flooring materials. Over time, visible and hidden damage can affect safety, hygiene, and long-term performance. Here’s why replacing your kitchen floor is crucial for maintaining a safe and functional space.
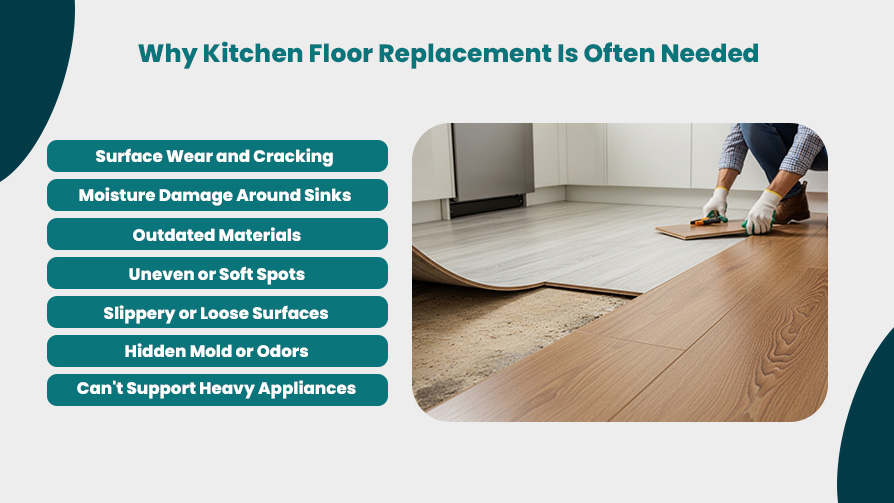
Signs such as scratches, cracked tiles, loose planks, and peeling vinyl indicate that your kitchen floor is deteriorating. These damages affect both the appearance and functionality of the floor.
Water exposure around sinks, dishwashers, and base cabinets is a major contributor to floor failure. Leaks and splashes soak into seams and edges, weakening the material below, and can lead to soft spots or subfloor rot.
Older flooring materials like linoleum or worn laminate may no longer provide the durability needed for modern kitchen use. These materials can't withstand the daily exposure to spills, heat, and moisture that kitchens face.
Soft spots or uneven sections often indicate subfloor damage beneath the surface. This can happen from long-term moisture exposure or heavy appliance weight.
Loose tiles, curled vinyl edges, or slippery worn finishes increase the risk of slips and falls, especially in a high-traffic space like the kitchen.
Kitchen appliances like refrigerators, ovens, and islands can weigh anywhere from 300 to 600 pounds. Old or weakened flooring may crack or compress under this weight, causing long-term structural issues.
Moisture trapped under old flooring can lead to mold growth, which causes persistent odors and hidden health risks. These issues are often difficult to detect until they become serious.
Replacing a kitchen floor is a meticulous process designed to ensure durability, optimal fit, and long-lasting performance. The process typically involves a series of steps from the removal of old materials to the final finishing touches, each phase focused on addressing the unique challenges of a kitchen environment. Whether you're upgrading to hardwood, tile, vinyl, or other modern flooring options, here’s what you can expect during the replacement process.
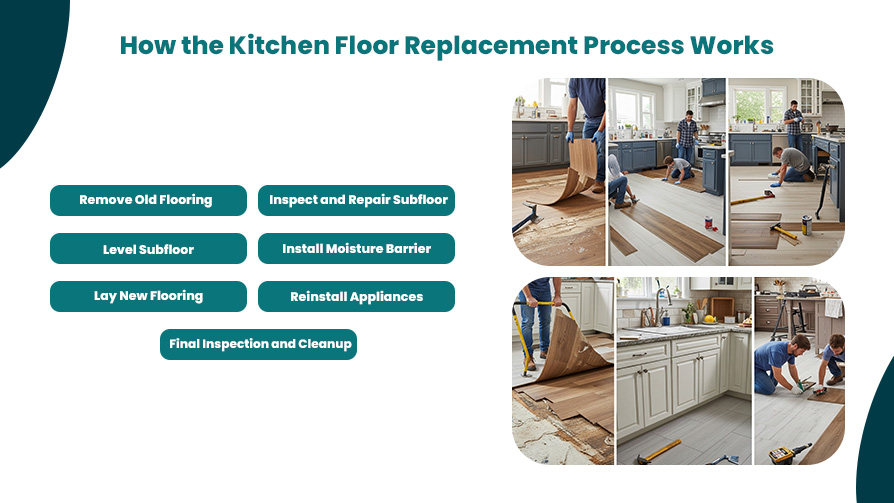
The first step in replacing a kitchen floor is the careful removal of the existing floor materials. This can include tile, vinyl, laminate, or linoleum. Special tools are used to break the adhesive bond and loosen the floor from the subfloor. This process involves removing nails, staples, and any underlayment that might be present. A professional will also take the necessary precautions to protect surrounding areas, such as walls, cabinets, and appliances, from damage during removal. It’s important that all debris and residue from the old floor are cleared away to create a clean foundation for the new installation.
Once the old flooring is removed, the subfloor, which provides the foundation for your new floor, needs to be inspected for any signs of damage. This is a crucial step since the subfloor can often suffer from issues like moisture damage, unevenness, or cracks—common in kitchens due to water spills from sinks and dishwashers. The inspector will look for signs of rot or soft spots that need immediate repair. Any damaged sections of the subfloor will be replaced or reinforced before proceeding. Proper attention at this stage prevents future problems such as sagging or uneven flooring.
A level subfloor is essential for ensuring the stability and durability of your new kitchen floor. During this stage, any uneven areas or dips in the subfloor will be addressed using leveling compounds or other appropriate underlayment materials. This ensures that the new floor has a smooth, flat surface to sit on, which helps prevent issues such as floor squeaks, cracked tiles, or shifting planks over time. Any irregularities in the subfloor are corrected to guarantee that the new flooring stays intact for many years.
In kitchens, water damage is a common concern, so an additional moisture barrier or underlayment is often installed before the new floor is laid. The underlayment acts as a protective layer between the subfloor and the new flooring, shielding it from spills, leaks, and humidity.
This step is particularly important for materials that can be damaged by moisture, such as hardwood and laminate. Furthermore, underlayment also enhances comfort underfoot, reduces noise, and can improve the overall performance of the flooring. Some underlayment's also have insulation properties, providing an additional benefit of temperature regulation in the kitchen.
Once the subfloor is prepared, it's time to install the new kitchen flooring. This step varies depending on the type of flooring chosen. For hardwood or engineered wood floors, the boards may be glued, nailed, or floated over the underlayment. For tile floors, mortar is applied to secure the tiles in place. Vinyl or laminate may be glued down or clicked into place using a floating method.
Throughout this stage, professional installers ensure proper alignment, spacing for expansion, and accurate cuts for edges or corners. Precision is key to ensuring the floor’s longevity and aesthetic appeal.
Once the new floor is installed, it’s time to carefully reinstall the appliances. This must be done with caution to avoid scratching or damaging the new surface. Transition strips are also installed where the kitchen floor meets other rooms or areas such as hallways or living rooms.
These strips not only create a smooth and seamless transition between different flooring types but also prevent any tripping hazards by providing a clean, even edge. Transition strips can also act as a decorative finishing touch that enhances the overall design of the space.
The final step in the kitchen floor replacement process is a thorough inspection to ensure everything is in order. The installer will check for any gaps, loose sections, or misalignments and address any issues immediately. This inspection ensures that the floor is both functional and visually appealing.
Once any final adjustments are made, the area is cleaned to remove any dust, debris, or adhesive residue left behind from installation. The kitchen is now ready for use, with a beautifully finished floor that will serve both aesthetic and practical purposes for years to come.
Replacing kitchen flooring without removing cabinets can be a desirable option for many homeowners. It saves time, reduces labor costs, and minimizes disruption. While it's possible in some cases, whether this is a viable solution depends on several factors, including the type of flooring, the method of installation, and the condition of the subfloor beneath the cabinets. Below, we explore when this approach works and the limitations involved.
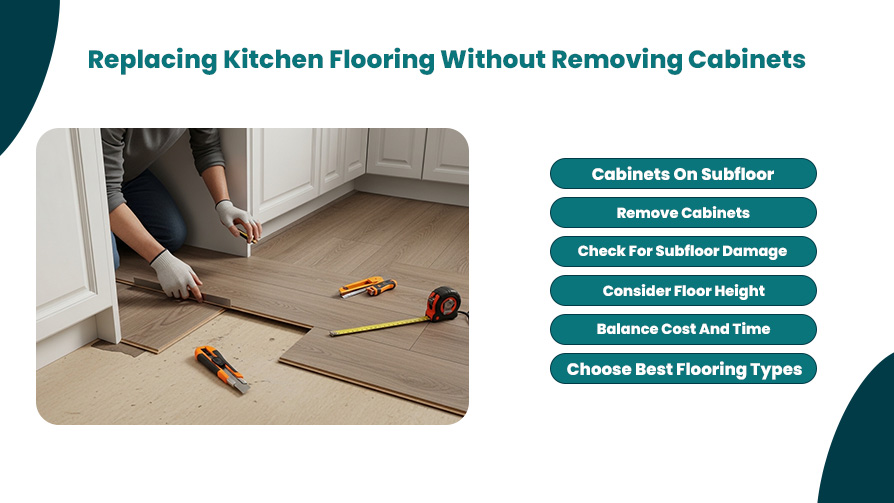
In many modern kitchens, cabinets are installed directly on the subfloor, not on top of the existing flooring. In these cases, replacing the flooring without removing cabinets is achievable. Floating floors such as luxury vinyl planks (LVP) and laminate can be cut to fit precisely around the cabinet bases, allowing the new flooring to be installed without disturbing the cabinet structures. This approach works best when there is no significant damage to the subfloor beneath the cabinets.
Certain types of flooring are more adaptable to installation around fixed cabinetry. Luxury vinyl plank (LVP), laminate, and some engineered hardwoods are particularly well-suited for this. These materials can be easily cut around obstacles, such as cabinets, and can accommodate expansion gaps, which are critical for long-term durability. The flexibility of these materials ensures that a clean installation is possible without requiring full cabinet removal.
In some situations, replacing kitchen flooring without removing cabinets is not an option. If the existing flooring runs underneath the cabinets (common in older kitchens with tile or hardwood floors), removing the cabinets may be necessary. This is especially true when there is subfloor damage—such as water damage or rot—that extends under the cabinets. In these cases, it’s crucial to address the damage beneath the cabinets to ensure the structural integrity of the floor.
Leaks from sinks, dishwashers, or plumbing fixtures can cause significant damage to the subfloor under the cabinets. If this damage is not addressed, it can lead to structural issues, such as weakened areas that might compromise the new flooring. In these instances, replacing the floor sections without removing the cabinets might leave underlying problems unresolved. To fully repair the subfloor and prevent future issues, it may be necessary to lift or temporarily remove the cabinets to access the damaged areas.
When replacing the kitchen floor, it's important to consider the new floor’s thickness. If the new flooring is thicker than the existing floor, this could affect the clearance of cabinet toe-kicks, appliances, and even cabinet doors. Adjustments may be needed to maintain proper spacing. If the new floor height interferes with the functionality of the cabinets, a partial cabinet removal or repositioning might be required to maintain the kitchen's usability.
While leaving cabinets in place can reduce both labor time and costs, this approach is not without risks. Skipping the cabinet removal process when it’s needed might lead to uneven floors, difficulties with the new flooring, or unresolved subfloor damage. A professional assessment can help determine whether it's possible to keep the cabinets in place or if removing them is the safer and more effective approach in the long run. While keeping cabinets intact reduces short-term costs, addressing underlying issues can save money on future repairs.
Choosing the right kitchen flooring material affects durability, cost, comfort, and long-term maintenance. Kitchens demand flooring that can handle moisture, spills, foot traffic, and heavy appliances without breaking down. Each material performs differently depending on how the kitchen is used.
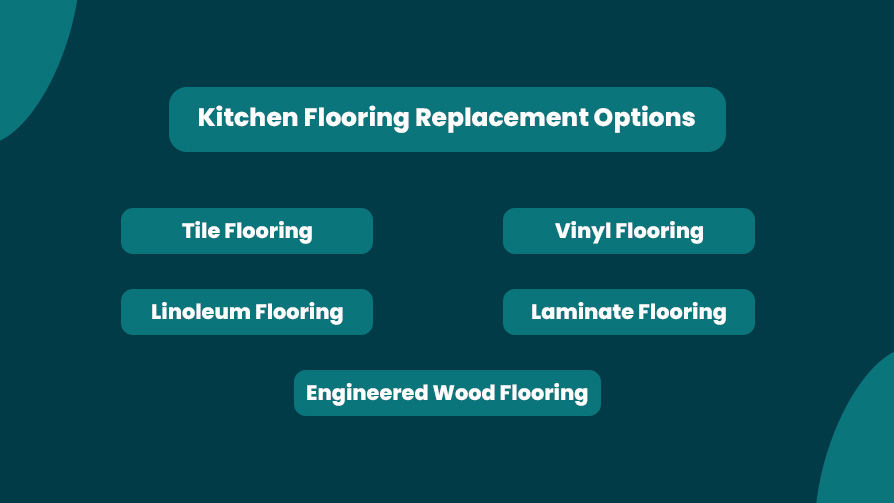
Kitchen floor tile replacement is a durable option known for strong moisture resistance and long lifespan. Tile handles spills, heat, and heavy foot traffic well, making it suitable for busy kitchens. However, tile requires a solid and level subfloor to prevent cracking over time. Proper installation is critical for long-term performance.
Vinyl and linoleum flooring are popular kitchen choices due to their water resistance and softer feel underfoot. These materials are easier to install and work well in kitchens with minor subfloor imperfections. Vinyl planks and sheets are especially effective at resisting spills and stains while keeping maintenance simple.
Laminate flooring offers a wood-like appearance at a lower cost but requires careful selection for kitchen use. Moisture-resistant laminate varieties and sealed edges are essential to prevent swelling. When installed properly, laminate can perform well in kitchens with controlled moisture exposure.
Engineered wood provides the look of real hardwood with better moisture stability than solid wood. Its layered construction helps reduce expansion and contraction caused by humidity changes. This option works best in kitchens with good ventilation and consistent temperature control.
| Flooring Type | Water Resistance | Durability | Maintenance Level |
|---|---|---|---|
| Tile | High | Very High | Low |
| Vinyl | High | High | Very Low |
| Linoleum | High | Medium | Low |
| Laminate | Moderate | Medium | Medium |
| Engineered Wood | Moderate | Medium | Medium |
Replacing your kitchen flooring is more than just an aesthetic upgrade—it's a crucial step to ensure your kitchen functions effectively and remains a safe, durable space for years to come. Over time, kitchen floors endure constant foot traffic, exposure to moisture, spills, and heavy appliances. These factors can cause wear, tear, and hidden damage, potentially compromising the floor’s safety and performance. Here's why replacing your kitchen flooring is essential for long-term functionality.
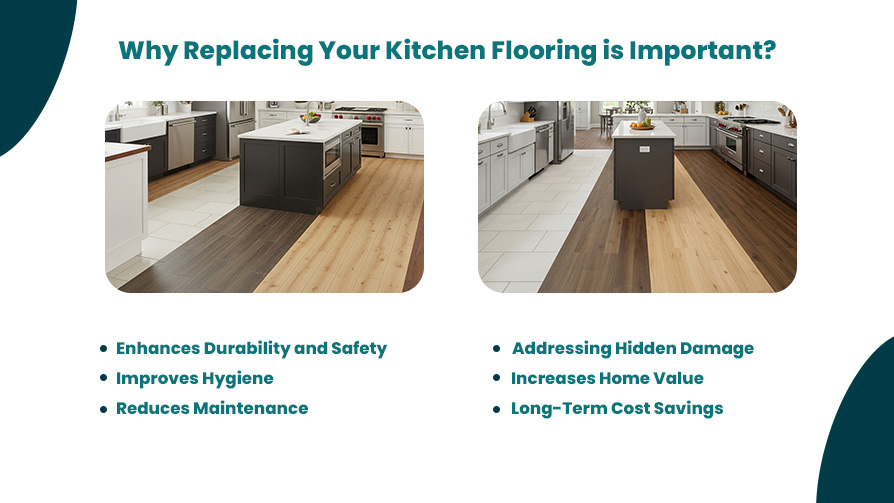
Over time, old kitchen floors can develop cracks, loose tiles, or worn-out surfaces, which may lead to slips and falls. Replacing your kitchen flooring ensures a safer environment by removing hazardous areas that could cause accidents. Durable materials like porcelain tile, vinyl, or engineered hardwood are specifically designed to withstand daily wear and tear. In fact, choosing high-quality, water-resistant flooring materials can improve the safety and longevity of your kitchen.
Worn-out flooring materials, such as old tiles or linoleum, may trap dirt, grease, and moisture, creating a breeding ground for bacteria and mold. Replacing your kitchen flooring with easy-to-clean, moisture-resistant options can make cleaning simpler and more effective. For instance, vinyl and porcelain tiles have low maintenance needs and resist dirt build-up, contributing to a healthier kitchen environment.
Moisture leaks from appliances like dishwashers, sinks, or refrigerators can cause hidden damage to your subfloor. Over time, undetected water damage can weaken the subfloor, leading to sagging or rot. Replacing old flooring gives you the chance to inspect and address any hidden damage. In fact, more than 15% of homeowners experience subfloor issues due to prolonged moisture exposure. By replacing the flooring, you can fix these problems before they escalate into costly repairs.
Kitchen renovations, including flooring replacements, are known to increase the overall value of your home. According to Remodeling Magazine’s Cost vs. Value report, a kitchen remodel—including new flooring—offers a return on investment (ROI) of approximately 60-80%. Not only does a modern, functional kitchen enhance your daily life, but it also increases your home's market appeal, especially if you choose high-quality, attractive flooring options.
While replacing kitchen flooring may seem costly upfront, the investment can save you money in the long run. New, durable flooring reduces the need for frequent repairs and maintenance. For example, replacing worn-out laminate with ceramic tile or luxury vinyl can lower the likelihood of repairs for years, saving you from repeated costs associated with patching up older floors. A well-chosen floor can last anywhere from 15 to 50 years depending on the material.
The kitchen is a high-traffic area that constantly deals with moisture and spills. It's crucial to select flooring that can handle these specific conditions. Water-resistant and durable materials such as ceramic tile, luxury vinyl, and engineered hardwood are ideal for kitchens. A good choice will not only improve the aesthetics but will also withstand the demands of daily use, from spills to heavy foot traffic.
Replacing old kitchen flooring is a practical decision that improves safety, durability, and everyday usability in one of the most active areas of the home. Worn or damaged floors often hide moisture issues, subfloor problems, and safety risks that become more expensive over time. Addressing these concerns early helps protect the structure of the kitchen and keeps maintenance manageable.
With the right materials and proper installation, new kitchen flooring can handle daily foot traffic, spills, and heavy appliances without breaking down. Understanding the replacement process, costs, and limitations allows homeowners to make informed choices and avoid common mistakes. A well-planned kitchen floor replacement creates a stable, clean, and functional foundation that supports the kitchen for years to come.
In some cases, installing new flooring over old flooring is possible, especially with materials like vinyl planks, laminate, and floating floors. However, this is not recommended if the old floor is damaged or uneven, as it may affect the installation quality and long-term performance of the new floor. Tile and hardwood floors usually require the old flooring to be removed to prevent complications like uneven surfaces or poor adhesion.
Yes, in certain situations, it’s possible to replace kitchen flooring without removing the cabinets. This works if the existing cabinets are installed directly on the subfloor (not over the flooring) and the flooring material is flexible enough to be cut around the cabinets, such as luxury vinyl planks (LVP) or laminate. However, if the original flooring runs under the cabinets or the subfloor is damaged, removal may be necessary for a proper installation.
If your kitchen floor feels cold, especially in winter, consider installing an underfloor heating system. Radiant floor heating can be added beneath tile, vinyl, and some engineered wood floors. This option provides consistent warmth and can enhance comfort while also being energy-efficient. If you’re replacing your floor, now may be the perfect time to incorporate this feature for better warmth in the kitchen.
When choosing new flooring for your kitchen, it's essential to consider both functionality and aesthetic appeal. For a rustic or farmhouse-style kitchen, wood-look tile or engineered hardwood may be ideal. If you want a modern, sleek look, concrete, porcelain tile, or polished marble could be the perfect fit. Additionally, consider color schemes that complement your cabinets, countertops, and backsplash. Always balance the material’s practicality (water resistance, durability) with its style.
If you have pets, it’s important to choose scratch-resistant, durable flooring. Tile, vinyl, and engineered hardwood are all good options for kitchens with pets. These materials are easy to clean and resist damage from pet claws. Avoid flooring types that can trap pet hair, like deep-textured carpets, and choose smoother surfaces for easier maintenance. Additionally, look for flooring that is moisture-resistant to handle pet accidents.
Join our mailing list for exclusive updates, expert tips, and special offers tailored to your needs. Be the first to know about the latest in home services.

Renovize Home is a platform that supports homeowners from planning to renovation. Whether it’s Renovize AI for guidance or a one-on-one call with Pro Finder, we understand your project and match you with local contractors tailored to your needs.
Who We Are
About Renovize HomeGet in TouchHomeownwer Support:
Coming Soon!
General Inquiries:
support@renovizehome.com
Head Office:
24 Greenway Plaza, STE 1800M, Houston, TX 77046.