Explore All
BROWSE BY CATEGORY
Interior
Exterior
Home Essentials
Homeowner Tools
Blogs & Guides
Find a Pro
Book Your Appointment Now
Home Essentials
About Renovize Home
Explore All
BROWSE BY CATEGORY
Interior
Exterior
Home Essentials
Homeowner Tools
Blogs & Guides
Find a Pro
Book Your Appointment Now
Home Essentials
About Renovize Home
Last Updated 2026-02-13
Installing a kitchen island adds valuable workspace, storage, and functionality to the kitchen, but it requires careful planning to ensure proper clearance, structural stability, and safe utility connections. A kitchen island that is installed correctly improves workflow and enhances daily use without disrupting movement or appliance access. Understanding how to install a kitchen island also helps homeowners avoid layout mistakes, electrical issues, and unexpected installation costs during the process.
Table of Contents
What Is a Kitchen Island?
Types of Kitchen Islands
Complete Process of Installing a Kitchen Island
Final Note on Installation Durability
Average Cost to Install a Kitchen Island
Common Problems Kitchen Island Installation Prevents
Final Thoughts
A kitchen island is a freestanding cabinet structure placed in the center of a kitchen to provide additional workspace, storage, and functionality. Unlike wall cabinets or countertops that are attached to the perimeter, a kitchen island is accessible from all sides and serves as a central working and gathering area within the kitchen layout.
It is designed to improve workflow by adding extra surface area for food preparation, cooking support, serving, or seating. In modern kitchens, the island often becomes the most used feature in the entire space.
Kitchen islands are not all built the same. The type of island you choose depends on kitchen size, layout, budget, and how you plan to use the space. Some islands are simple storage additions, while others become fully integrated cooking and prep stations.

A freestanding kitchen island is a movable or lightly anchored unit that is not permanently fixed to the floor. It is ideal for small kitchens, rental properties, or spaces where flexibility is important.
These islands typically include basic storage and a countertop surface. Some models come with wheels, allowing them to be repositioned when needed.
A built-in kitchen island is permanently anchored to the floor and designed as part of the kitchen layout. It often matches the surrounding cabinetry and includes finished panels on all visible sides.
These islands provide stronger structural support and allow for plumbing, electrical outlets, or appliance installation.
This type of island includes an extended countertop overhang to accommodate bar stools or chairs. It serves both as a prep station and a casual dining area.
The seating area usually requires a 12–15 inch overhang and approximately 24 inches of width per person for comfort.
A kitchen island with a sink becomes a functional work station. It may serve as the primary sink location or as a secondary prep sink.
Installing a sink requires plumbing extensions, proper drainage, and ventilation planning. Because of this, installation costs increase compared to a basic island.
An island cooktop integrates cooking directly into the center of the kitchen. This setup requires electrical or gas connections and proper ventilation through a ceiling hood or downdraft system. While visually impressive, it requires careful planning to maintain safety and proper clearance.
A double island layout features two separate islands within the same kitchen. This design is typically found in luxury or oversized kitchens. One island may focus on prep and cooking, while the second provides seating and serving space.
A peninsula is technically not a freestanding island, but it functions similarly. It extends from existing cabinetry and remains connected to a wall or cabinet run. Peninsulas work well in smaller kitchens where a full island would restrict movement.
Installing a kitchen island requires careful measurement, structural support, leveling, and proper anchoring. Whether it’s a basic storage island or a built-in island with seating, plumbing, or electrical features, each step directly affects stability, safety, and long-term durability.
Following the full installation process ensures the island does not shift, crack flooring, interfere with workflow, or create structural stress over time.
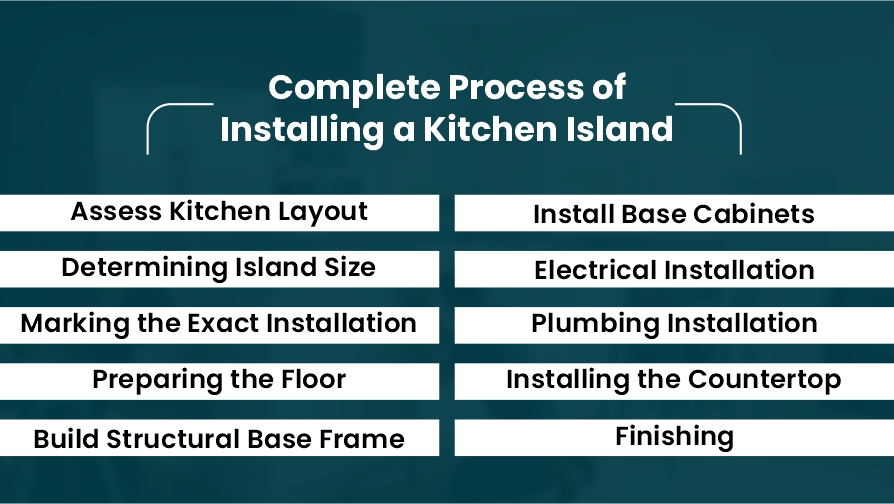
Before installing a kitchen island, evaluate the available space. An island should improve workflow, not block it. Proper clearance is essential for safety and comfort. Measure the kitchen carefully and confirm:
Mark the proposed island footprint on the floor using painter’s tape. This visual check prevents spacing mistakes before installation begins.
The size and internal structure of the island depend on how it will be used. A prep-only island is simpler than one with a sink or cooktop.
Once measurements are confirmed, mark the exact location permanently. Straight alignment is critical, especially if the island is centered between existing cabinets.
Use chalk lines to mark the base perimeter. Recheck clearances and confirm that the island aligns visually with upper cabinets, lighting fixtures, or flooring patterns. Even slight misalignment becomes noticeable after installation.
At this stage, inspect the flooring condition and confirm that the subfloor beneath is stable and level.
For permanent built-in islands, anchoring directly to the subfloor provides the most stability. In many cases, flooring inside the island footprint is removed.
Carefully cut along the marked lines and remove tile, laminate, or hardwood. Expose the subfloor and clear away all debris. Installing weak flooring can cause long-term shifting.
Freestanding islands may not require this step, but built-in islands benefit greatly from direct subfloor anchoring.
A base frame supports the cabinet structure and prevents movement. This frame is typically constructed from 2x4 lumber and secured to the subfloor.
The frame should be slightly smaller than the cabinet base so it remains hidden. Position the frame within the marked outline and level it carefully in both directions. Secure it using long wood screws, anchoring into floor joists when possible. Taking time to ensure the frame is perfectly level prevents uneven countertops and misaligned drawers later.
With the base frame secured, cabinets can be placed on top. Position the first cabinet carefully and check the level from front to back and side to side. Even small variations should be corrected using shims before fastening.
Once the first cabinet is secure, additional cabinets can be aligned and clamped together. Fasten them through the side panels and recheck level before tightening fully. Stability at this stage determines how solid the finished island will feel. A properly installed cabinet base should not shift or wobble when pressure is applied.
If the island includes outlets, electrical wiring must be installed before the cabinets are fully sealed. Most kitchen islands require at least one outlet for safety and code compliance.
Wiring typically runs beneath the floor and enters through the cabinet base. A GFCI outlet is commonly required in kitchen environments due to moisture exposure.
Electrical work should comply with local building regulations. If you are not experienced with wiring, professional installation ensures both safety and proper inspection approval.
If the island includes a sink, plumbing must be extended from existing supply lines. The process involves:
The countertop completes the structural installation. Before applying adhesive, place the countertop dry to confirm proper alignment and overhang measurements.
Once positioning is confirmed, apply construction adhesive along the cabinet top edges. Lower the countertop carefully into place and check alignment again. For wooden countertops, screws may be used from beneath the cabinet frame. For stone surfaces, professional installers are typically required due to weight and precision cutting.
After the countertop is secured, install decorative panels, toe kicks, and hardware. Inspect all joints and edges to ensure clean lines and proper sealing.
Allow adhesives and sealants to cure fully before heavy use. Perform a complete stability check by applying light pressure in different directions. The island should feel solid and completely stable. Final inspection should confirm:
A properly installed kitchen island should feel solid, stable, and balanced. Movement, misalignment, or poor anchoring often leads to long-term structural issues.
When installation includes plumbing, electrical, or heavy stone countertops, professional assistance ensures safety and compliance.
Following this complete process step by step ensures your kitchen island remains secure, functional, and visually integrated for years.
The total cost depends heavily on complexity. A basic island costs significantly less than one requiring plumbing relocation or structural modifications.
| Type of Island | Estimated Cost Range |
|---|---|
| Small freestanding island | $800 – $2,000 |
| Basic built-in island | $1,500 – $4,000 |
| Island with seating extension | $2,500 – $6,000 |
| Island with sink | $3,500 – $8,000 |
| Island with cooktop | $4,000 – $10,000 |
| Custom luxury island | $8,000 – $20,000+ |
A properly installed kitchen island is more than a design upgrade. When measured, leveled, and anchored correctly, it prevents structural, functional, and long-term maintenance issues. Many kitchens without a well-planned island struggle with poor workflow, limited storage, and inefficient space usage.
In kitchens without enough counter space, homeowners often move back and forth between prep areas, the sink, and the stove. This constant movement reduces efficiency and increases fatigue during cooking.
A properly positioned island improves workflow by supporting the kitchen work triangle. It provides a central prep area that reduces unnecessary walking and keeps frequently used zones within reach.
Many kitchens lack sufficient countertop surface for meal preparation, especially during gatherings or large family meals. This leads to cluttered workspaces and inefficient cooking.
An island adds dedicated prep space that helps distribute tasks. It reduces reliance on perimeter counters and keeps the kitchen more organized.
Without additional cabinet space, kitchen essentials often end up stored in inconvenient locations. Overcrowded drawers and cabinets reduce efficiency and increase clutter.
A kitchen island typically includes base cabinets and drawers that expand storage capacity. This prevents:
In open-concept kitchens, undefined space can cause traffic congestion, especially during gatherings. Without a central anchor point, movement patterns become chaotic.
A kitchen island creates a structured flow within the space. It separates cooking zones from dining or living areas while maintaining openness. When installed with correct clearance, it guides movement naturally instead of obstructing it.
Poorly installed islands can shift over time, especially if not secured directly to the subfloor. Movement may lead to countertop cracks, cabinet misalignment, and uneven surfaces. Proper installation prevents:
Modern kitchens require accessible power outlets for appliances such as mixers, blenders, and chargers. Without proper planning, extension cords may be used, creating clutter and safety hazards.
A professionally installed island includes code-compliant electrical outlets. This prevents unsafe wiring setups and improves convenience.
In kitchens without an island, lighting may focus only on perimeter walls. This can leave central work areas dim and less functional.
Installing an island allows for better lighting placement, including pendant fixtures directly above the prep area. This improves visibility and reduces shadows during food preparation.
In homes without a kitchen island, families often rely solely on dining tables. This can limit casual seating and reduce social interaction during cooking.
An island with proper overhang creates a functional seating area. It prevents overcrowding in adjacent rooms and encourages interaction between cooking and gathering areas.
Outdated kitchens without central workspaces may feel incomplete in modern home designs. Buyers often expect islands in medium to large kitchens.
A properly installed island prevents the kitchen from feeling undersized or outdated. It enhances visual balance and adds resale appeal.
Installing a kitchen island can significantly improve how a kitchen functions, offering added workspace, storage, and flexibility when planned and installed correctly. From proper spacing and secure anchoring to electrical planning and countertop support, each step plays a role in long-term safety and usability.
While simple island setups may seem manageable, many installations involve structural and electrical considerations that require precision. With thoughtful planning and correct installation, a kitchen island becomes a durable, well-balanced feature that enhances daily use without compromising movement or layout efficiency.
Yes, but you must carefully plan spacing and dimensions first. In kitchens with limited width, narrow or mobile islands (or even a peninsula) work better than a full-size fixed island. Some homeowners use islands as narrow as ~18–24 inches deep if clearances allow usable walkways. Always mark the footprint with tape before committing.
If you attach a built-in island to the subfloor or cut into flooring, damage can occur without proper preparation. Removable islands or ones on wheels generally won’t harm floors, but heavier built-ins require leveling, reinforcement, and, sometimes, floor repair after installation.
Choose a shape based on kitchen layout and function. Rectangular islands are most common, L-shaped or T-shaped ones work well in large open kitchens, and round islands improve traffic flow in tighter spaces. The ideal shape is one that maintains circulation and meets your cooking and seating goals.
There’s no hard rule, but many designers suggest having enough space so that an island doesn’t block movement or appliance access. Some recommend ensuring the island doesn’t take up more than ~10% of total floor area and at least ~36–42 inches of clearance on all sides.
Pendant lights are the most popular choice over islands, ideally hung 30–36 inches above the countertop for task lighting and ambiance. Under-cabinet lighting or recessed fixtures can provide additional functional light.
Join our mailing list for exclusive updates, expert tips, and special offers tailored to your needs. Be the first to know about the latest in home services.

Renovize Home is a platform that supports homeowners from planning to renovation. Whether it’s Renovize AI for guidance or a one-on-one call with Pro Finder, we understand your project and match you with local contractors tailored to your needs.
Who We Are
About Renovize HomeGet in TouchHomeownwer Support:
Coming Soon!
General Inquiries:
support@renovizehome.com
Head Office:
24 Greenway Plaza, STE 1800M, Houston, TX 77046.