Explore All
BROWSE BY CATEGORY
Interior
Exterior
Home Essentials
Homeowner Tools
Blogs & Guides
Find a Pro
Book Your Appointment Now
Home Essentials
About Renovize Home
Explore All
BROWSE BY CATEGORY
Interior
Exterior
Home Essentials
Homeowner Tools
Blogs & Guides
Find a Pro
Book Your Appointment Now
Home Essentials
About Renovize Home
Last Updated 2026-02-18
Replacing or installing kitchen countertops is one of the most impactful updates in a kitchen renovation. The right countertop material can dramatically change the look and feel of your kitchen, while correct installation ensures lasting durability and functionality. Whether you're installing countertops as part of a full kitchen remodel or upgrading your current surfaces, understanding the installation process and choosing the right material for your needs is essential. In this guide, you'll learn how to install kitchen countertops step-by-step and explore various countertop options that suit different kitchen styles and practical uses.

Table of Contents
1. Confirm Base Cabinets Are Level and Secure
2. Measure the Countertop Area Precisely
3. Choosing the Best Kitchen Countertop Material
4. Dry Fit the Countertop
5. Secure the Countertop
6. Securing Stone Countertops
7. Join Seams Properly
Install Sink and Cooktop Cutouts
9. Seal and Finish the Edges
Install Backsplash (If Required)
Types of Kitchen Countertops
Cost Factors for Installing Kitchen Countertops
Final Thoughts
Before installing any countertop, verify that the base cabinets are structurally sound and perfectly level. Countertops do not have independent structural support, they rely entirely on the cabinet framework beneath them. If cabinets are unstable or uneven, even the strongest countertop material will eventually fail.
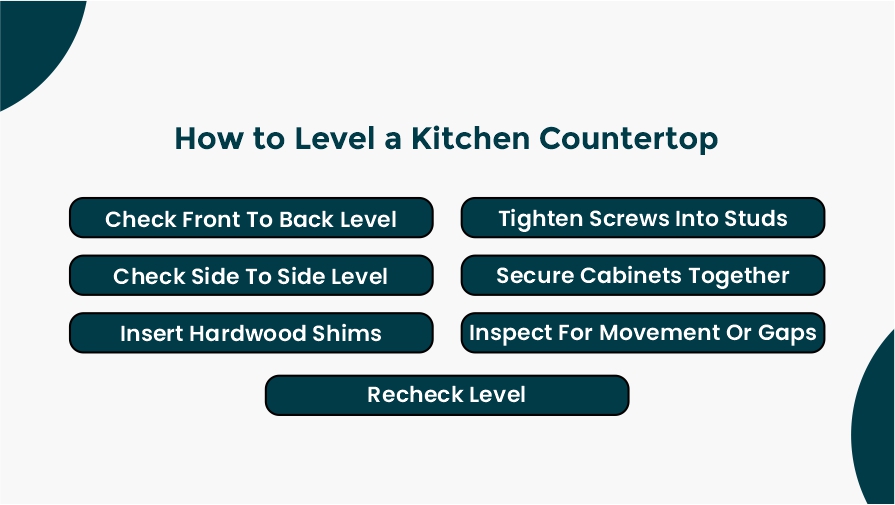
Begin by placing a 4-foot level across the tops of the base cabinets. Check alignment carefully in multiple directions to ensure complete surface consistency.
Do not assume cabinets are level simply because they were recently installed. Floors often slope slightly, especially in older homes. Even a variation of 1/8 inch across several feet can create installation problems later.
If cabinets are uneven, adjustments must be made before countertop installation begins. Countertops cannot compensate for poor base alignment.
To correct uneven cabinets:
It is especially important to identify the highest floor point and level all cabinets upward from that reference. Leveling downward can create unsupported gaps.
Proper leveling is not just about appearance, it directly affects structural performance. Stone materials such as quartz, granite, and marble are rigid and cannot flex under uneven pressure.
If cabinets are not fully level:
Leveling alone is not enough. Cabinets must also be rigid and securely fastened before supporting countertop weight.
Inspect cabinet tops and frames for:
Apply light pressure across different cabinet sections. Cabinets should feel solid with no rocking or movement. If any shifting is detected, reinforce mounting points before proceeding.
Measurement errors are one of the most expensive mistakes in countertop installation. Once materials such as granite or quartz are cut, they cannot be resized or adjusted. Precision during measurement directly determines fabrication accuracy and final fit.
Never assume two cabinet runs are identical, even if the layout appears symmetrical. Each section must be measured independently.
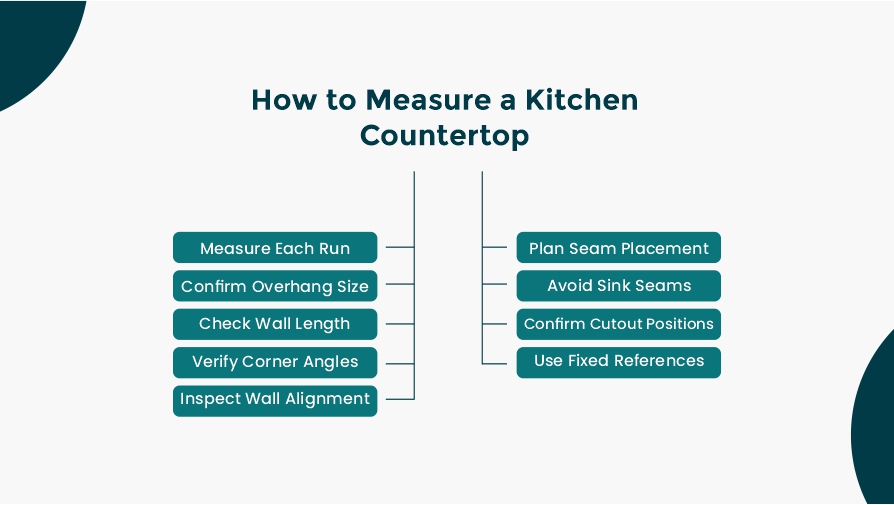
Start by measuring the full wall-to-wall length of each cabinet run. Record every dimension separately to avoid assumption-based errors.
Measure:
Always double-check measurements before recording final numbers. Even a small miscalculation can lead to fabrication waste.
Corners are rarely a perfect 90 degrees, especially in older homes. Use an angle finder to determine the exact corner measurement.
If stone is fabricated assuming a true 90-degree angle but the actual wall measures 92 degrees, visible gaps will appear during installation. Correct angle measurement prevents costly rework.
Also check walls for bows or waves by placing a long straight edge against the surface. Identify any gaps that may affect countertop fit.
For L-shaped or U-shaped kitchens, seam placement must be carefully planned before fabrication. Poor seam positioning can affect appearance and structural strength.
Confirm:
Seams near sinks or cooktops weaken structural integrity and increase risk of cracking over time.
Accurate placement of sink and cooktop cutouts is critical. Measure from fixed reference points such as cabinet edges rather than relying on visual centering.
Incorrect cutout positioning cannot be corrected after fabrication. Always confirm appliance specifications before finalizing measurements.
Never reuse measurements from previous countertops. Cabinets may have shifted slightly during removal or reinstallation, and even minor movement affects fit.
Professional installers often create a physical template using thin wood strips or use digital laser measurement tools to eliminate guesswork. Templating ensures precision and reduces fabrication risk.
Material selection affects installation method, structural support, and long-term durability. Each countertop material behaves differently under load, moisture exposure, and temperature changes. Understanding how the material performs during installation prevents structural failure and unnecessary repair.
Laminate countertops are lightweight and built around a compressed core. Because the core is vulnerable to moisture and compression damage, installation must focus on pressure control and seam protection. Excess force during fastening can crush the substrate, and improper seam treatment can lead to swelling over time. Laminate is forgiving to cut but unforgiving to water exposure.
| Tool | Purpose |
|---|---|
| Circular saw with fine blade | Clean edge trimming |
| Jigsaw | Interior cutouts |
| Drill & driver | Underside fastening |
| Seam roller | Bonding pressure at joints |
| Clamps | Stabilizing sections during joining |
| Laminate seam compound | Moisture barrier at joints |
Butcher block is solid wood and reacts to environmental humidity. During installation, allowance must be made for natural expansion and contraction. Restricting movement can cause splitting or warping. The fastening method must stabilize the surface while still permitting seasonal adjustment. Immediate surface protection is critical after placement.
| Tool | Purpose |
|---|---|
| Track saw or circular saw | Straight material cutting |
| Router | Edge profiling |
| Drill with pilot bit | Controlled fastening |
| Orbital sander | Surface preparation |
| Bar clamps | Position stabilization |
| Application pads or brushes | Sealant application |
Quartz and granite are rigid and extremely heavy materials that demand precise structural support. These slabs cannot compensate for uneven cabinets and will transfer stress directly to weak points. Installation relies more on precision alignment and proper slab handling than on mechanical fastening. Because of their weight and fragility during placement, professional handling is strongly recommended.
| Tool | Purpose |
|---|---|
| Suction cup lifters | Safe slab positioning |
| Seam alignment clamps | Tight joint compression |
| 6-foot level | Surface verification |
| Non-staining silicone | Stabilization dabs |
| Razor blade scraper | Adhesive cleanup |
| Diamond polishing pads | Seam finishing |
Marble is softer and more porous than other stone surfaces. It is sensitive to impact and chemical exposure. During installation, careful handling is essential to prevent edge damage. Because marble absorbs liquids more easily, sealing plays a critical role in long-term performance. Seam alignment must be handled delicately to avoid surface chipping.
| Tool | Purpose |
|---|---|
| Vacuum lifters | Controlled handling |
| Seam clamps | Even slab compression |
| Polishing compounds | Surface refinement |
| Penetrating sealer applicator | Surface protection |
| Microfiber cloths | Final buffing |
Dry fitting is a non-negotiable step in countertop installation. It ensures that every section aligns correctly before permanent attachment. Once adhesive is applied or stone is secured, adjustments become extremely difficult or impossible.
Place each countertop section carefully onto the cabinets without using adhesive. This allows you to inspect alignment and surface contact before final installation.

Begin by checking how the countertop sits across the cabinet run. Alignment should be consistent from one end to the other.
Carefully inspect:
The overhang should remain uniform along the cabinet faces. Inconsistent spacing may indicate cabinet misalignment or incorrect measurements.
Before final installation, confirm that sink and cooktop cutouts are positioned correctly. Improper placement cannot be corrected once the countertop is secured.
Check:
Ensure appliances fit within manufacturer-recommended tolerances and that structural support around cutouts remains intact.
During dry fitting, carefully examine the slab for stability and proper contact with cabinet tops. Look for:
If the countertop rocks or shifts, the underlying cabinets may require additional leveling or shimming before proceeding.
If gaps appear between the countertop and wall, scribing may be required. Scribing involves trimming the back edge of the countertop to match the wall’s contour, ensuring a tight, seamless fit.
For laminate or wood surfaces, scribing can often be done on-site. However, for stone materials, adjustments must be completed during fabrication rather than at the job site. Failing to address wall irregularities at this stage can result in visible gaps or uneven seams.
The method of securing a countertop depends on the material type. Each material reacts differently to pressure, movement, and environmental changes. Using the wrong fastening technique can cause cracking, splitting, or long-term structural failure.
Proper attachment ensures the countertop remains stable without restricting necessary material movement.
For laminate or butcher block countertops, apply construction adhesive or silicone to the tops of the cabinets before placing the countertop.
Adhesive should be applied carefully using small, spaced beads rather than full surface coverage. Excess adhesive can create uneven support and make future removal difficult.
Follow these guidelines:
Once adhesive is applied, lower the countertop into place slowly and evenly. Avoid sliding the surface excessively, as this can disturb adhesive distribution or damage edges.
Ensure proper alignment with cabinet fronts and confirm overhang remains consistent before proceeding with fastening. Correct positioning at this stage prevents stress on seams and edges.
After positioning, secure the countertop from underneath using screws through corner brackets, support braces, or mounting strips
Follow these important steps:
Overtightening can crack laminate cores or split solid wood surfaces. Fasteners should hold the countertop firmly without restricting natural movement.
Wood-based countertops expand and contract with humidity changes. Securing them too rigidly can cause warping or cracking over time.
Ensure that fastening methods allow slight flexibility where required. Stone countertops, on the other hand, rely more on adhesive bonding and cabinet support rather than mechanical fastening. Understanding how each material behaves ensures long-term durability.
Stone countertops require a different securing method compared to laminate or wood surfaces. Because stone slabs are extremely heavy, their own weight provides the primary structural stability. Adhesive is used only to prevent shifting, not to permanently bond the slab to the cabinets.
Improper adhesive selection or excessive bonding can create stress points and restrict natural material movement.
Apply small dabs of high-quality silicone at strategic points along the cabinet tops. These dabs act as stabilizers rather than full adhesive coverage.
Avoid spreading adhesive across the entire cabinet surface. Stone countertops must rest evenly on the cabinet structure without trapped pressure beneath them.
Never use rigid construction adhesives that fully bond the slab to the base. Rigid adhesives can create tension during seasonal expansion and contraction.
When placing the slab, lower it slowly and evenly onto the cabinet tops. Sudden movement or uneven placement can create internal stress or edge damage.
Ensure the slab makes full, even contact across all cabinet support areas. Any unsupported sections can lead to cracking over time.
Once the slab is positioned, perform a final inspection before the silicone begins to cure.
Confirm:
Even small misalignments should be corrected immediately, as adjustments become more difficult once the adhesive sets.
Stone must sit flat with full support across the cabinet tops. There should be no rocking, twisting, or visible gaps beneath the slab.
If uneven cabinet tops create unsupported areas, additional leveling or shimming must be completed before final placement. Stone surfaces cannot flex to compensate for improper support.
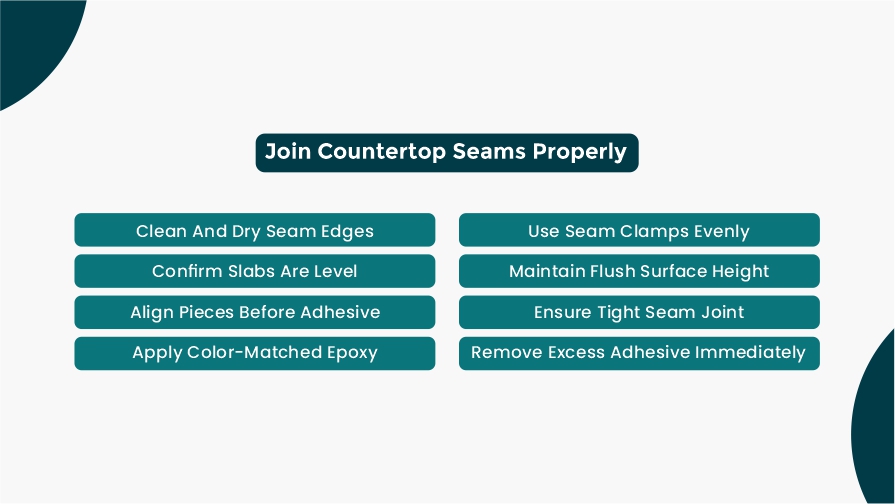
Seams are among the most critical structural points in countertop installation. When executed correctly, seams should be tight, level, and nearly invisible. Poor seam alignment can weaken the countertop system and create long-term structural issues. Precision and patience are essential during this stage.
Before applying adhesive, thoroughly clean the seam edges. Dust, debris, or residue can prevent proper bonding and weaken the joint.
Ensure:
Even slight misalignment at this stage will become highly visible after the adhesive sets.
Apply color-matched seam adhesive, typically an epoxy formulated for stone surfaces. The adhesive should be applied evenly along the seam edge without excess buildup.
Use professional seam clamps to draw the slabs together evenly. Clamps help maintain consistent pressure and ensure both pieces remain flush during curing. Careful alignment during clamping prevents visible gaps and uneven surfaces.
As the slabs are drawn together, closely monitor vertical alignment. There should be no height difference between adjoining surfaces.
Important considerations include:
Excess adhesive left on the surface can stain stone or require difficult scraping later.
Improper seam installation can compromise both appearance and structural strength. Seams that are uneven or poorly bonded often lead to:
Because seams concentrate stress along a narrow area, precision leveling is essential to prevent future failure.
Sink and cooktop cutouts are among the weakest structural points in any countertop system. Removing material reduces load-bearing capacity, especially in stone surfaces where rigidity is high. Proper installation and sealing are critical to prevent cracking, water intrusion, and long-term cabinet damage. Careful handling during this stage directly impacts durability.
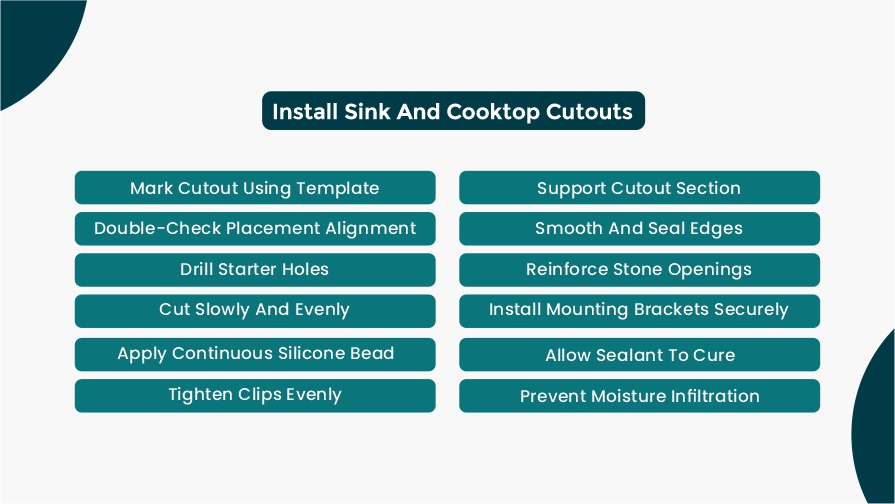
For laminate or butcher block countertops, cutouts are typically completed on-site. Accuracy during marking and cutting determines final fit and edge durability.
Begin by marking the cutout area using the manufacturer’s template. Double-check positioning relative to cabinet edges before cutting.
To complete the cutout:
For quartz, granite, or marble countertops, cutouts are completed during fabrication using specialized tools. On-site cutting is not recommended due to the risk of cracking.
Because stone is rigid, cutout areas must be reinforced to maintain structural integrity. Undermount sinks require proper mounting brackets and support systems to prevent stress around the opening.
Stone edges around cutouts are especially vulnerable to impact damage, so careful positioning is essential.
Apply a continuous bead of silicone around the sink perimeter before lowering it into position. The seal must be unbroken to prevent moisture infiltration.
Lower the sink carefully and secure mounting clips evenly. Uneven tightening can create pressure imbalance around the cutout.
Allow silicone to cure fully before connecting plumbing. Rushing this stage can compromise the seal.
Improper sealing around sink edges is one of the most common causes of cabinet deterioration. Water infiltration can lead to:
Sealing and edge finishing are essential final steps in countertop installation. Proper sealing protects the material from moisture intrusion, staining, and long-term deterioration. Edge finishing affects not only durability but also the visual quality of the entire installation. Sealing requirements vary depending on the countertop material.
Laminate surfaces are vulnerable to moisture damage at seams and exposed edges. If water penetrates the core material, swelling and delamination can occur.
All seams must be sealed thoroughly using approved seam sealer or silicone. Pay special attention to sink cutout edges and backsplash joints, as these areas are most exposed to moisture. Proper seam sealing significantly extends the lifespan of laminate countertops.
Butcher block countertops require surface protection immediately after installation. Because wood is porous, it absorbs moisture quickly if left unsealed.
Common sealing options include:
Mineral oil requires periodic reapplication, while polyurethane creates a harder protective coating. The choice depends on maintenance preference and intended use.
Granite and marble are natural stone materials and require penetrating sealers to reduce porosity and prevent staining.
Apply the sealer evenly across the surface and allow it to absorb according to manufacturer instructions. Buff off any excess residue after the recommended dwell time. Proper sealing reduces staining from spills and helps maintain long-term surface integrity.
Quartz countertops are engineered and non-porous. They do not require sealing after installation.
However, it is still important to inspect seams and edges to ensure proper finishing and adhesive cleanup.
After sealing, inspect all countertop edges for quality and consistency. Edge finishing directly affects both durability and visual appeal.
Look for:
Address minor imperfections immediately, as exposed edges are more vulnerable to long-term wear.
A backsplash is not just decorative — it serves as a protective barrier against moisture and splashes. Proper installation prevents water from seeping behind cabinets and damaging walls or cabinet frames.
Backsplash installation methods vary depending on whether you are installing a standard strip backsplash or a full-height slab.
If installing a separate backsplash strip, ensure the wall surface is clean, dry, and free from dust before beginning.
Apply adhesive evenly along the back of the backsplash panel. Press it firmly against the wall while ensuring it sits flush with the countertop surface.
During installation:
Once secured, seal the bottom joint between the countertop and backsplash with a continuous bead of silicone. This seal prevents moisture from entering the gap.
The most important function of a backsplash is moisture protection. All horizontal and vertical joints should be sealed using high-quality silicone.
Improper sealing can allow water to seep behind cabinets, leading to swelling, mold growth, and long-term structural damage.
When installing kitchen countertops, the material you choose plays a vital role in both the aesthetics and functionality of your kitchen. Different materials offer varying degrees of durability, maintenance needs, and style options. Here’s a breakdown of some of the most popular materials and their unique advantages.
Quartz countertops are manufactured surfaces created by combining crushed natural quartz with binding resins. This engineered composition produces a dense, non-porous material that resists staining, moisture absorption, and bacterial growth, making it a highly durable option for kitchen environments.
This makes quartz a highly durable and low-maintenance choice for kitchens. Available in a wide range of colors and patterns, quartz also provides a sleek, modern look. It doesn’t require sealing like granite or marble, which saves time and effort.
Granite is a natural stone known for its durability and timeless elegance. It is one of the most popular choices for high-end kitchens due to its ability to withstand heat, scratches, and impact. Although granite requires sealing to prevent stains, it provides a unique, natural appearance due to its varied patterns.
Laminate countertops are an affordable and versatile option, made from a composite material covered with a plastic laminate surface. While not as durable as stone options, laminate is highly cost-effective and comes in a wide variety of colors and patterns. It’s a great choice for those on a budget or those looking to update their kitchen without breaking the bank.
Marble offers a luxurious and classic appearance with unique veining. While it is prone to scratching and staining due to its porous nature, marble countertops are often chosen for their elegance and timeless beauty. Marble’s cool surface makes it ideal for pastry preparation or baking.
Concrete countertops are custom-made and offer a unique, industrial style. They can be cast to fit any shape or size, providing flexibility for custom designs. Concrete is durable and can be treated with sealants to resist stains and scratches. It’s ideal for those looking for a more modern or industrial look.
The cost to install kitchen countertops can vary greatly depending on several factors, including material choice, kitchen size, and installation complexity. Each of these aspects contributes to the overall expense, and understanding them will help you plan for the project while staying within budget.
The material you choose will be the most significant factor in determining the cost of your new kitchen countertops. For example:
Choosing more durable, premium materials like quartz or granite will cost more upfront but can save money in the long run due to their low maintenance needs.
Installing new kitchen countertops can completely transform your space, providing both practical benefits and an aesthetic boost. Whether you're updating worn-out surfaces or upgrading to a more durable and stylish material, careful planning and precise installation are key to ensuring long-lasting results. While DIY installation is possible for simpler materials, professional help is often recommended for more complex tasks to avoid costly mistakes. By choosing the right material for your needs and following the proper installation steps, you’ll enhance the functionality, beauty, and value of your kitchen for years to come.
Not always. Laminate and some wood countertops typically require a plywood subtop for structural support, especially if the cabinet tops are not fully enclosed. However, most quartz and granite countertops are installed directly over properly leveled cabinets without additional plywood because the slab thickness provides sufficient rigidity. The need for plywood depends on cabinet construction, span length, and material type.
Yes, countertops can often be replaced without removing cabinets, provided the cabinets are structurally sound and level. However, new measurements must always be taken. Even slight cabinet shifts or wall irregularities can affect fit, especially for stone surfaces that require precision fabrication
Minor wall gaps are common because walls are rarely perfectly straight. Professional installers often scribe laminate or wood surfaces to match wall contours. For stone materials, fabrication adjustments are made before installation. Small gaps are typically sealed with backsplash material or silicone for a clean finish.
Yes, certain materials require expansion allowance. Butcher block and laminate can expand or contract slightly due to humidity and temperature changes. If installed too tightly against walls or cabinets, these materials may warp or buckle. Stone materials expand minimally but still require proper installation spacing.
Stone slabs must be transported vertically using proper suction lifters and multiple handlers. Carrying slabs flat increases the risk of cracking under their own weight. Improper handling during movement is one of the leading causes of stone damage before installation.
Join our mailing list for exclusive updates, expert tips, and special offers tailored to your needs. Be the first to know about the latest in home services.

Renovize Home is a platform that supports homeowners from planning to renovation. Whether it’s Renovize AI for guidance or a one-on-one call with Pro Finder, we understand your project and match you with local contractors tailored to your needs.
Who We Are
About Renovize HomeGet in TouchHomeownwer Support:
Coming Soon!
General Inquiries:
support@renovizehome.com
Head Office:
24 Greenway Plaza, STE 1800M, Houston, TX 77046.