Explore All
BROWSE BY CATEGORY
Interior
Exterior
Home Essentials
Homeowner Tools
Blogs & Guides
Find a Pro
Book Your Appointment Now
Home Essentials
About Renovize Home
Explore All
BROWSE BY CATEGORY
Interior
Exterior
Home Essentials
Homeowner Tools
Blogs & Guides
Find a Pro
Book Your Appointment Now
Home Essentials
About Renovize Home
Last Updated 2026-02-11
Installing kitchen cabinets is a precision-based process that directly impacts storage, workflow, and the overall durability of the kitchen. Whether you're installing brand-new cabinets or replacing existing ones, proper planning and execution are key. Accurate leveling, precise alignment, and secure fastening are essential for ensuring a smooth and successful kitchen cabinet installation. With the right approach, you can maximize your kitchen's functionality, avoid costly mistakes, and achieve a professional finish that lasts for years.
Table of Contents
What Installing Kitchen Cabinets Includes
Complete Process of Installing Kitchen Cabinets
Tools for Installing Kitchen Cabinets
How to Install Cabinet Hardware Correctly
Kitchen Cabinet Installation Cost Factors
Common Problems Proper Cabinet Installation Prevents
Final Thoughts
Installing kitchen cabinets is a detailed process that involves more than just placing the cabinets in the desired spots. It requires accurate measurements, secure mounting, and proper alignment to ensure stability, durability, and smooth functionality. Each step is crucial to make sure the cabinets perform well and enhance the kitchen’s design.
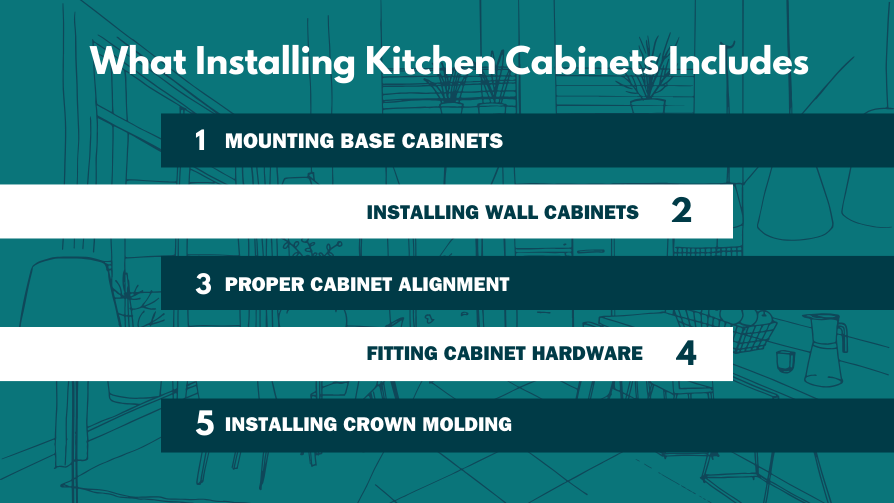
Base cabinets are installed first, ensuring they are securely anchored to the wall and properly aligned. The cabinets must be level and plumb to support countertops and other components. Correct placement of base cabinets also ensures sufficient space for plumbing, appliances, and other fixtures.
Wall cabinets are mounted after the base cabinets, typically using screws and heavy-duty wall anchors. Ensuring they are level and securely fastened prevents sagging or shifting over time. Spacing between base and wall cabinets must be precise for a consistent and functional look.
Alignment of all cabinets base and wall is critical for both aesthetic and functional purposes. Gaps between cabinets, walls, or countertops can affect the look and make it difficult to open or close doors and drawers smoothly. Accurate measurements and adjustments ensure a seamless, aligned finish.
Cabinet hardware such as handles, knobs, and hinges must be installed with precision. The placement should align with the overall design and ensure ease of use. Hardware placement also contributes to the durability of cabinet doors and drawers, preventing wear and tear.
Crown molding adds a polished look to the tops of upper cabinets, creating a cohesive finish. Toe kicks, the recessed areas at the bottom of base cabinets, are installed to complete the look and provide proper clearance for feet when standing at counters. Both components enhance the kitchen's visual appeal and functionality.
During installation, allowances for appliances such as dishwashers, ovens, and refrigerators are crucial. Ensuring the cabinets fit around appliances without restricting airflow or access is important for both function and safety. Adjustments may need to be made for countertop height, cabinet depth, and appliance clearance.
Installing kitchen cabinets is one of the most important steps in a kitchen remodel or new build. A proper cabinet installation focuses on accurate measurements, secure anchoring, and precise alignment. From marking wall studs to leveling base cabinets and fastening wall units, each step directly affects the kitchen’s long-term durability and appearance. When installed correctly, kitchen cabinets remain stable, balanced, and functional for many years, creating a strong foundation for everything built on top of them.

The installation process begins with detailed measurement and layout planning. Wall length, ceiling height, appliance sizes, and corner clearances must all be confirmed before installation starts. Standard wall cabinets are typically mounted so their bottom edge sits about 54 inches from the floor, but this measurement may change depending on ceiling height, cabinet size, or appliance requirements.
Planning also includes determining filler panel placement, cabinet spacing, and alignment with windows or doors. A precise layout prevents last-minute adjustments that can compromise alignment or require cabinet modifications.
Cabinets must be anchored into wall studs to ensure long-term strength. Drywall alone cannot support cabinet weight, especially once dishes, cookware, and countertops are added. A stud finder is used to locate studs, which are then clearly marked across the entire cabinet run.
Vertical stud lines are extended above and below cabinet installation zones to maintain accuracy while mounting. Proper stud anchoring prevents cabinets from loosening, tilting, or pulling away from the wall over time.
Before mounting wall cabinets, a temporary ledger board is installed along the bottom cabinet line. This straight, level board supports the weight of the cabinets during installation, allowing precise positioning without strain.
The ledger board ensures cabinets stay level while being fastened into studs. Once wall cabinets are fully secured, the board is removed.
Wall cabinets are always installed before base cabinets. This keeps the floor area clear and prevents damage to base cabinets during lifting and fastening. Installation usually begins at a corner or reference cabinet and continues outward.
Each cabinet is lifted onto the ledger board, checked for level and plumb, and secured into studs through the cabinet back. Adjacent cabinets are clamped together and fastened to maintain flush faces and tight seams. Level checks are performed after each cabinet to prevent alignment issues from compounding.
Most walls are not perfectly straight, which makes shimming essential. Shims are placed behind cabinets where walls dip or bow, ensuring cabinet faces stay flat and aligned. Forcing cabinets to match uneven walls can twist frames and cause door misalignment.
Correct shimming improves cabinet durability, prevents stress on fasteners, and ensures consistent spacing between doors and drawers.
After wall cabinets are anchored, they are secured to each other to form a unified structure. Cabinets are clamped together, pre-drilled, and fastened through their face frames. This creates a rigid cabinet run that distributes weight evenly and improves overall strength. This step is especially important for long cabinet runs and heavy countertop installations.
Base cabinet installation begins at the highest point on the floor to maintain level across the entire run. Each cabinet is leveled side-to-side and front-to-back before being secured. Shims are placed under cabinets as needed rather than trimming cabinet bases, which preserves structural integrity.
Once leveled, base cabinets are anchored into wall studs. Even though they rest on the floor, stud anchoring is necessary to support countertop weight and prevent shifting.
Filler strips close gaps between cabinets and walls, appliances, or adjacent cabinet runs. These fillers are scribed to match wall contours and secured from inside the cabinet for a seamless appearance.
End panels are installed on exposed cabinet sides to create a finished look. Proper filler and panel installation improves symmetry and prevents dirt buildup in gaps.
Before countertops are installed, a final inspection ensures cabinet faces are flush, doors and drawers are properly aligned, and all fasteners are secure. Hinges are adjusted to achieve even spacing and smooth operation.
Any corrections made at this stage are far easier and less expensive than adjustments after countertops are installed.
Specific tools for installing cabinets include drill drivers for securing screws, clamps for holding cabinets in place temporarily, and hammer and nails for additional support. If you are cutting custom pieces or making adjustments, a saw or jigsaw may also be required. A stud finder is vital to locate studs in the wall, ensuring that cabinets are securely fastened to sturdy points.
Proper leveling tools are essential to ensure the cabinets are installed evenly. A laser level or spirit level can be used to check horizontal and vertical alignment. Shims are also important for adjusting cabinet height, especially if the floor is uneven. The fastening tools include drills, screwdrivers, and cabinet screws designed specifically for kitchen installations. These tools help secure the cabinets firmly to the wall and to one another.
The correct mounting hardware is key to securing the cabinets to the wall and to each other. Cabinet brackets and mounting clips help keep the cabinets in place during installation. Hinges, screws, and latches are also necessary for ensuring the doors open and close smoothly. For heavy-duty installations, stronger hardware, like angle brackets, might be required to support additional weight.
| Tool | Purpose | Why It's Needed |
|---|---|---|
| Measuring Tape | Accurate measurements of space and cabinet sizes | Essential for ensuring the cabinets fit correctly. |
| Level | Ensures cabinets are aligned properly | Prevents crooked or misaligned cabinets. |
| Drill Driver | Fastening screws into walls and cabinets | Essential for securing cabinets to the wall and to each other. |
| Clamps | Holding cabinets in place temporarily | Helps keep cabinets steady during installation. |
| Screwdrivers | Tightening screws | Needed for securing hardware, hinges, and fixtures. |
| Stud Finder | Locating wall studs for cabinet attachment | Ensures secure mounting into the wall for stability. |
| Laser Level | Checking horizontal and vertical alignment | Helps achieve precise cabinet installation. |
| Shims | Adjusting uneven floors or walls | Ensures cabinets are level and properly aligned. |
Installing cabinet hardware may seem like a small finishing step, but it has a major impact on how your kitchen looks and functions. Poorly aligned knobs or pulls can make even high-quality cabinets look unprofessional. Incorrect drilling can permanently damage cabinet doors. Proper hardware installation ensures smooth operation, balanced spacing, and long-term durability.
This guide explains the full process of installing cabinet hardware correctly, including preparation, placement techniques, drilling methods, adjustments, and the tools required.
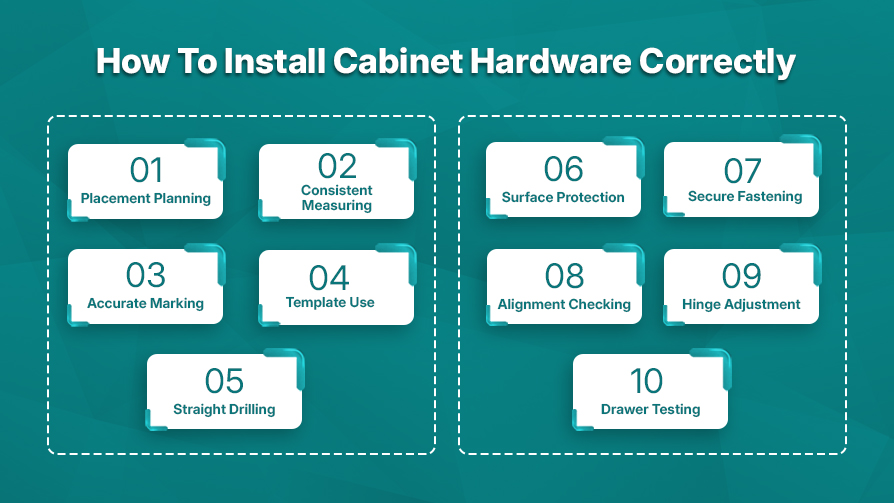
Before drilling any holes, determine the exact placement of knobs and pulls. Placement depends on cabinet style, door size, and personal preference.
For cabinet doors, hardware placement should be both functional and visually balanced. Knobs are typically installed 2 to 3 inches from the top or bottom corner on the side opposite the hinges. This positioning ensures comfortable access while maintaining a clean, consistent appearance. Pulls are often installed vertically along the stile, which is the vertical frame edge of the door. This placement keeps the hardware aligned with the cabinet structure and creates a professional, symmetrical look.
Drawer hardware placement focuses on balance and ease of use. Pulls are usually centered horizontally across the drawer front to maintain visual symmetry. For larger or wider drawers, two pulls may be installed instead of one. This not only improves balance but also provides better support and strength when opening drawers that carry heavier items.
Accurate marking prevents misalignment and unnecessary patching. Use a pencil and measuring tape to mark hole centers carefully. A hardware template or jig is highly recommended because it standardizes spacing and prevents human error.
Key considerations when marking:
Drilling is the most critical step. A crooked or oversized hole cannot be easily corrected. Use a sharp drill bit that matches the screw diameter exactly.
To avoid cabinet surface damage:
Insert the screws from the inside of the cabinet and secure the hardware from the outside, ensuring it sits flush against the surface.
Tighten the screws firmly so the hardware feels stable, but avoid overtightening, as excessive pressure can crack the cabinet material or strip the screw holes. A secure but controlled fastening ensures long-term durability without damaging the cabinet finish.
Sometimes adding hardware can slightly shift the balance of cabinet doors or drawers. After installing knobs or pulls, it is important to recheck alignment and movement to ensure smooth operation and even spacing.
| Tool | Purpose | Why It’s Important |
|---|---|---|
| Measuring Tape | Measure spacing and placement | Ensures uniform positioning. |
| Pencil | Mark drilling points | Temporary marking without surface damage. |
| Level | Maintain straight alignment | Prevents slanted hardware placement. |
| Hardware Template / Jig | Standardize hole placement | Improves accuracy and consistency. |
| Power Drill | Drill holes for screws | Essential for clean and controlled drilling. |
| Drill Bits (Correct Size) | Match screw diameter | Prevents loose or tight fitting. |
| Painter’s Tape | Protect surface while drilling | Reduces splintering and chipping. |
| Screwdriver | Tighten screws | Final hardware securing. |
| Clamp (Optional) | Stabilize doors while drilling | Improves drilling accuracy. |
| Safety Glasses | Protect eyes during drilling | Essential safety measure. |
The cost to install kitchen cabinets is influenced by several structural and project-related factors. Proper cabinet installation requires precise leveling, secure stud anchoring, alignment adjustments, and finishing details. These technical steps directly impact labor time and overall pricing. While cabinet purchase cost is separate, installation expenses depend on complexity, preparation, and additional features.
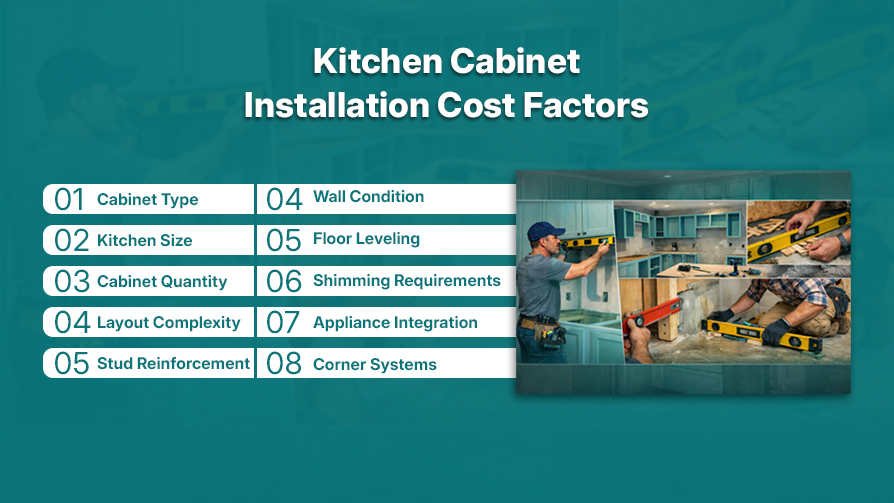
The type of cabinets selected plays a major role in installation requirements. Stock cabinets are pre-manufactured in standard sizes and are generally faster to install. Semi-custom cabinets require minor adjustments for fit and alignment.
Fully custom cabinets demand precision fitting, detailed measurements, and additional alignment work. Larger kitchens increase installation demands because they include:
Labor effort varies depending on layout complexity and structural requirements. Straight cabinet runs are easier to install than kitchens with multiple corners, angled walls, or integrated islands.
Installation scope may include:
The condition of the walls and floors directly impacts installation effort. Cabinets must be mounted into solid wall studs and leveled properly. Uneven surfaces require additional shimming and adjustments. Some common structural challenges include:
When walls or floors are not properly prepared, extra corrective steps are necessary before cabinet installation can proceed.
Kitchen layout design affects how cabinets are positioned and secured. Installations involving appliance gaps, ventilation clearances, or plumbing adjustments require careful measurement and customization.
Complex layouts may include:
The addition of finishing components increases installation scope. These features require precise alignment and careful attachment to maintain visual balance.
Finishing work may include:
Although these details may seem minor, they require careful measurement and execution to ensure durability and symmetry.
Below is a general cost estimate table for professional kitchen cabinet installation. These estimates reflect installation only and exclude the cost of purchasing cabinets.
| Kitchen Size | Installation Complexity | Estimated Installation Cost |
|---|---|---|
| Small Kitchen (8–10 cabinets) | Basic layout, minimal adjustments | $2,000 – $4,500 |
| Medium Kitchen (10–18 cabinets) | Standard alignment and leveling | $4,000 – $7,500 |
| Large Kitchen (18+ cabinets) | Custom layout, advanced adjustments | $7,000 – $15,000+ |
Proper cabinet installation is essential to avoid future issues that can compromise both functionality and aesthetics. Correct installation ensures long-term stability, smooth operation, and prevents unnecessary repairs down the line. Here are some common problems that proper installation prevents:

When cabinets are not installed level or aligned properly, uneven doors can occur. This may cause doors to hang crookedly, affecting both the visual appeal and functionality of the cabinets. Properly securing and aligning the cabinets ensures that the doors close evenly, providing a polished look and preventing unnecessary wear on the hinges.
Improperly secured wall cabinets may begin to sag over time, especially when subjected to the weight of heavy items. Without proper anchoring to the wall studs, the weight distribution becomes uneven, potentially leading to cabinet failure. Correctly securing the cabinets ensures that they remain stable, even when storing heavy cookware or dishes.
Misaligned drawers can lead to difficulty in opening or closing smoothly, and can also cause wear on the tracks over time. Proper cabinet installation ensures that the drawer slides are installed correctly, allowing the drawers to function properly and maintain their alignment for years.
Cabinets that are not anchored properly to the wall or to each other can become loose or unstable over time. Loose cabinets are not only a safety risk but also affect the overall performance and functionality. Proper installation, including securing cabinets with the right anchors and screws, ensures that cabinets stay securely in place, preventing shifting or loosening.
Installing new kitchen cabinets is a transformative project that can greatly improve both the functionality and aesthetic appeal of your kitchen. Whether you’re upgrading outdated cabinets, adding more storage, or changing the layout for better workflow, proper installation is crucial for ensuring durability, smooth operation, and long-term satisfaction.
While DIY installation is possible, professional help can make the process smoother and ensure the cabinets are aligned correctly and securely mounted. By understanding the installation process, cost factors, and the potential challenges, homeowners can make informed decisions that lead to a beautiful and efficient kitchen for years to come.
In most cases, base cabinets are installed before hardwood or laminate flooring to prevent future shifting and reduce material costs. However, if you’re installing floating floors, cabinets should never sit on top because expansion and contraction can damage the flooring. Tile flooring is usually installed first since it does not expand. The decision depends on flooring type and long-term remodeling plans.
Cabinets are leveled by starting at the highest point of the floor and using shims under the cabinet base to adjust height. Shims are trimmed once alignment is confirmed. Forcing cabinets to match an uneven floor without shimming can cause frame twisting, door misalignment, and countertop cracking. Precision leveling ensures structural integrity.
Cabinet installation requires cabinet-grade structural screws, typically 2½ to 3 inches long, designed for fastening into wall studs. Drywall screws should not be used because they are brittle and may snap under weight. Proper cabinet screws provide stronger holding power and long-term stability.
When properly secured into wall studs, standard wall cabinets can typically hold 50 to 70 pounds per linear foot. Weight capacity depends on cabinet construction, screw placement, and stud anchoring. If mounted incorrectly into drywall only, the cabinet may fail under heavy dishware or cookware loads.
Installing new cabinets over old cabinets is generally not recommended. Cabinets must be anchored directly to studs, and layering cabinets can reduce structural strength and alignment accuracy. For best results, old cabinets should be removed completely before installation begins.
Join our mailing list for exclusive updates, expert tips, and special offers tailored to your needs. Be the first to know about the latest in home services.

Renovize Home is a platform that supports homeowners from planning to renovation. Whether it’s Renovize AI for guidance or a one-on-one call with Pro Finder, we understand your project and match you with local contractors tailored to your needs.
Who We Are
About Renovize HomeGet in TouchHomeownwer Support:
Coming Soon!
General Inquiries:
support@renovizehome.com
Head Office:
24 Greenway Plaza, STE 1800M, Houston, TX 77046.