Explore All
BROWSE BY CATEGORY
Interior
Exterior
Home Essentials
Homeowner Tools
Blogs & Guides
Find a Pro
Book Your Appointment Now
Home Essentials
About Renovize Home
Explore All
BROWSE BY CATEGORY
Interior
Exterior
Home Essentials
Homeowner Tools
Blogs & Guides
Find a Pro
Book Your Appointment Now
Home Essentials
About Renovize Home
Last Updated 2026-02-19
Installing a kitchen backsplash is one of the most effective ways to protect walls from moisture, grease, and heat while dramatically improving the kitchen’s appearance. Although backsplash installation may seem simple, proper surface preparation, layout planning, tile alignment, cutting accuracy, and sealing techniques determine whether the result looks professional or uneven.
A correctly installed backsplash prevents long-term wall damage, reduces cleaning difficulty, and adds structural durability around sinks and cooking areas. This guide explains every stage of backsplash installation in detail.
Table of Contents
1. Inspect and Prepare the Wall Surface
2. Measure and Plan the Layout
3. Choose the Right Adhesive
4. Apply Adhesive Properly
5. Set the First Row Carefully
6. Cutting Tiles Around Obstacles
7. Continue Installing Remaining Rows
8. Apply Grout
9. Seal Grout (If Required)
10. Apply Caulk Along Edges
Types of Kitchen Backsplashes You Can Install
Kitchen Backsplash Install Cost Breakdown
Final Thoughts
Proper wall preparation determines how securely the backsplash adheres and how long it will last. Even premium tile and high-strength adhesive will fail if installed over a contaminated or unstable surface. Preparation at this stage affects bonding strength, alignment accuracy, and long-term durability.
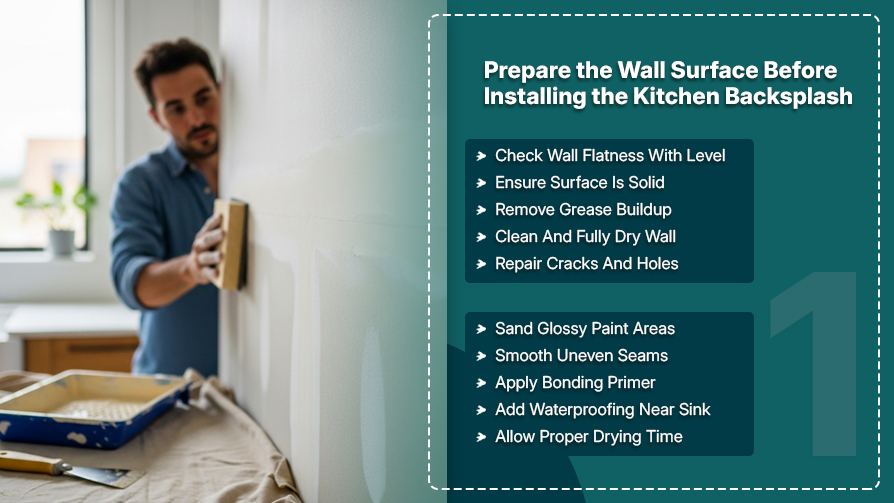
Start by inspecting the wall behind the countertop carefully. The surface must be clean, dry, smooth, and structurally sound before any adhesive is applied.
Use a 4-foot level or straightedge to check flatness. Surface variation should not exceed 1/8 inch over 4 feet. Larger deviations can cause visible tile lippage and uneven grout lines.
Press firmly across the drywall. If the wall flexes, shifts, or feels soft in certain areas, reinforcement or replacement may be required before continuing.
Kitchen walls, especially behind stoves, often accumulate invisible grease layers. Even a thin film can significantly reduce adhesive bonding strength.
Clean the area thoroughly using a degreasing cleaner, focusing on the zone within 12–18 inches above the cooktop. Rinse with clean water and allow the surface to dry completely before proceeding. Adhesive should never be applied over moisture or residue.
Tiles mirror the surface beneath them. Any irregularities will transfer directly to the finished layout. Repair the following before installation:
Patch damaged areas with joint compound and allow at least 24 hours for full curing before sanding smooth. If glossy paint is present, lightly sand the surface to improve adhesive grip.
Behind sinks and near faucets, moisture exposure is higher. Applying a bonding primer or waterproofing membrane in these areas improves durability and reduces the risk of long-term damage.
Allow the primer to dry according to manufacturer instructions, typically 1–4 hours depending on product type.
Proper layout planning prevents uneven cuts, misaligned grout lines, and awkward tile slivers at edges. Unlike large floor areas, backsplash space is visually concentrated, meaning small alignment mistakes become highly noticeable. Planning before adhesive is applied ensures a balanced and professional result.
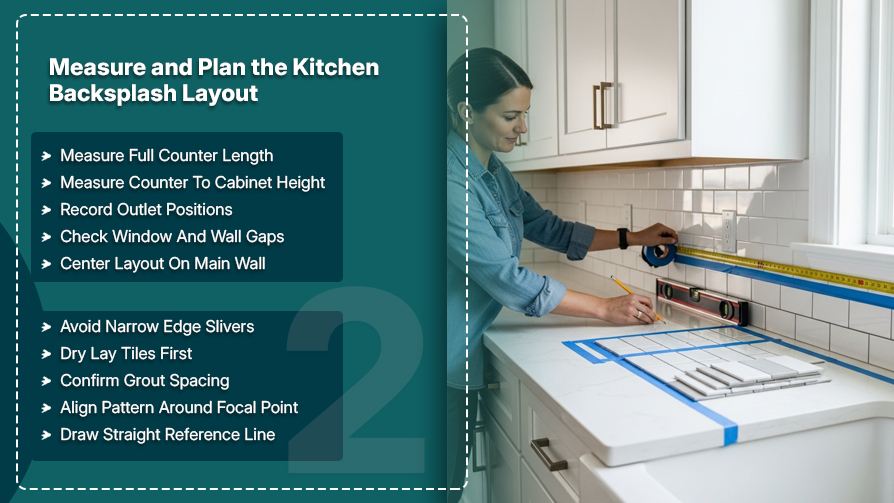
Begin by measuring the full countertop length from end to end. Then measure the vertical distance from the countertop surface to the bottom of the upper cabinets. In most kitchens, this height ranges between 18 and 20 inches, but it should always be verified.
Also measure:
Record every measurement independently. Even small differences of ¼ inch can affect tile alignment across the run.
Choosing the correct starting point determines how the entire backsplash will look. In most installations, tiles are centered horizontally along the main wall to ensure symmetrical cuts at both ends.
Avoid starting directly from one edge unless the design specifically requires it. Centering reduces the chance of narrow slivers that are less than ½ inch wide, which are difficult to cut and visually distracting.
If the layout includes a focal point such as a cooktop or decorative insert, center the tile pattern around that feature instead of the full wall.
Before installing, place tiles or mosaic sheets directly on the countertop without adhesive. This allows you to visualize spacing, pattern alignment, and edge cuts.
Dry laying helps confirm:
Even if the countertop is slightly uneven, the tile must appear level. Use a 4-foot level to draw a straight horizontal reference line across the wall where the first row will sit.
If the countertop varies slightly (more than 1/8 inch), begin tiling from the reference line rather than directly from the counter surface. The bottom gap can later be concealed with a thin bead of silicone.
A straight reference line ensures the tile installation does not visually “climb” or “dip” across the wall.
Adhesive selection depends on the tile material, weight, and wall conditions. Using the wrong adhesive can lead to tile slippage, weak bonding, staining, or long-term detachment. The bonding system must match both the tile type and the installation environment.
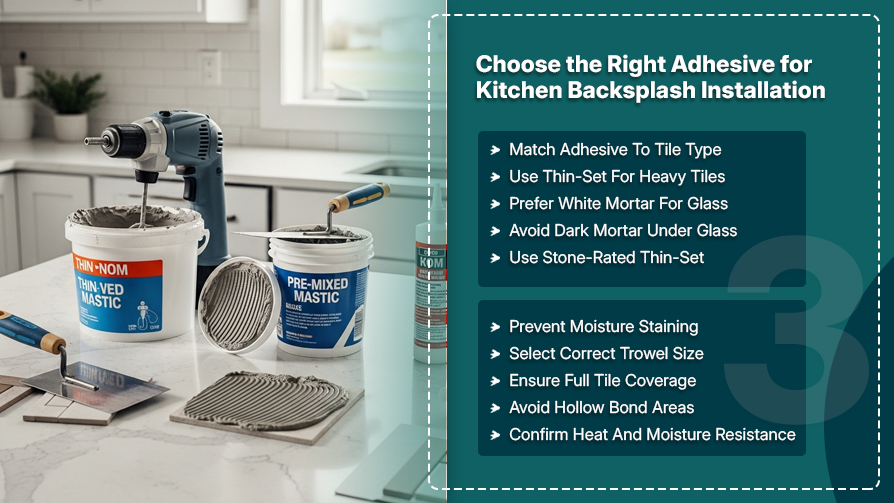
Ceramic and porcelain tiles are commonly installed using either pre-mixed mastic or thin-set mortar. For backsplash applications, mastic is often used because it is easy to apply and has strong initial grab.
However, thin-set mortar provides a stronger, more durable bond and is recommended for heavier tiles or areas exposed to heat and moisture.
In kitchens, thin-set is generally preferred if tiles exceed 8 inches in height or weigh more than standard subway tile formats.
Glass tile requires special attention because its translucent surface can reveal adhesive color beneath it. Always use white thin-set mortar to prevent color show-through.
Dark or gray mortar can alter the final appearance of glass tile and create visible shadowing. In addition, glass tile requires full adhesive coverage behind each piece to prevent visible voids. Use a smaller notch size and flatten ridges after application to ensure a smooth adhesive bed.
Natural stone tiles such as marble, travertine, or slate require mortar specifically designed for stone installation. Standard adhesives may cause staining or moisture discoloration.
Stone tiles are heavier and more porous than ceramic. Mortar must support the weight while preventing moisture migration through the tile body. Modified thin-set mortar rated for stone applications is typically recommended.
Adhesive must be applied evenly using a notched trowel. The notch size depends on tile thickness and format.
As a general guide:
Proper notch size ensures at least 80–95% adhesive coverage on the back of the tile. Insufficient coverage can cause hollow spots and weak bonding.
Proper adhesive application ensures strong bonding and an even tile surface. Applying too much adhesive or spreading it too far ahead of placement can cause bonding failure. Adhesive begins to skin over quickly, reducing its ability to properly grip the tile. Controlled application is critical for a professional result.
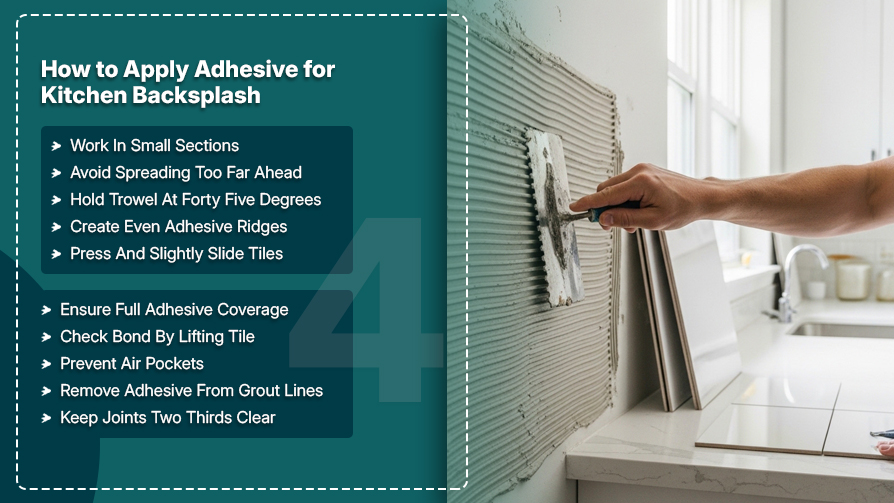
Do not spread adhesive across the entire wall at once. Most thin-set mortars begin to skin over within 10 to 20 minutes, depending on room temperature and humidity.
Apply adhesive in sections of approximately 2 to 3 square feet at a time. This allows you to place tiles while the adhesive is still fresh and fully workable. If adhesive forms a dry film before tile placement, it must be scraped off and reapplied.
Hold the notched trowel at approximately a 45-degree angle while spreading adhesive. This angle creates uniform ridges that control adhesive thickness.
Consistent ridge height ensures:
Avoid flattening the ridges prematurely unless working with glass tile, which may require ridge smoothing.
After placing each tile, press it firmly into position and slide it slightly back and forth (about 1/8 inch movement) to collapse the adhesive ridges. This motion eliminates air pockets and ensures strong surface contact.
Tiles should achieve at least 80–95% coverage on the back for backsplash applications. Periodically remove a tile to confirm proper adhesive transfer.
While firm pressure is necessary, excessive adhesive can squeeze into grout lines. This reduces grout depth and complicates finishing.
If adhesive squeezes out:
The first row establishes the visual alignment for the entire backsplash. Any deviation at the base will multiply as the installation progresses upward. Taking extra time at this stage prevents visible slope, uneven grout joints, and misaligned patterns. Precision here determines the final appearance.
Place spacers between each tile to maintain uniform grout lines. Most backsplash installations use grout joints between 1/16 inch and 1/8 inch, depending on tile size and design style.
Smaller joints create a modern, tight appearance, while slightly wider joints can accommodate minor wall irregularities. Consistent spacing ensures visual balance across the entire wall. Remove spacers only after the adhesive begins to set but before it fully hardens.
Do not assume the countertop is perfectly level. Even a variation of 1/8 inch across 4 feet can cause the tile line to appear uneven if followed directly.
Use a 2-foot or 4-foot level to check alignment after every few tiles. If the countertop slopes slightly, leave a small gap—typically 1/8 inch—between the tile and the counter surface. This gap will later be sealed with flexible caulk to create a clean finish. The goal is visual levelness, not mechanical alignment with an imperfect counter.
Before moving to the second row, confirm:
Minor adjustments are much easier to correct while the adhesive is still workable, usually within the first 15–20 minutes of placement.
Electrical outlets, switches, cabinet edges, and inside corners require precise tile cuts. Poorly executed cuts are immediately noticeable and can disrupt grout alignment and symmetry. Careful measurement and the correct cutting method ensure a clean, professional result. Safety should always be the first step.
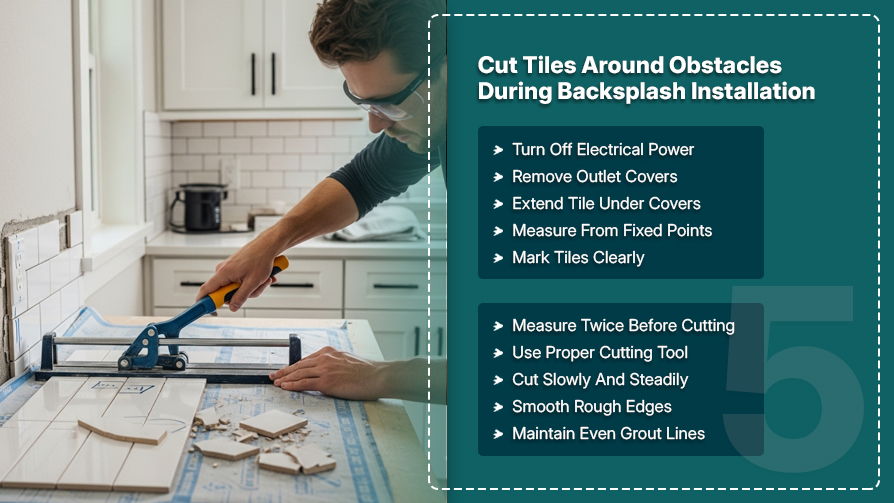
Before working around electrical outlets or switches, turn off power at the breaker panel. Remove outlet covers carefully to expose the full opening.
Tiles should extend slightly beneath the outlet cover plate—typically 1/8 to 1/4 inch—so that cut edges remain hidden once the cover is reinstalled. This prevents visible gaps and uneven transitions.
Precise marking prevents wasted tile and visible misalignment. Measure from fixed reference points such as the countertop or the previously installed tile row.
Always measure twice before cutting. Even a 1/16 inch error can create uneven grout lines or exposed gaps. Use a pencil or grease marker that is visible but easy to remove after cutting.
Different tile materials require different cutting methods:
Glass and stone tiles should be cut slowly to reduce edge chipping. Applying steady pressure rather than forcing the cut improves accuracy.
After cutting, inspect tile edges carefully. Smooth minor roughness using a sanding stone or rubbing stone if necessary. Rough or chipped edges are highly visible, especially around outlets and inside corners.
Improper cuts not only affect appearance but also create uneven grout spacing that becomes more noticeable after installation.
After the first row is properly aligned, continue setting tiles upward one row at a time. Maintain steady spacing, consistent adhesive thickness, and visual alignment throughout the process. Rushing this stage often results in uneven grout lines and noticeable surface variation.
As you install additional rows, regularly step back and visually inspect the wall. Small shifts may not be noticeable up close but become obvious from a distance.
Periodically check:
Use a level after every 2–3 rows to confirm the layout remains straight. Minor adjustments should be made while adhesive is still workable, typically within 15–20 minutes.
Excess adhesive squeezing into grout joints must be removed immediately. Once hardened, it becomes difficult to scrape out without damaging tile edges.
Maintain grout joint depth at least two-thirds of the tile thickness to ensure proper grout bonding later. Clean joints improve final grout consistency and color uniformity.
Avoid touching, pressing, or disturbing tiles during this period. Movement before curing can break the adhesive bond and create uneven surfaces.
Full curing may take several days depending on humidity and temperature. Maintaining room temperature between 60°F and 75°F supports proper curing.
Once the adhesive has fully cured—typically after 24 hours—grouting can begin. Grout fills the joints between tiles, strengthens the overall installation, and prevents moisture from penetrating behind the surface. Applying grout correctly ensures uniform color, smooth joints, and long-term durability.
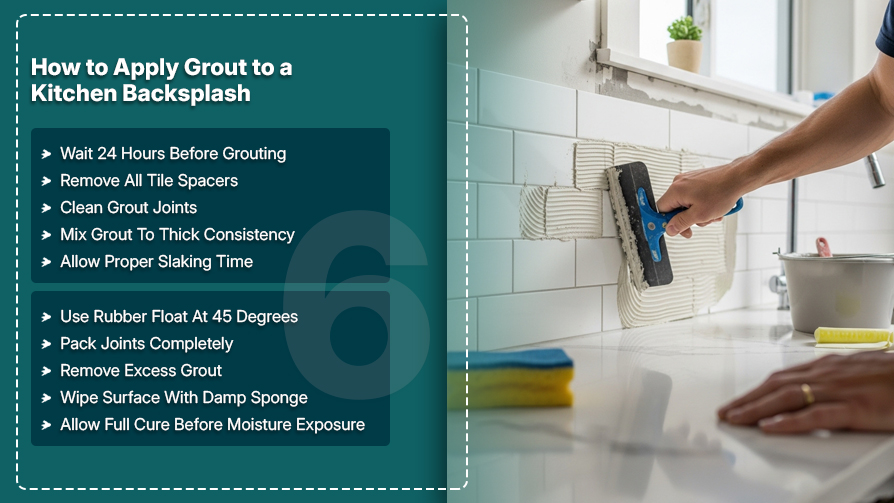
Start by removing all tile spacers carefully. Inspect the grout lines to ensure they are clean and free from hardened adhesive. Any remaining debris can weaken grout bonding and create uneven joints.
If necessary, use a utility knife or margin trowel to clean out shallow adhesive buildup before proceeding.
Mix grout according to the manufacturer’s instructions. The consistency should resemble thick peanut butter—smooth but firm enough to hold shape.
Allow the mixture to rest for 5 to 10 minutes (a process known as slaking), then remix without adding additional water. Overwatering grout weakens strength and may cause cracking later.
Only mix enough grout that can be applied within 20 to 30 minutes, as it begins to stiffen quickly.
Use a rubber float held at a 45-degree angle to press grout firmly into the joints. Move diagonally across the tile lines to fully pack the grout without pulling it out.
Ensure all joints are completely filled with no air pockets. Proper filling increases structural integrity and moisture resistance.
After application, remove excess grout by holding the float nearly upright and scraping diagonally across the surface.
After approximately 10 to 15 minutes, begin cleaning the tile surface with a damp (not wet) sponge. Use light, circular motions to remove excess grout while smoothing the joints.
Rinse the sponge frequently in clean water to prevent haze buildup. Avoid pressing too hard, as excessive water can weaken the grout or create uneven joints. A second light wipe may be needed after another 30 to 60 minutes to remove residual haze.
Grout typically requires 24 to 48 hours to cure before exposure to moisture. During this time, avoid splashing water on the backsplash or cleaning the surface.
Full curing may take several days depending on humidity and temperature. Maintaining room temperature between 60°F and 75°F supports proper curing.
Sealing grout is essential when using cement-based grout. Because it is porous, unsealed grout can absorb moisture, cooking oils, and food stains over time. Proper sealing increases stain resistance and protects the integrity of the backsplash.
Traditional cement-based grout must be sealed after it fully cures. Most grout requires at least 48 to 72 hours of curing before applying sealer.
However, quartz-based or epoxy grout is non-porous and typically does not require sealing. Always confirm based on the grout manufacturer’s specifications. Applying sealer to grout before it fully cures can trap moisture and weaken performance.
Use a small applicator brush, sponge applicator, or roller bottle to apply sealer directly along grout lines. Work in sections to ensure full coverage.
Allow the sealer to absorb for approximately 5 to 10 minutes, then wipe away excess from tile surfaces using a clean cloth. Leaving sealer residue on tile may cause streaking or haze.
For high-moisture areas near sinks, a second coat may be recommended after 1 to 2 hours, depending on product instructions.
Sealing significantly improves resistance to staining and moisture penetration. While it does not make grout waterproof, it greatly extends its lifespan and simplifies maintenance.
Grout should never be used in movement joints where the backsplash meets the countertop, cabinets, or inside corners. These areas require flexible silicone caulk to accommodate natural expansion and contraction. Rigid grout in these joints often cracks within months.
Apply caulk along:
These joints experience slight structural movement due to temperature changes and cabinet shifting.
Cut the caulk tube tip at a 45-degree angle to control bead size. Apply a smooth, continuous bead along the joint without stopping abruptly.
Immediately smooth the bead using a damp finger or a caulking finishing tool. This ensures a clean, uniform appearance and proper adhesion to both surfaces.
Using flexible caulk instead of grout at movement joints prevents cracking and long-term separation. Properly sealed edges protect against moisture infiltration and complete the backsplash installation with a clean, professional finish.
Choosing the right material for your kitchen backsplash is crucial for achieving the right look, durability, and functionality. Different materials come with their own advantages, and each requires specific installation techniques. Here’s an overview of the most popular backsplash options.
Tile backsplashes (ceramic, porcelain, or stone) are the most common choice due to their durability, ease of cleaning, and variety of design options. Tiles come in many shapes, sizes, and finishes, allowing you to create a custom look. Ceramic tiles are especially popular for their affordability and wide range of styles. Installation involves applying adhesive to the wall, pressing tiles into place, and grouting the spaces between tiles.
Glass backsplashes offer a sleek, modern aesthetic with a high gloss finish that reflects light, making small kitchens appear bigger and brighter. Glass tiles are easy to clean, but they require precise installation to avoid cracking. A key benefit of glass tiles is their ability to add color and texture to the kitchen without overwhelming the space. Installation includes securing glass tiles with adhesive and using clear or matching grout to maintain the clean look.
Stone backsplashes, including marble, granite, and slate, bring a natural, luxurious look to the kitchen. These materials are durable and unique, offering natural veining and patterns. Mosaic tiles, made from stone, glass, or ceramic, allow for creative designs and custom patterns. The installation of stone or mosaic tiles requires more expertise, as precision cuts are needed for intricate designs, and sealing is often necessary to maintain the material's longevity.
Subway tile is a classic and timeless backsplash choice. Its rectangular shape and simple design work well with many kitchen styles, especially modern or traditional. Subway tiles are easy to install and come in various materials like ceramic, glass, or porcelain. Their classic appearance allows you to create a clean, cohesive design, and they are easy to maintain with regular cleaning.
Peel-and-stick backsplash tiles are perfect for homeowners looking for a quick, DIY-friendly option. Made from materials like vinyl or metal, these tiles have adhesive on the back, making them easy to install without any mess. They come in a variety of patterns, including faux tile looks, and are an affordable option for those on a budget. While not as durable as traditional tile, they are a great temporary solution or for renters.
Metal backsplashes, such as those made from stainless steel, copper, or aluminum, provide a modern, industrial look to kitchens. Metal backsplashes are heat-resistant, durable, and easy to clean, making them ideal for high-traffic areas around stoves and sinks. They require careful installation to avoid denting or scratching, but once in place, they add a sleek, contemporary touch to the kitchen.
Wood backsplashes or wood-look tiles bring warmth and texture to the kitchen. They can be made from real wood, reclaimed wood, or wood-like materials such as MDF or laminate. While beautiful, wood backsplashes require proper sealing to protect them from moisture and staining, especially in areas near sinks. Wooden tiles or planks can be installed in a variety of patterns for a rustic or farmhouse style.
Understanding the cost to install a kitchen backsplash helps you plan for the entire project, from material selection to labor costs. Several factors can influence the overall cost, including the type of backsplash material, the size of your kitchen, and the complexity of the installation. Here’s a detailed breakdown of what affects the cost.
The material cost is often the largest portion of your backsplash budget. Common options vary in price:
Labor costs for installing a kitchen backsplash vary depending on the complexity and the region. On average, you can expect to pay between $40 and $100 per hour for professional installation. For a standard kitchen backsplash, labor costs typically range from $300 to $1,000. The labor cost will increase if the backsplash requires intricate cuts, multiple layers, or specialized installation techniques, such as for mosaic tiles or intricate stonework.
The complexity of the installation significantly affects the cost. For example:
Installation complexity also includes factors such as the height and width of the backsplash area, whether any special cuts are required (like around outlets or sinks), and how much grout or caulk is needed for sealing.
Installing a kitchen backsplash is a simple yet impactful upgrade that not only enhances the visual appeal of your kitchen but also adds practical benefits like protecting your walls from cooking splatters and moisture. Whether you opt for a DIY installation or choose to hire a professional, understanding the materials, installation process, and cost factors ensures you make an informed decision. With so many material options available, you can easily find a backsplash that complements your kitchen style and meets your functional needs. Overall, a well-installed backsplash is an investment that can elevate your kitchen’s aesthetic, protect your walls, and increase your home's value.
Yes, but only if the existing tile surface is firmly bonded, level, and free of cracks. The old tile must be thoroughly cleaned and lightly sanded to improve adhesive grip. However, installing over tile increases wall thickness and may require extending electrical outlet boxes to remain code-compliant. If the existing surface is uneven or loose, removal is strongly recommended.
No, countertops typically remain in place during backsplash installation. In fact, the countertop serves as the base reference point for tile alignment. However, if the countertop is not level or is scheduled for replacement soon, it is better to install the backsplash after the countertop is finalized to avoid misalignment.
Tile sliding usually occurs when too much adhesive is applied or when using the wrong type of mortar. Using the correct notch size and pressing the tile firmly to collapse adhesive ridges reduces movement. For heavier tiles, spacers and temporary support strips can help hold the first row in place until the adhesive begins to set.
It depends on design preference. Traditional installations stop at the bottom of upper cabinets, typically 18 to 20 inches above the countertop. However, full-height backsplashes extending to the ceiling are increasingly popular, especially behind cooktops. Full-height installations create a more dramatic and modern appearance but require precise planning around cabinets and vents.
Adhesive thickness depends on tile size and notch selection. For most standard subway tiles, adhesive thickness after ridge collapse ranges between 1/8 and 3/16 inch. Larger format tiles may require slightly thicker mortar beds to ensure proper bonding. Too much adhesive can cause uneven surfaces, while too little may create hollow spots.
Join our mailing list for exclusive updates, expert tips, and special offers tailored to your needs. Be the first to know about the latest in home services.

Renovize Home is a platform that supports homeowners from planning to renovation. Whether it’s Renovize AI for guidance or a one-on-one call with Pro Finder, we understand your project and match you with local contractors tailored to your needs.
Who We Are
About Renovize HomeGet in TouchHomeownwer Support:
Coming Soon!
General Inquiries:
support@renovizehome.com
Head Office:
24 Greenway Plaza, STE 1800M, Houston, TX 77046.