Explore All
BROWSE BY CATEGORY
Interior
Exterior
Home Essentials
Homeowner Tools
Blogs & Guides
Find a Pro
Book Your Appointment Now
Home Essentials
About Renovize Home
Explore All
BROWSE BY CATEGORY
Interior
Exterior
Home Essentials
Homeowner Tools
Blogs & Guides
Find a Pro
Book Your Appointment Now
Home Essentials
About Renovize Home
Last Updated 2026-01-15
Installing an air conditioner can be a game-changer for home comfort, especially as temperatures rise. In fact, studies show that homes with air conditioning can reduce indoor temperatures by up to 20°F (11°C), providing relief during hot weather. Whether you're installing a window unit or a split system, correct installation is key to ensuring the system works at its peak efficiency.
homeowners up to 30% on cooling costs compared to older or improperly installed systems. This guide will walk you through the steps of choosing the right unit, preparing the space for installation, and setting everything up for optimal performance. By following these tips, you can ensure a comfortable, energy-efficient home for the entire summer.
Table of Contents
Types of Air Conditioners and Their Installation Needs
Step-by-Step Guide for Installing Air Conditioning
Common Installation Mistakes to Avoid
Why Hire a Professional for Air Conditioner Installation?
Final Thoughts
Choosing the right air conditioner depends on factors like space size, ductwork availability, and energy efficiency. Understanding the installation needs for each type helps you select the system that best fits your home’s requirements.
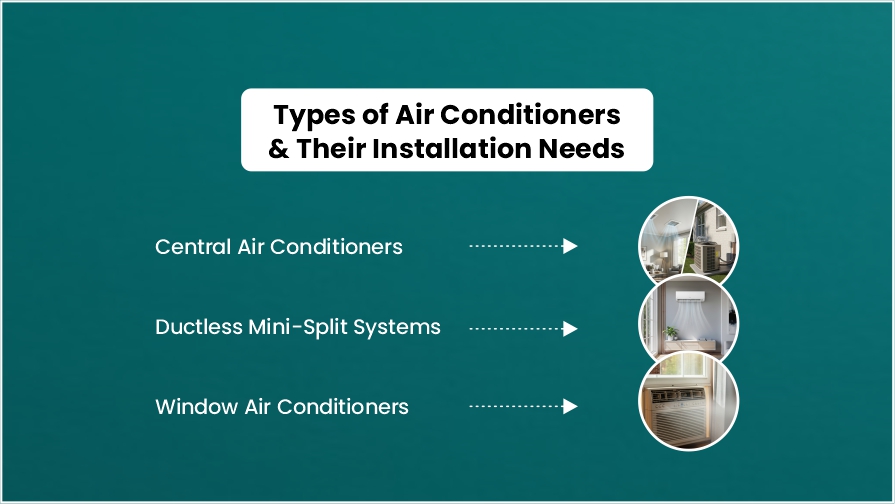
Central air conditioners are designed to cool large homes or multiple rooms through a ducted system. These systems provide consistent, even cooling throughout the home.
Mini-split systems offer flexibility for homes without existing ductwork. They consist of an outdoor compressor and one or more indoor units, providing efficient cooling and heating.
Window units are a popular option for cooling smaller spaces or individual rooms. These compact, affordable units are ideal for renters or homes that only need localized cooling.
Installing an air conditioner can seem like a daunting task, but with the right tools and steps, it’s a manageable project for many homeowners. Whether you’re installing a window unit, mini-split system, or central AC, the process generally follows a logical sequence that ensures everything is set up properly for efficient operation.
This step-by-step guide will help you navigate the installation process, from preparation to the final setup, ensuring your air conditioner is installed safely and ready to cool your home.
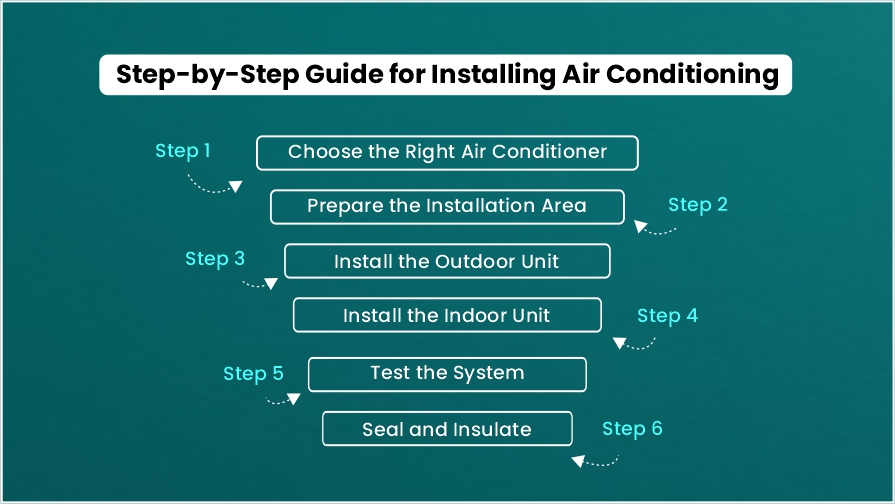
Before you begin the installation process, it's important to select the right air conditioning unit for your home. Factors to consider include:
Once you've chosen the right system, gather all the tools and equipment needed for installation, such as brackets, screws, and a drill.
For a smooth installation, you'll need to ensure that the area where you plan to install the air conditioner is prepared and ready.
For mini-split systems, start by installing the outdoor compressor unit. Here’s how:
For central AC systems, the outdoor condenser must be placed on a solid foundation. Make sure there is enough clearance for airflow.
For window AC units, the installation process typically involves placing the unit in the window, securing it with brackets, and sealing any gaps around the edges to prevent air leakage. Use the unit's built-in support arms to help with weight distribution.
For mini-split systems, install the indoor air handler:
For central AC systems, the air handler or furnace should be installed in a utility room, basement, or attic. Ensure it is connected to the ducts and properly sealed.
Air conditioning systems require power to run, and it’s essential to connect the system to the electrical supply properly.
Once everything is installed:
Ensure all gaps around the air conditioning unit are sealed properly to improve energy efficiency and prevent air leaks. For window units, use foam or weatherstripping to fill any gaps. For mini-split systems and central AC, ensure all connections are insulated and sealed correctly to prevent energy loss.
Installing an air conditioner is a big project that can significantly improve home comfort. However, mistakes during installation can lead to poor performance, higher energy bills, or even damage to the unit. Understanding common mistakes and how to avoid them can help ensure your AC operates efficiently and lasts for many years. Below are the most frequent installation errors homeowners make and tips on how to avoid them.
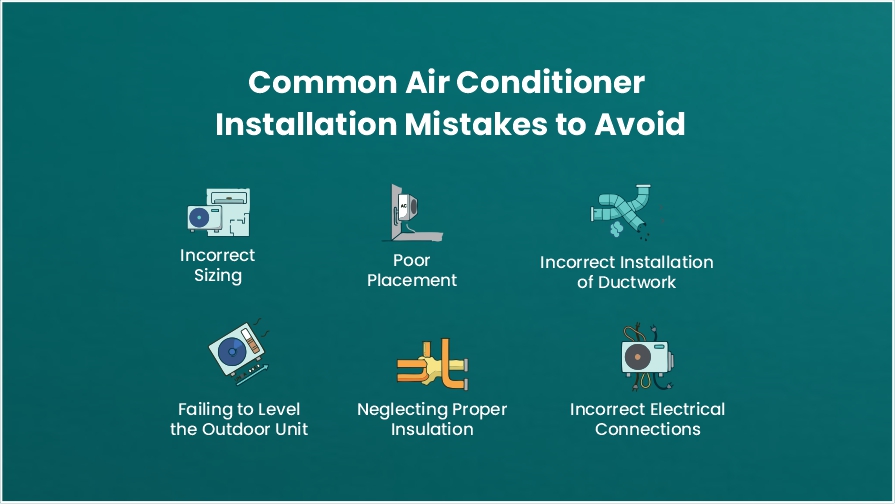
One of the most common mistakes is choosing the wrong size air conditioner for your home. If the unit is too small, it won’t cool your space effectively, causing the system to work harder and use more energy. On the other hand, an oversized unit can cycle on and off too frequently, leading to uneven cooling and increased wear on the system.
For mini-split systems, placing the indoor unit too high or too low on the wall can affect air distribution, leading to hot or cold spots in your home. Additionally, placing the unit in direct sunlight or near heat sources can make it less effective.
To avoid poor placement:
For central air conditioning, improper installation of ductwork can cause serious performance issues. Leaky ducts or poorly connected duct sections can lead to significant energy loss, reduced cooling efficiency, and higher utility bills.
For central AC and mini-split systems, failing to level the outdoor unit can affect its performance. A tilted or unstable outdoor unit may struggle with refrigerant flow, leading to poor cooling performance and potential damage to the compressor.
Air conditioners rely on efficient airflow and proper insulation to perform well. For window units, failing to seal gaps around the unit can lead to air leaks, reducing efficiency and causing discomfort.
Electrical issues are a common cause of AC failure. Improperly wired systems can lead to electrical shorts, system malfunctions, or even fires. For mini-split systems and central AC, it’s essential to have the system connected to the correct circuit and power source.
While installing an air conditioner may seem like a manageable DIY project, the complexity of the task makes professional installation the best choice for ensuring your system runs efficiently and reliably. From correctly sizing the unit to safely handling refrigerant and electrical components, professional installers bring the expertise needed to avoid common mistakes and maximize system performance.
Hiring a professional ensures your air conditioner is installed properly and can save you money in the long run by improving efficiency, prolonging the lifespan of the system, and preventing costly repairs.
Professional installers have the training and experience to handle complex installation tasks safely and efficiently. They understand how to correctly size an air conditioner for your home, ensuring optimal cooling and energy efficiency. They are also trained to handle refrigerant and electrical systems, which require specialized knowledge.
Air conditioner installation involves various steps, and even small mistakes can impact the system’s performance. From improper placement of the indoor and outdoor units to incorrect refrigerant levels, installation errors can lead to reduced cooling efficiency, higher energy bills, and even costly repairs.
Installing an air conditioner can be a time-consuming task that requires multiple steps, including electrical wiring, refrigerant charging, and system testing. A professional installer can complete the job in a fraction of the time it would take for a DIY installation, allowing you to enjoy your cool home sooner.
While professional installation may cost more upfront, it can save you money over time by ensuring your air conditioner operates efficiently. An improperly installed system can lead to higher energy bills, frequent breakdowns, and a shorter lifespan. A professional installation maximizes the system's efficiency and performance, reducing the need for repairs and extending the life of your air conditioner.
Air conditioner installation involves electrical work and handling refrigerants, both of which can be dangerous if not done correctly. A licensed professional has the necessary training to handle these elements safely, reducing the risk of electrical hazards, leaks, or system malfunctions.
Most air conditioner systems come with a warranty, but having a professional install the system ensures you don’t void that warranty. Improper installation can lead to issues that aren’t covered by the manufacturer’s warranty. Additionally, professionals often offer long-term support for maintenance and troubleshooting, ensuring you have access to expert help throughout the life of your system.
Every region has its own local building codes and regulations related to HVAC systems. Professionals are familiar with these codes and know how to properly install air conditioning systems to meet legal requirements. This ensures the system is compliant and avoids potential fines or issues during future inspections.
Installing an air conditioner is one of the most effective ways to improve home comfort, energy efficiency, and indoor air quality during warmer months. Whether you choose a window unit for a single room, a ductless mini-split for flexible zoning, or a central system for whole-home cooling, proper installation plays a major role in how well the system performs over time.
Understanding the different AC types, following the correct installation steps, and avoiding common mistakes can help prevent performance issues, high energy bills, and premature system wear. While some units are suitable for DIY installation, more complex systems benefit greatly from professional expertise to ensure safety, efficiency, and long-term reliability.
Installation time depends on the type of unit. Window units typically take 4-6 hours, while central or mini-split systems can take 1-2 days due to complexity.
Window and portable units can be installed by homeowners. However, central A/C and mini-split systems require professional installation for proper functionality and efficiency.
If your current ducts are outdated or damaged, it may be necessary to replace them for optimal performance with a new central A/C system.
Ducted air conditioners require space for both the indoor unit (typically in a basement, attic, or utility room) and an outdoor unit placed in an open, well-ventilated area.
Join our mailing list for exclusive updates, expert tips, and special offers tailored to your needs. Be the first to know about the latest in home services.

Renovize Home is a platform that supports homeowners from planning to renovation. Whether it’s Renovize AI for guidance or a one-on-one call with Pro Finder, we understand your project and match you with local contractors tailored to your needs.
Who We Are
About Renovize HomeGet in TouchHomeownwer Support:
Coming Soon!
General Inquiries:
support@renovizehome.com
Head Office:
24 Greenway Plaza, STE 1800M, Houston, TX 77046.