Explore All
BROWSE BY CATEGORY
Interior
Exterior
Home Essentials
Homeowner Tools
Blogs & Guides
Find a Pro
Book Your Appointment Now
Home Essentials
About Renovize Home
Explore All
BROWSE BY CATEGORY
Interior
Exterior
Home Essentials
Homeowner Tools
Blogs & Guides
Find a Pro
Book Your Appointment Now
Home Essentials
About Renovize Home
Last Updated 2025-11-17
A walk-in shower installation transforms your bathroom into a modern, spacious, and accessible space. Unlike traditional tubs or enclosed showers, walk-in showers feature a open entry design that enhances comfort, convenience, and safety. Whether you’re upgrading for style, accessibility, or value, a properly installed walk-in shower delivers both beauty and long-lasting function.
Table of Contents
How Walk-In Showers is Different From Traditional Showers
Why Homeowners Choose Walk-In Showers
Core Components of a Walk-In Shower System
Walk-In Shower Installation Process
Converting a Bathtub into a Walk-In Shower
Cost of Walk-In Shower Installation
Final Takeaway
A walk-in shower gives your bathroom an open and modern feel. It removes the barriers you usually see in traditional tubs or enclosed showers, making the space easier to use and much more comfortable. Instead of stepping over a high tub edge or standing behind a heavy curtain, you get a clean, open area that feels bigger and brighter. Here are key differences:
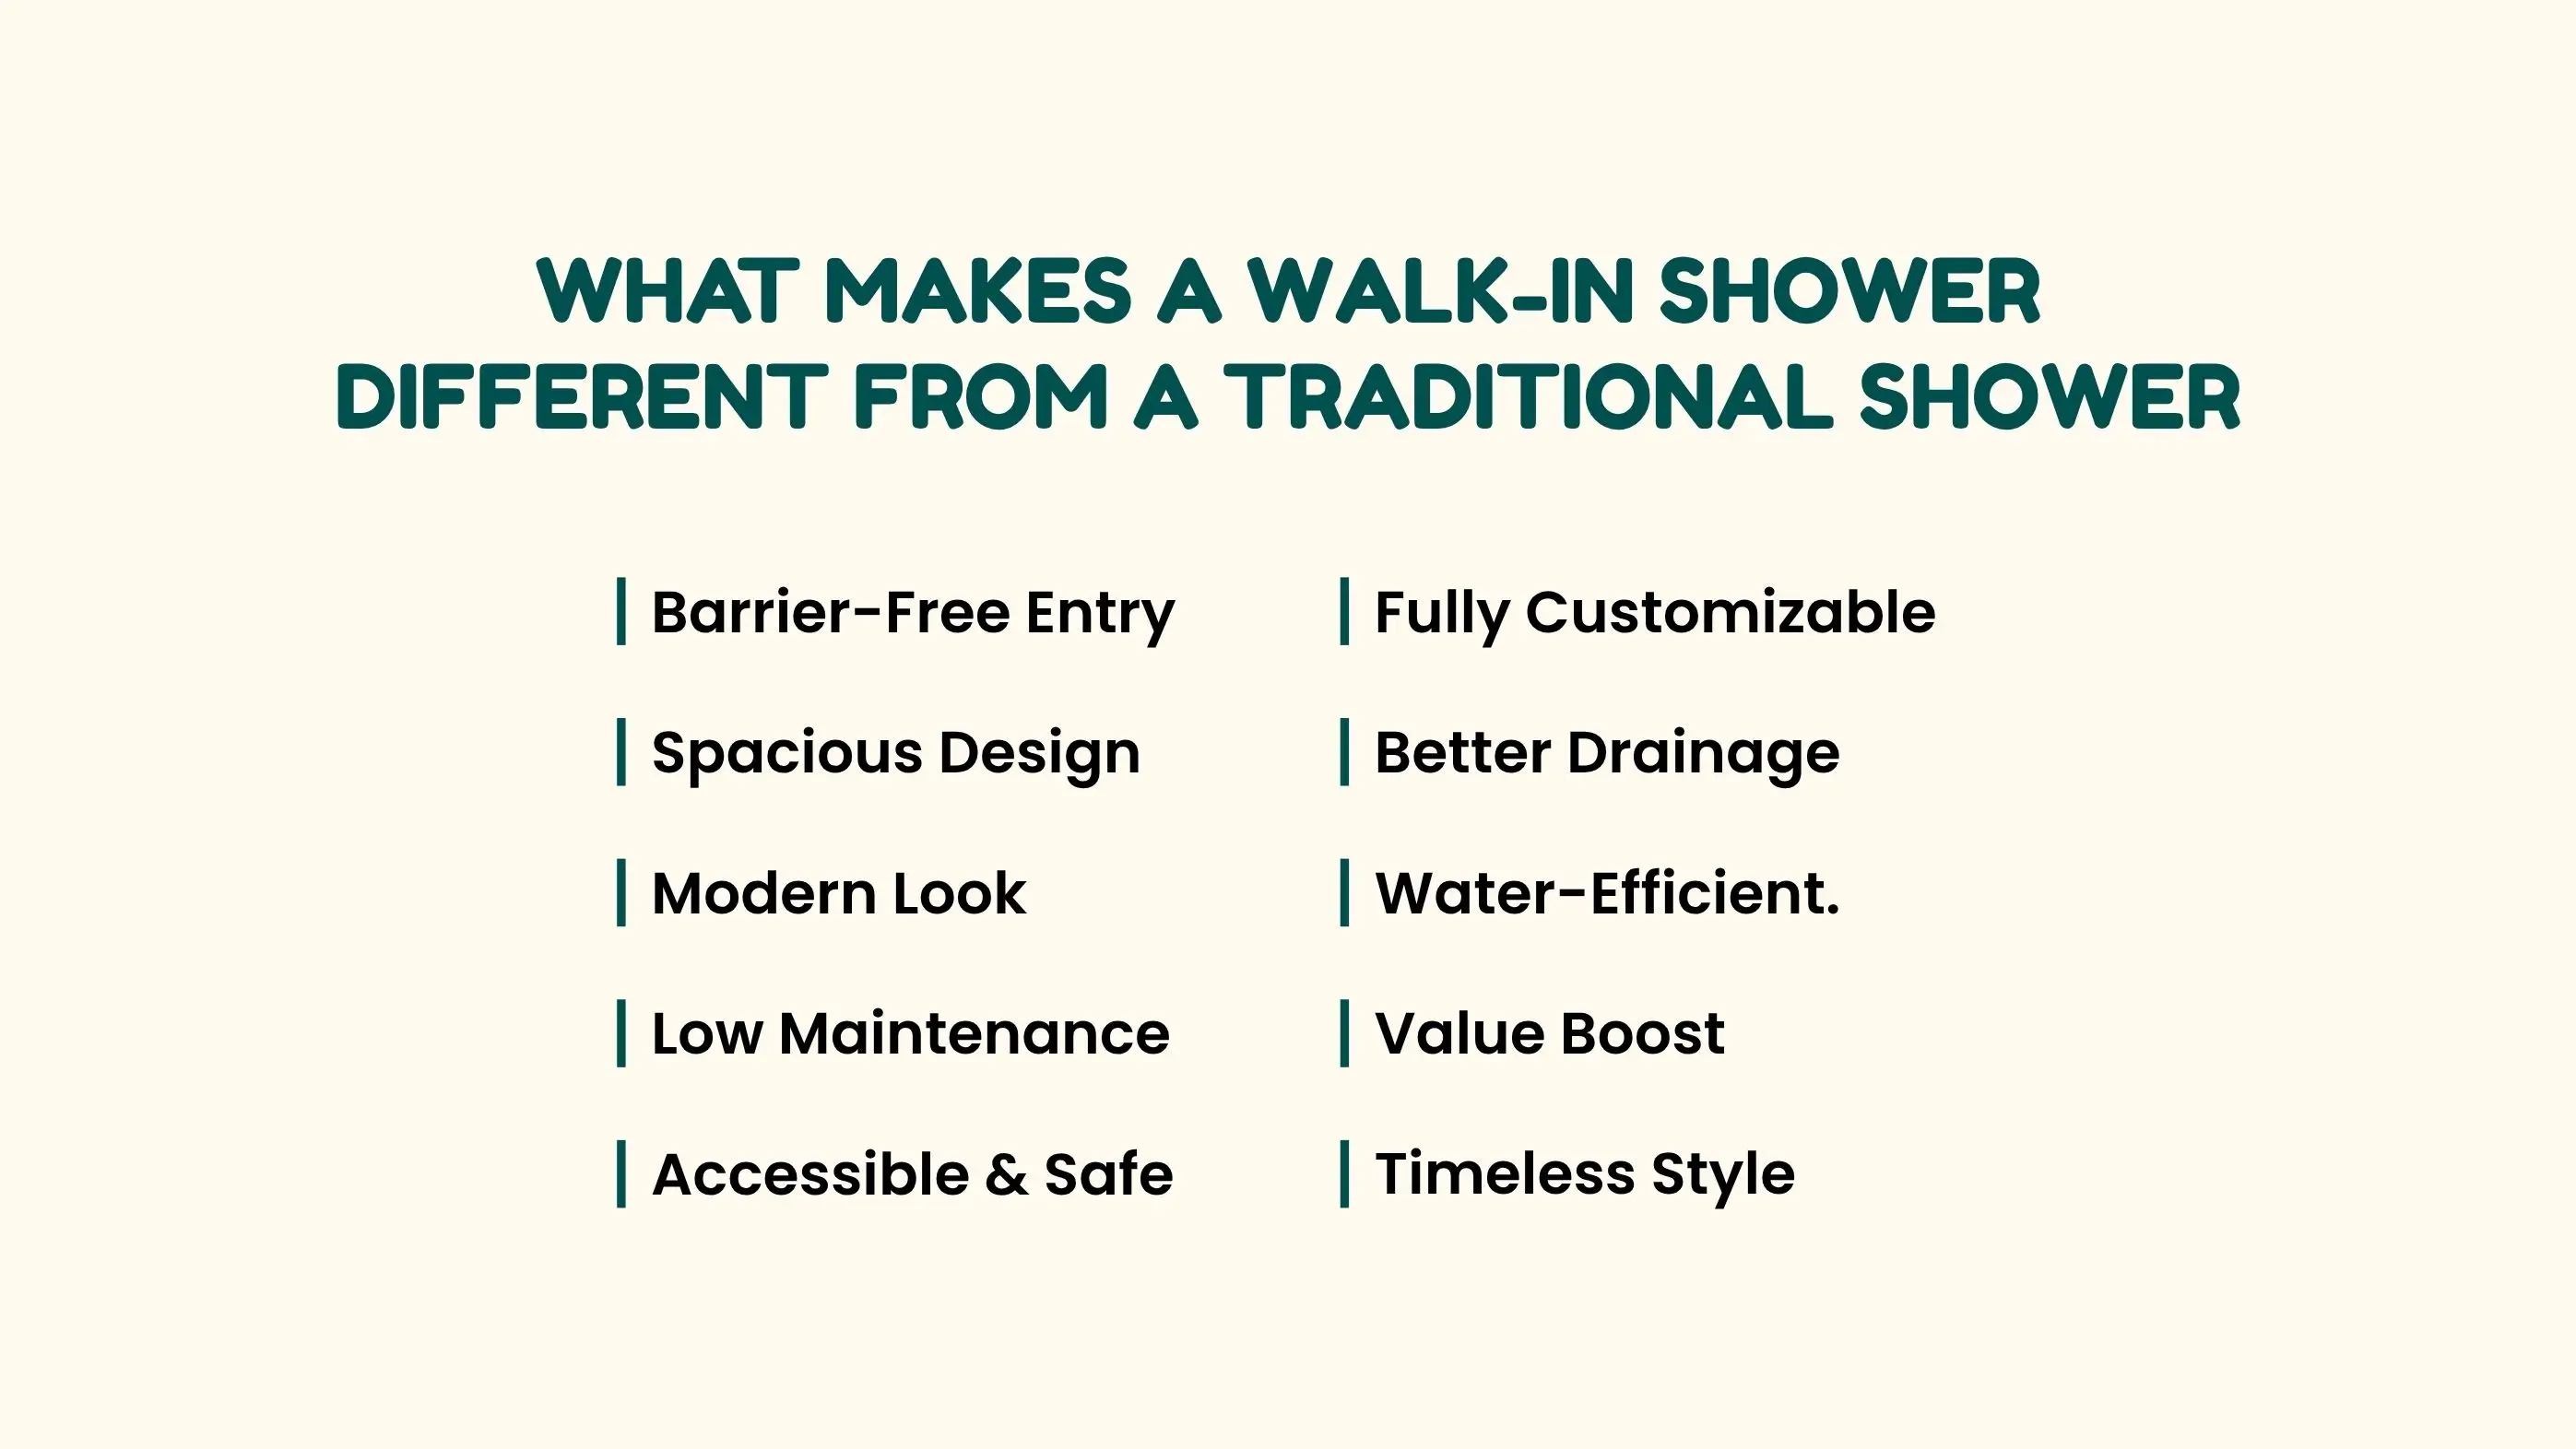
Walk-in showers have a low or curbless entry that makes it easy to walk in without lifting your feet high. This lowers the chance of slipping and is very helpful for kids, seniors, and anyone with mobility issues.
Without bulky frames or curtains, the bathroom feels wider and more open. Clear glass panels let more light in, making the whole room look fresh and airy.
Walk-in showers use clean lines and frameless glass to create a stylish, updated appearance. They fit well in both modern and minimalist bathroom designs.
Because there are fewer corners and no shower curtains, walk-in showers collect less dirt and soap scum. Smooth surfaces make cleaning quicker and more convenient.
You can add features like grab bars, slip-resistant flooring, wider openings, or built-in seating. These small additions make the shower safer without affecting the overall design.
Walk-in showers can be built to match your needs. You can add storage niches, rain showerheads, LED lighting, or a bench to create a comfortable and relaxing space.
The shower floor is slightly sloped so water drains better. Modern waterproofing methods help prevent leaks and moisture issues that are common in older tub setups.
Walk-in showers usually use less water than filling a bathtub. Pairing them with a low-flow showerhead can help save even more water.
Walk-in showers are one of the most popular bathroom upgrades today because they offer comfort, accessibility, and a modern look. They combine style with practical benefits, making them ideal for homeowners who want a future-ready bathroom.
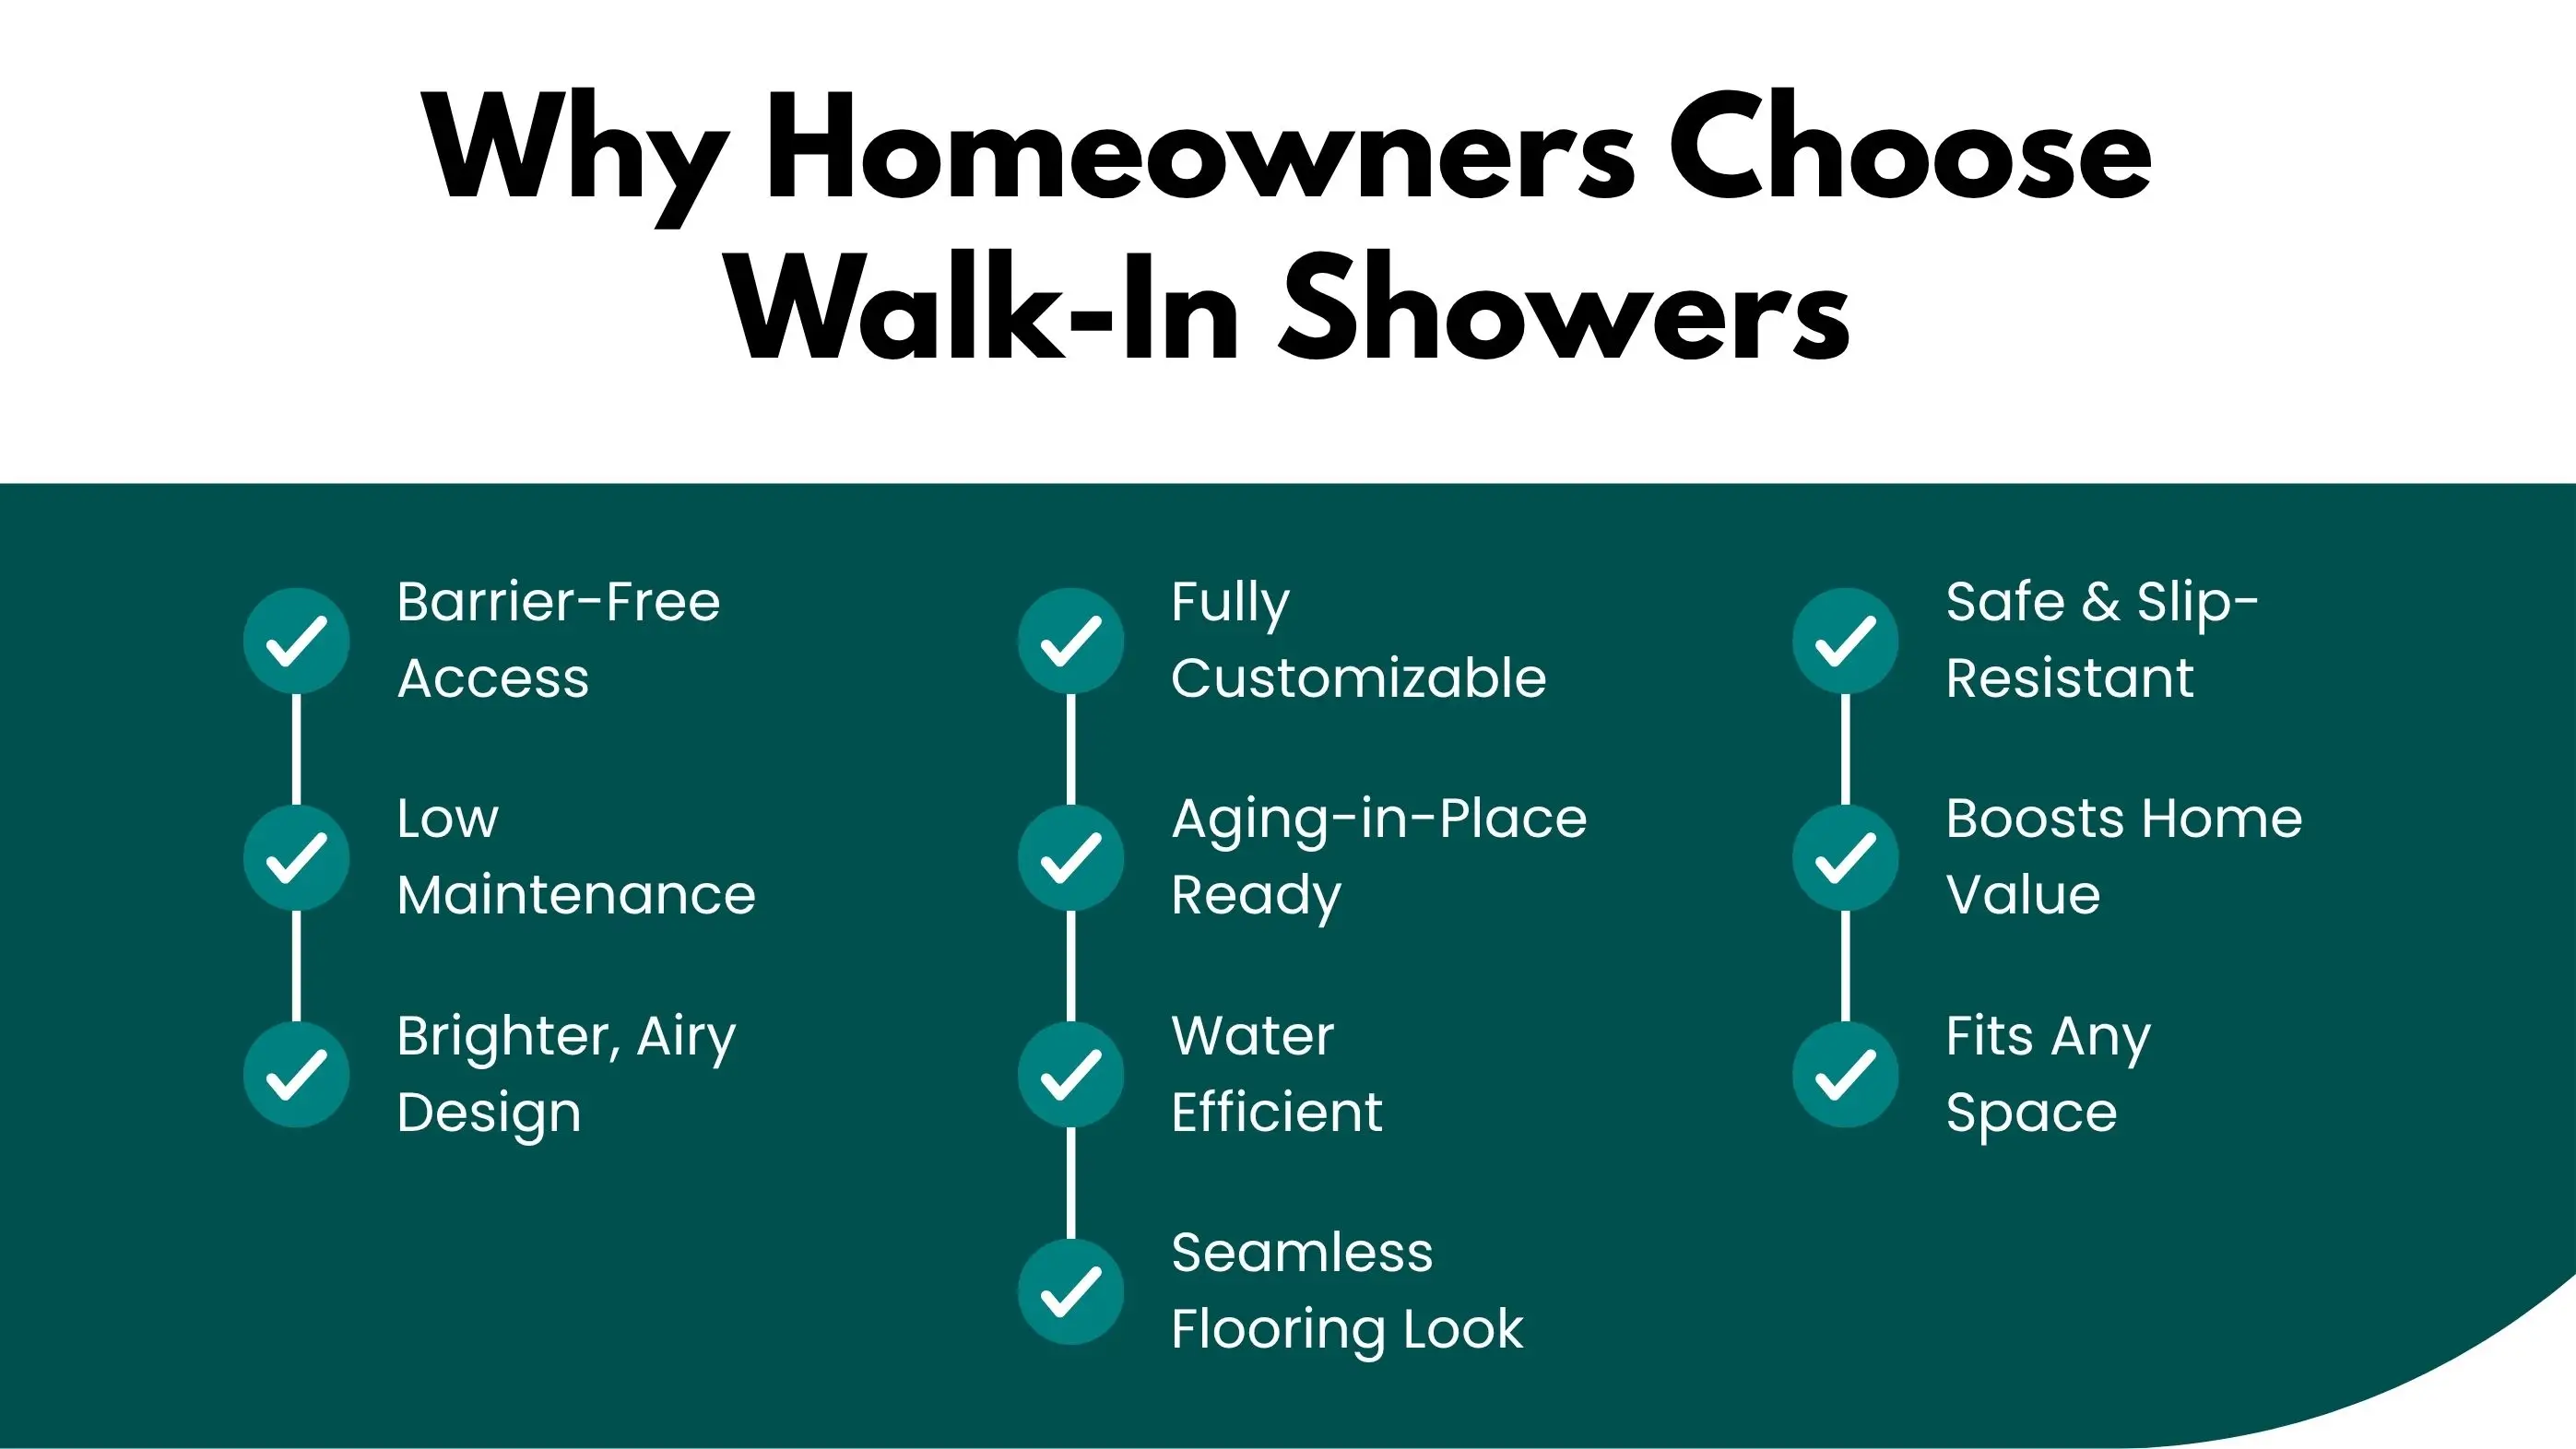
The curbless entry makes walk-in showers safe and convenient for children, seniors, and anyone using wheelchairs or mobility aids.
With no curtains, deep corners, or heavy framing, walk-in showers are much easier to clean. Smooth surfaces and installing large tiles reduce grime buildup and can cut cleaning time by up to 50 percent.
The open design improves ventilation, reduces humidity, and helps prevent mold. Clear glass also lets natural light brighten the bathroom.
Homeowners can choose everything from tiles and fixtures to benches and lighting. Features like rainfall showerheads, steam systems, and recessed niches create a spa-like feel without needing extra space.
Walk-in showers support aging in place by offering safe, lifelong accessibility without major renovations later.
They work well with low-flow showerheads and smart controls, reducing water use by 20 to 30 percent and helping lower monthly utility costs.
The curbless layout allows continuous flooring throughout the bathroom, creating a unified, high-end look and improving mobility for wheelchair users.
Non-slip tiles, grab bars, and seating options reduce the risk of slips and falls while keeping the space stylish.
Homes with walk-in showers often attract more buyers. Remodels can increase bathroom value by 5 to 10 percent, especially in modern markets.
Walk-in showers can be designed for small or large spaces. Corner setups, glass partitions, and linear layouts make them adaptable to almost any bathroom plan.
A walk-in shower consists of several carefully integrated components that work together to create a durable, waterproof, and visually appealing setup. Each element from the base to the glass enclosure plays a crucial role in maintaining both function and design consistency.
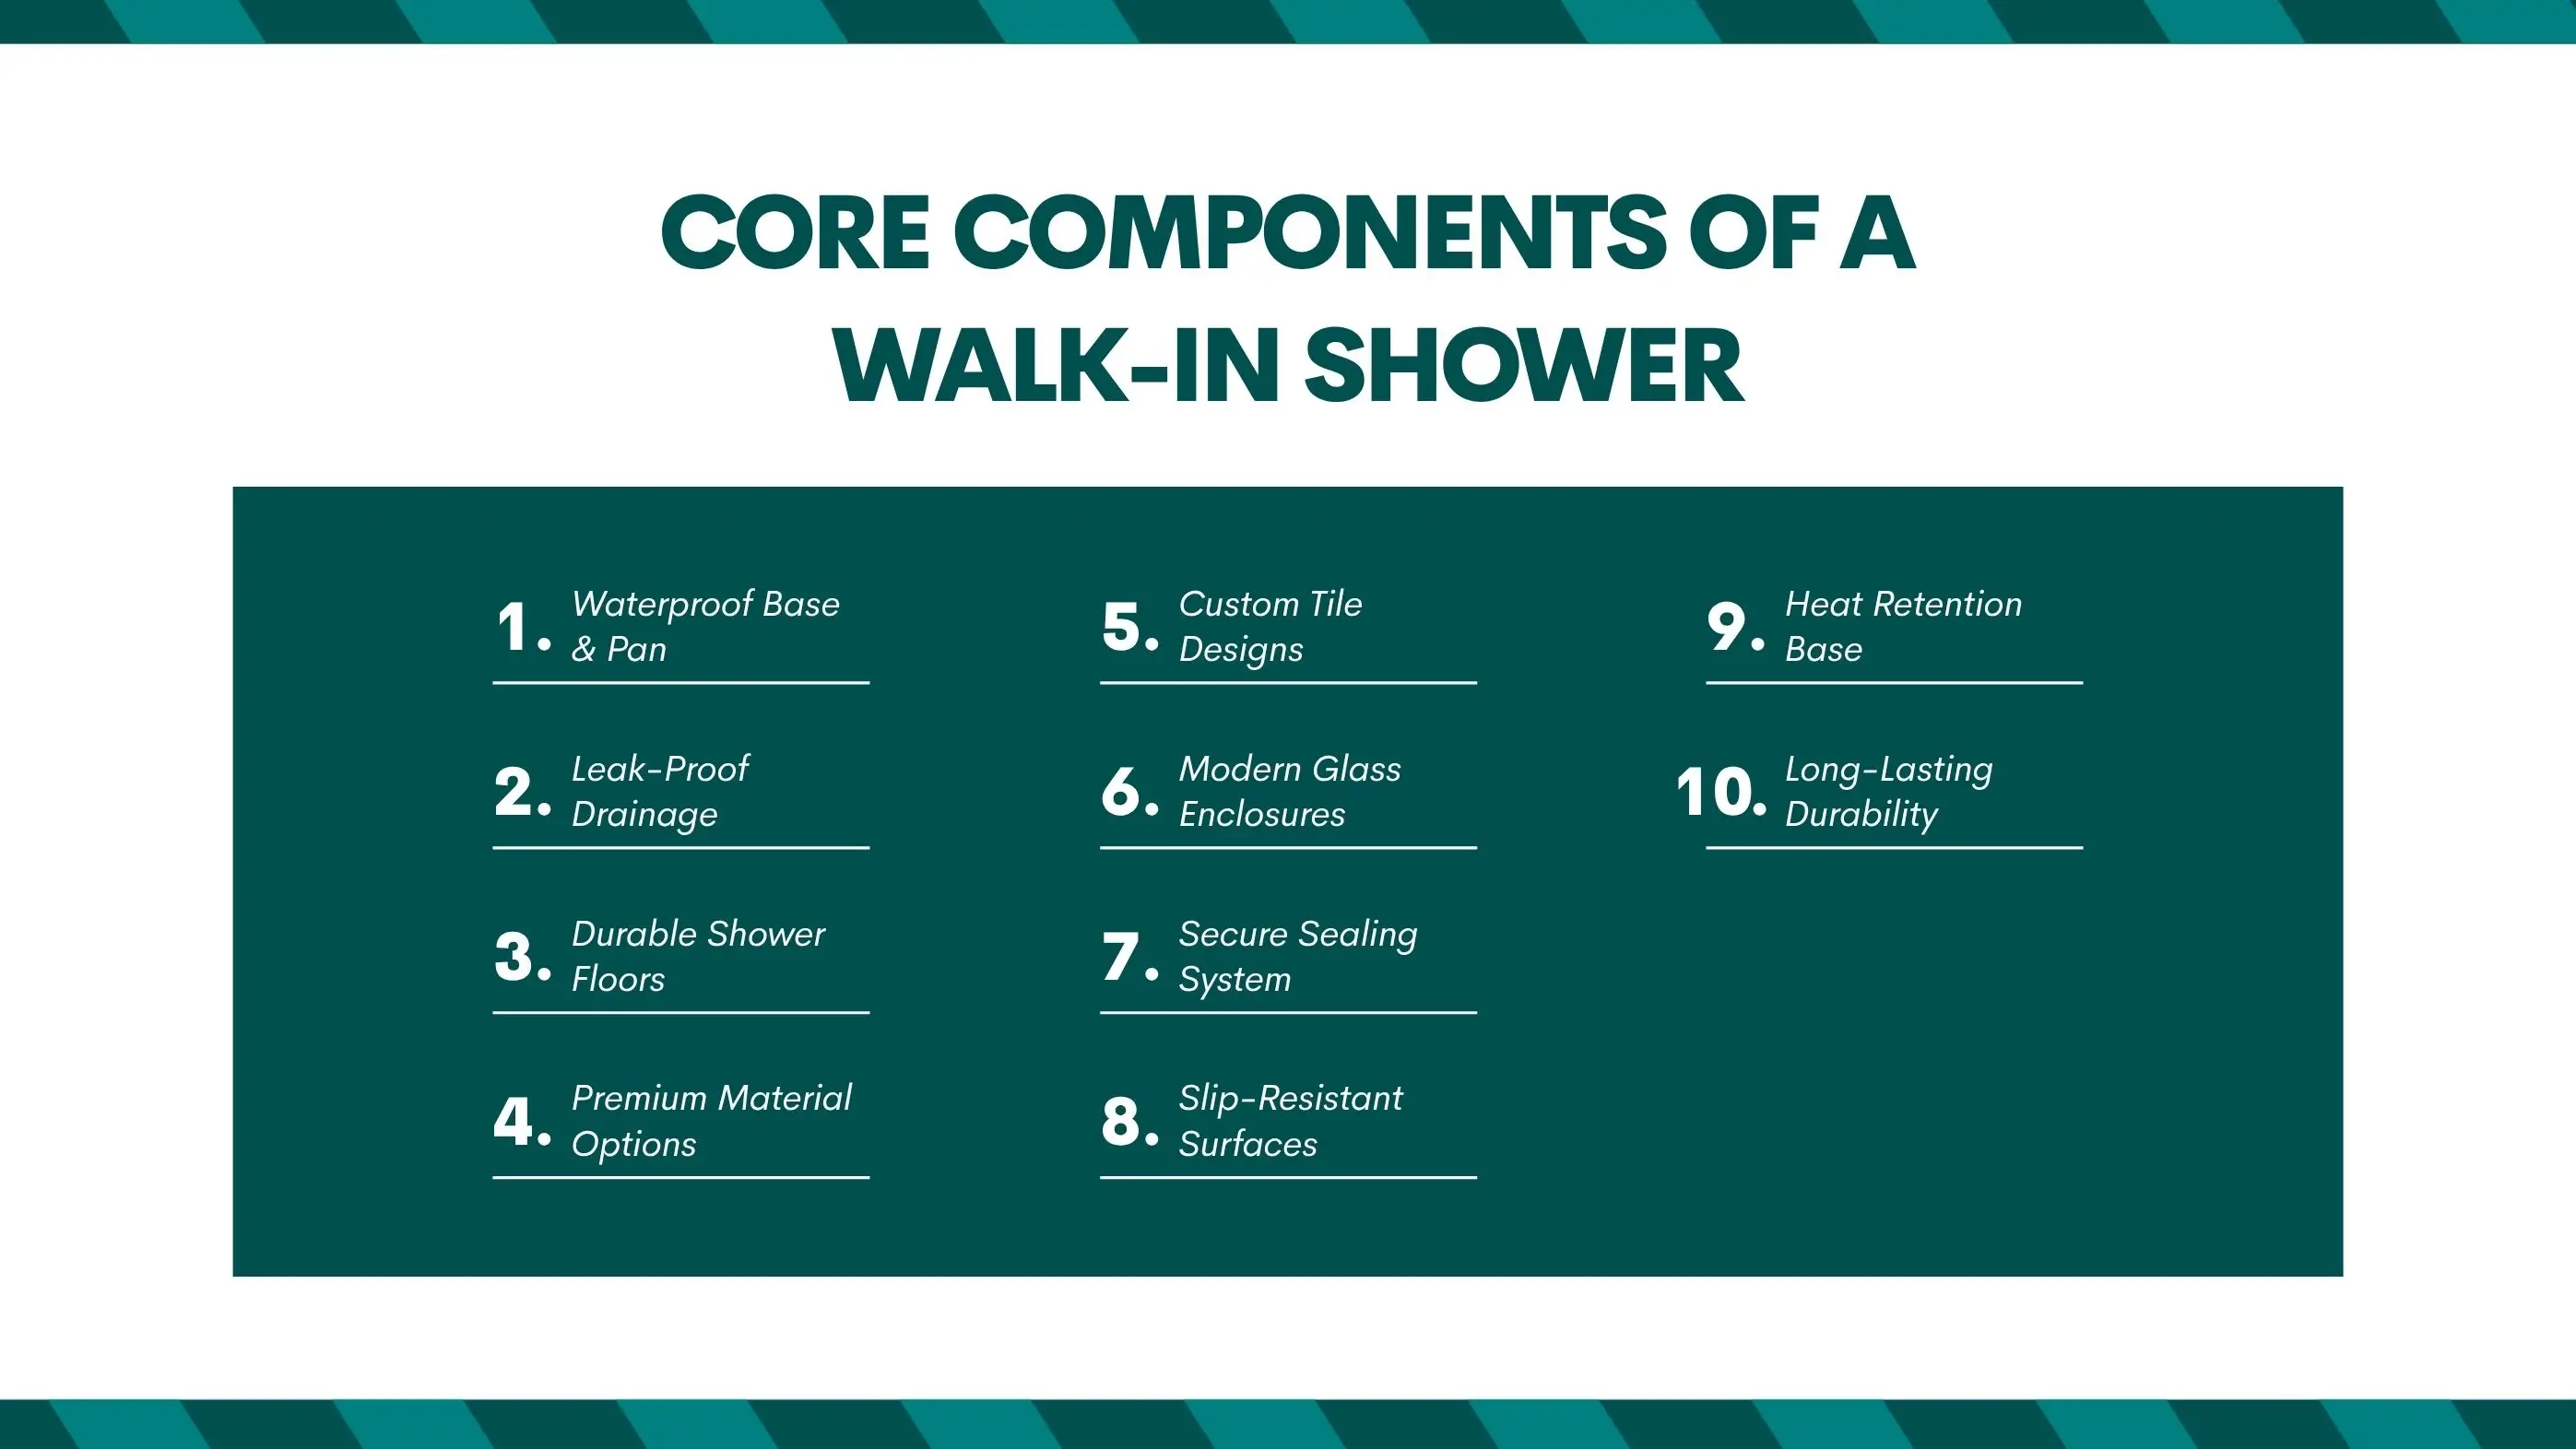
The base, pan, and shower floor form the foundation of any walk-in shower. These components manage water flow, maintain structural integrity, and prevent leaks all while complementing your bathroom’s style. A properly installed waterproof base ensures that water drains efficiently without pooling or seeping into subflooring, which is vital for preventing mold and damage.
Here’s a breakdown of the most common options and their features:
| Type | Material | Advantages | Best For |
|---|---|---|---|
| Acrylic Bases | Lightweight molded plastic | Affordable, easy to install, non-porous | Budget-friendly or quick remodels |
| Stone Resin Pans | Crushed stone with resin binder | Luxurious, durable, retains heat | Premium bathrooms and modern remodels |
| Tile Shower Floors | Ceramic or porcelain tiles over mortar bed | Fully customizable, aesthetic flexibility | Custom-designed and high-end bathrooms |
| Fiberglass Pans | Reinforced composite material | Lightweight, easy to maintain | Mid-range remodels and rentals |
Framed enclosures use metal edges for structural support, making them more affordable and easy to install. Frameless glass showers, on the other hand, use thicker tempered glass (⅜ to ½ inch) for a seamless, modern look. Frameless options enhance light flow and make cleaning easier since there’s no frame to trap grime.
| Type | Advantages | Best For |
|---|---|---|
| Framed | Affordable, strong support | Budget remodels |
| Semi-Frameless | Partial frame, elegant | Mid-range bathrooms |
| Frameless | Sleek, easy to clean | Modern and luxury designs |
A walk-in shower depends on proper plumbing, drainage, and wall protection to stay leak-free and efficient. These hidden components make sure the shower delivers water correctly, drains smoothly, and protects walls from long-term moisture damage.
Setting up the plumbing system supplies hot and cold water to the showerhead, valves, and optional fixtures like hand sprayers or body jets. Professionals use the right pipe size, secure all connections, and ensure proper pressure balance. Materials such as PEX or copper resist corrosion and help prevent leaks. Many installations include a thermostatic valve to keep water temperature consistent and safe.
Good drainage prevents puddles, mold, and odors. Walk-in showers commonly use center drains for smaller areas or linear drains for open layouts. Linear drains remove water faster and work well with large or flat tiles. The drain connects to a PVC or stainless steel trap that blocks sewer gases. The shower floor is sloped at ¼ inch per foot toward the drain to keep water flowing smoothly.
Wall panels protect the walls from moisture while adding style. Options include acrylic, laminate, solid surface, and stone composite. They are installed over a waterproof backer board or membrane to prevent leaks. Compared to tile, wall panels are smooth, low maintenance, and free of grout lines that can crack or stain over time.
Installing a walk-in shower requires careful steps to make sure the shower is durable, fully waterproof, and safe. Each stage matters because skipping even small details can lead to leaks, mold, or poor drainage later. Below is a clear and complete breakdown of what professionals do during installation.
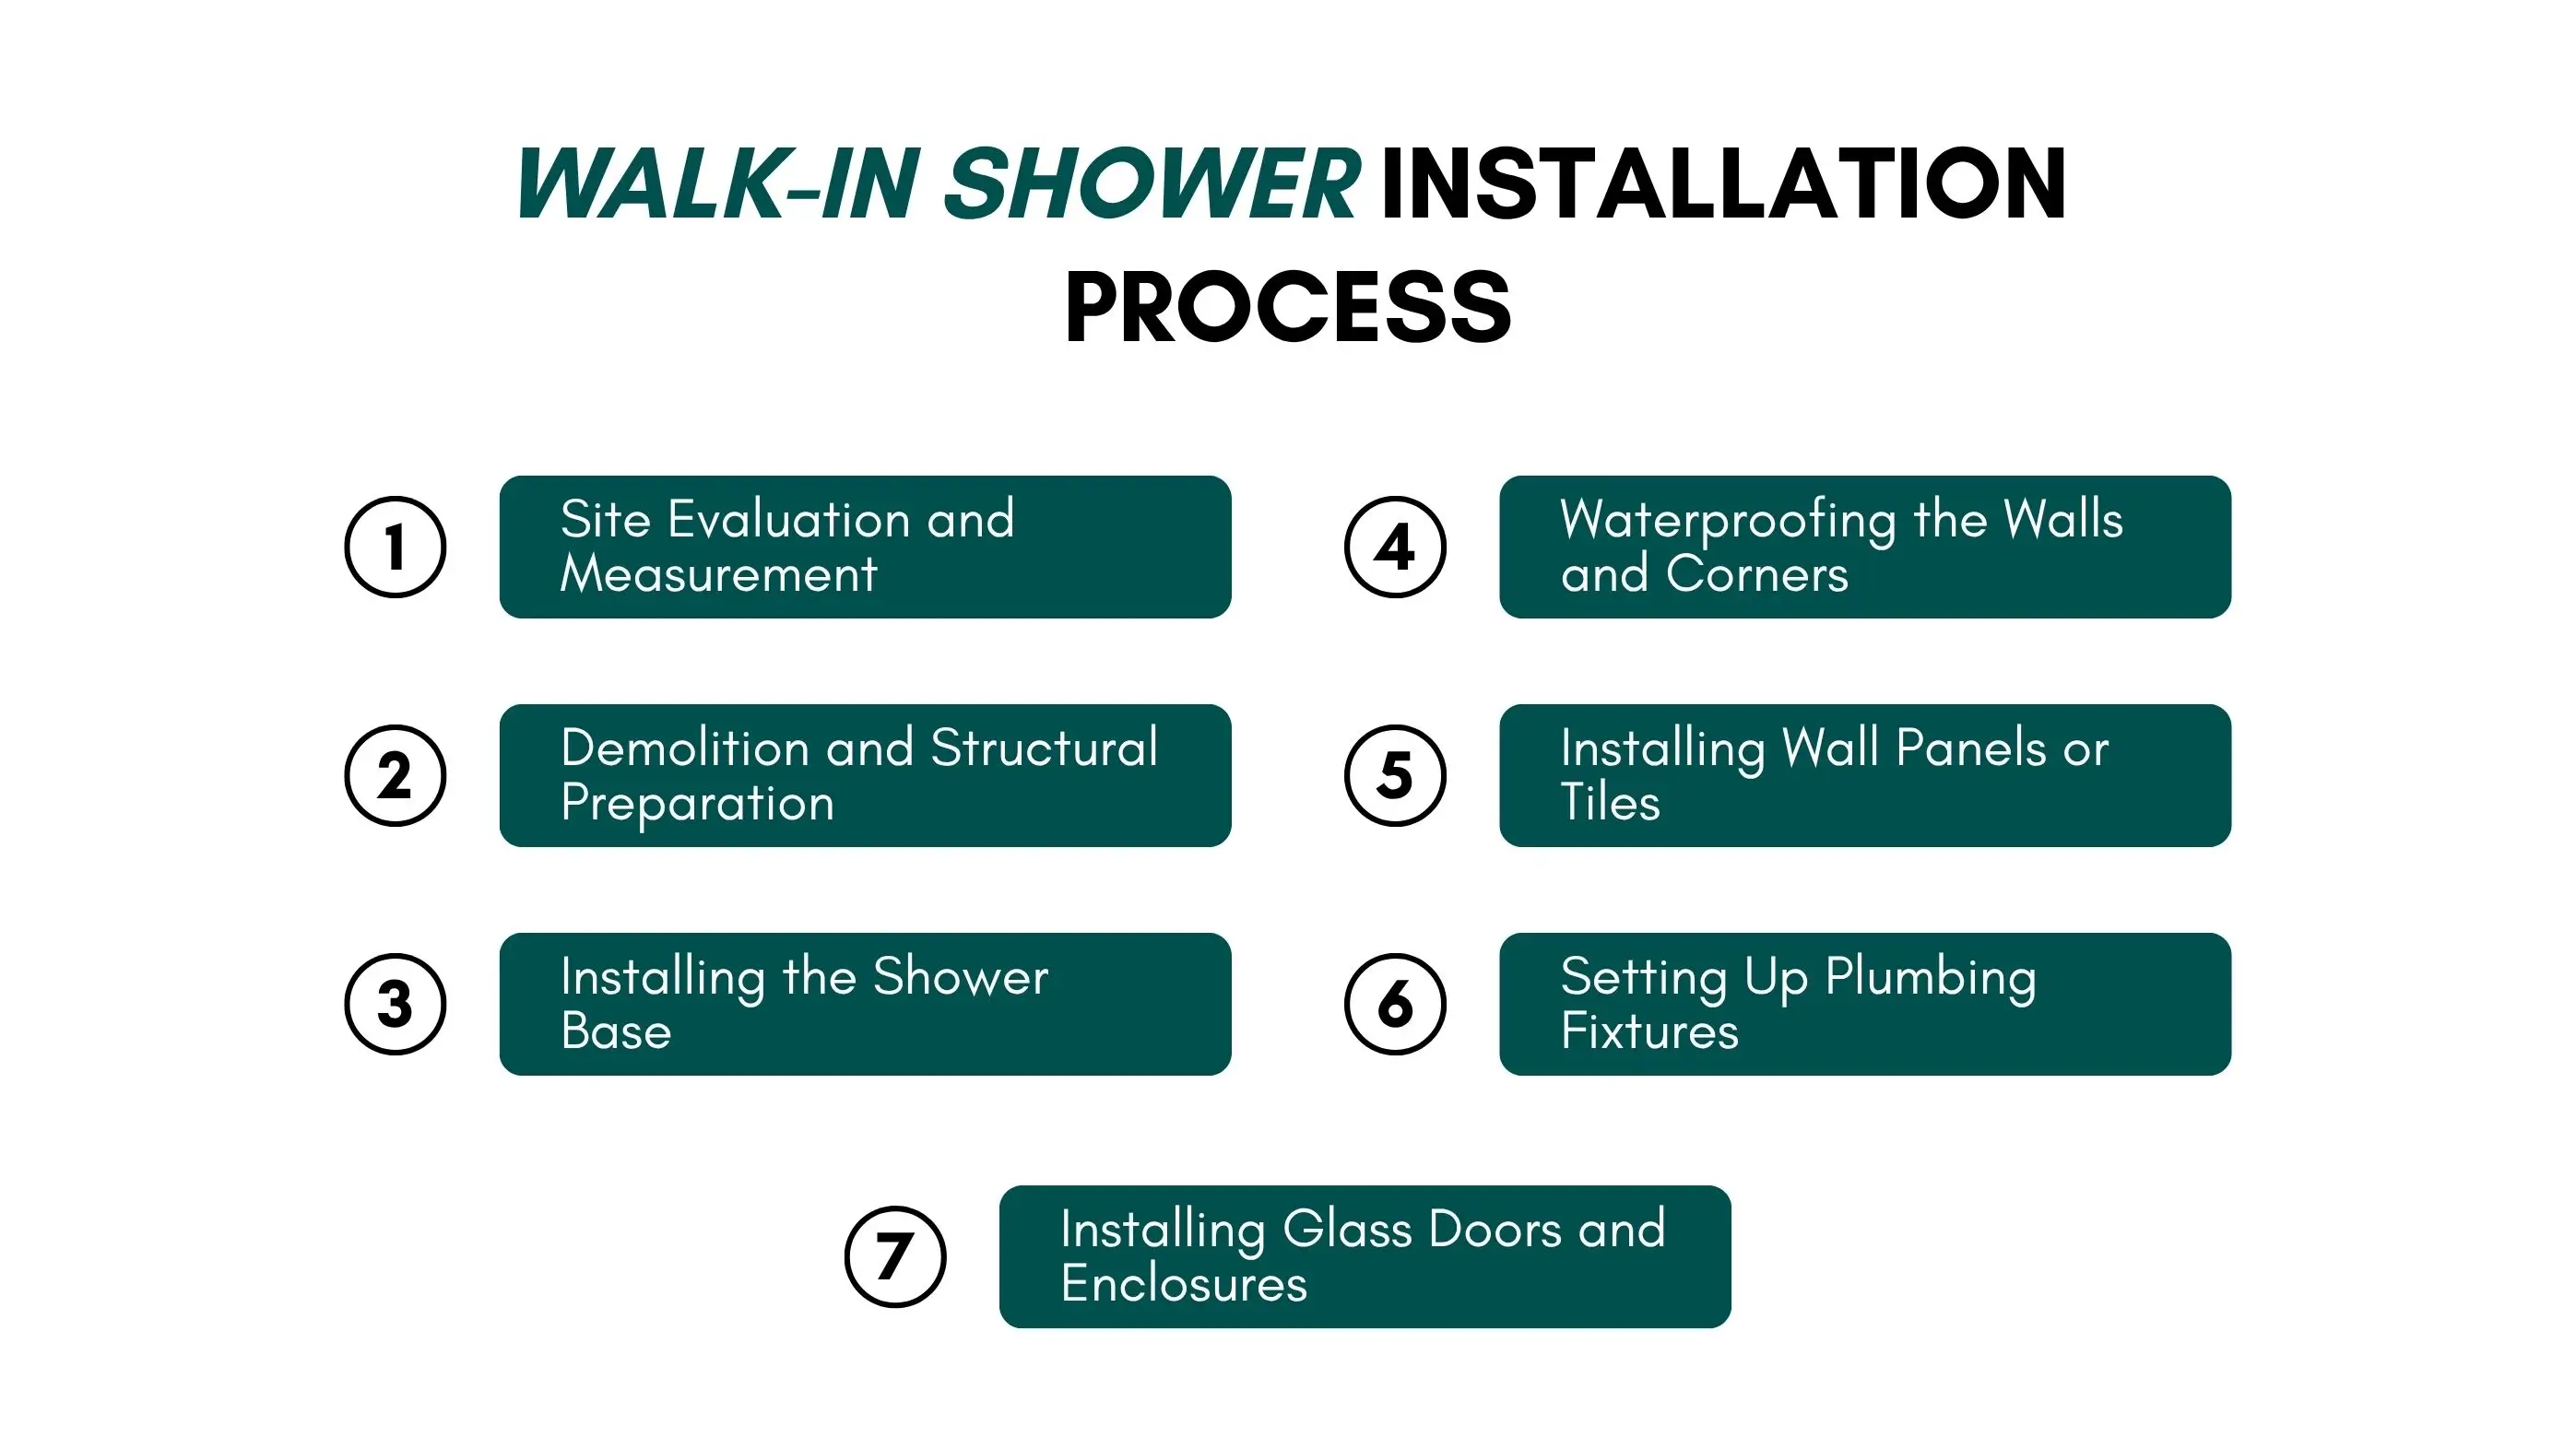
The installer measures the bathroom layout, checks wall studs, and reviews the plumbing system. They confirm whether the existing drain and water lines are correctly placed or need adjustment for the new design. Accurate measurements ensure the shower base, fixtures, and glass panels fit properly and prevent costly rework.
The old tub, tiles, or enclosure are removed. Water lines are shut off, and the drain is disconnected. The installer checks for hidden mold, rotted studs, or damaged subflooring (common in older bathrooms). Any issues are repaired, and the subfloor is leveled to prevent cracking or shifting after installation.
The shower base or pan is set on a layer of thin mortar or adhesive for stability and leveling. The drain assembly is connected and sealed with waterproof tape and silicone. Professionals check the floor slope, usually ¼ inch per foot, to ensure water flows directly to the drain. A waterproof membrane is installed under the base to prevent leaks.
Cement backer boards or waterproof panels are installed around the shower. All seams, joints, and corners are sealed with a liquid waterproof membrane or special waterproof tape. This step prevents water from getting behind the walls, which is a leading cause of mold growth. The surface is allowed to dry fully before tile or panels are added.
After waterproofing, acrylic panels, porcelain tiles, or stone finishes are installed. Installers work from the bottom up to maintain straight lines and even spacing. Tile grout is sealed, and panel seams are bonded with silicone to create a watertight surface.
Plumbers install valves, showerheads, hand sprayers, and any built-in niches, benches, or grab bars. Hot and cold water lines are pressure-tested to ensure there are no leaks. Smart features or rainfall showerheads are positioned correctly for best comfort and water flow.
Frameless or sliding glass doors are mounted and aligned. Hinges, clamps, or tracks are leveled to prevent wobbling. Edges are sealed with clear silicone to keep water inside while maintaining a clean, transparent look.
All joints and corners are sealed with 100 percent waterproof silicone. The installer tests water pressure, drainage flow, and checks for leaks around seams and fixtures. The shower door is checked for smooth movement, and ventilation is reviewed to prevent moisture buildup. The area is cleaned, polished, and prepared for use.
Replacing a bathtub with a walk-in shower is one of the most requested bathroom upgrades. It saves space, improves accessibility, and enhances property value.
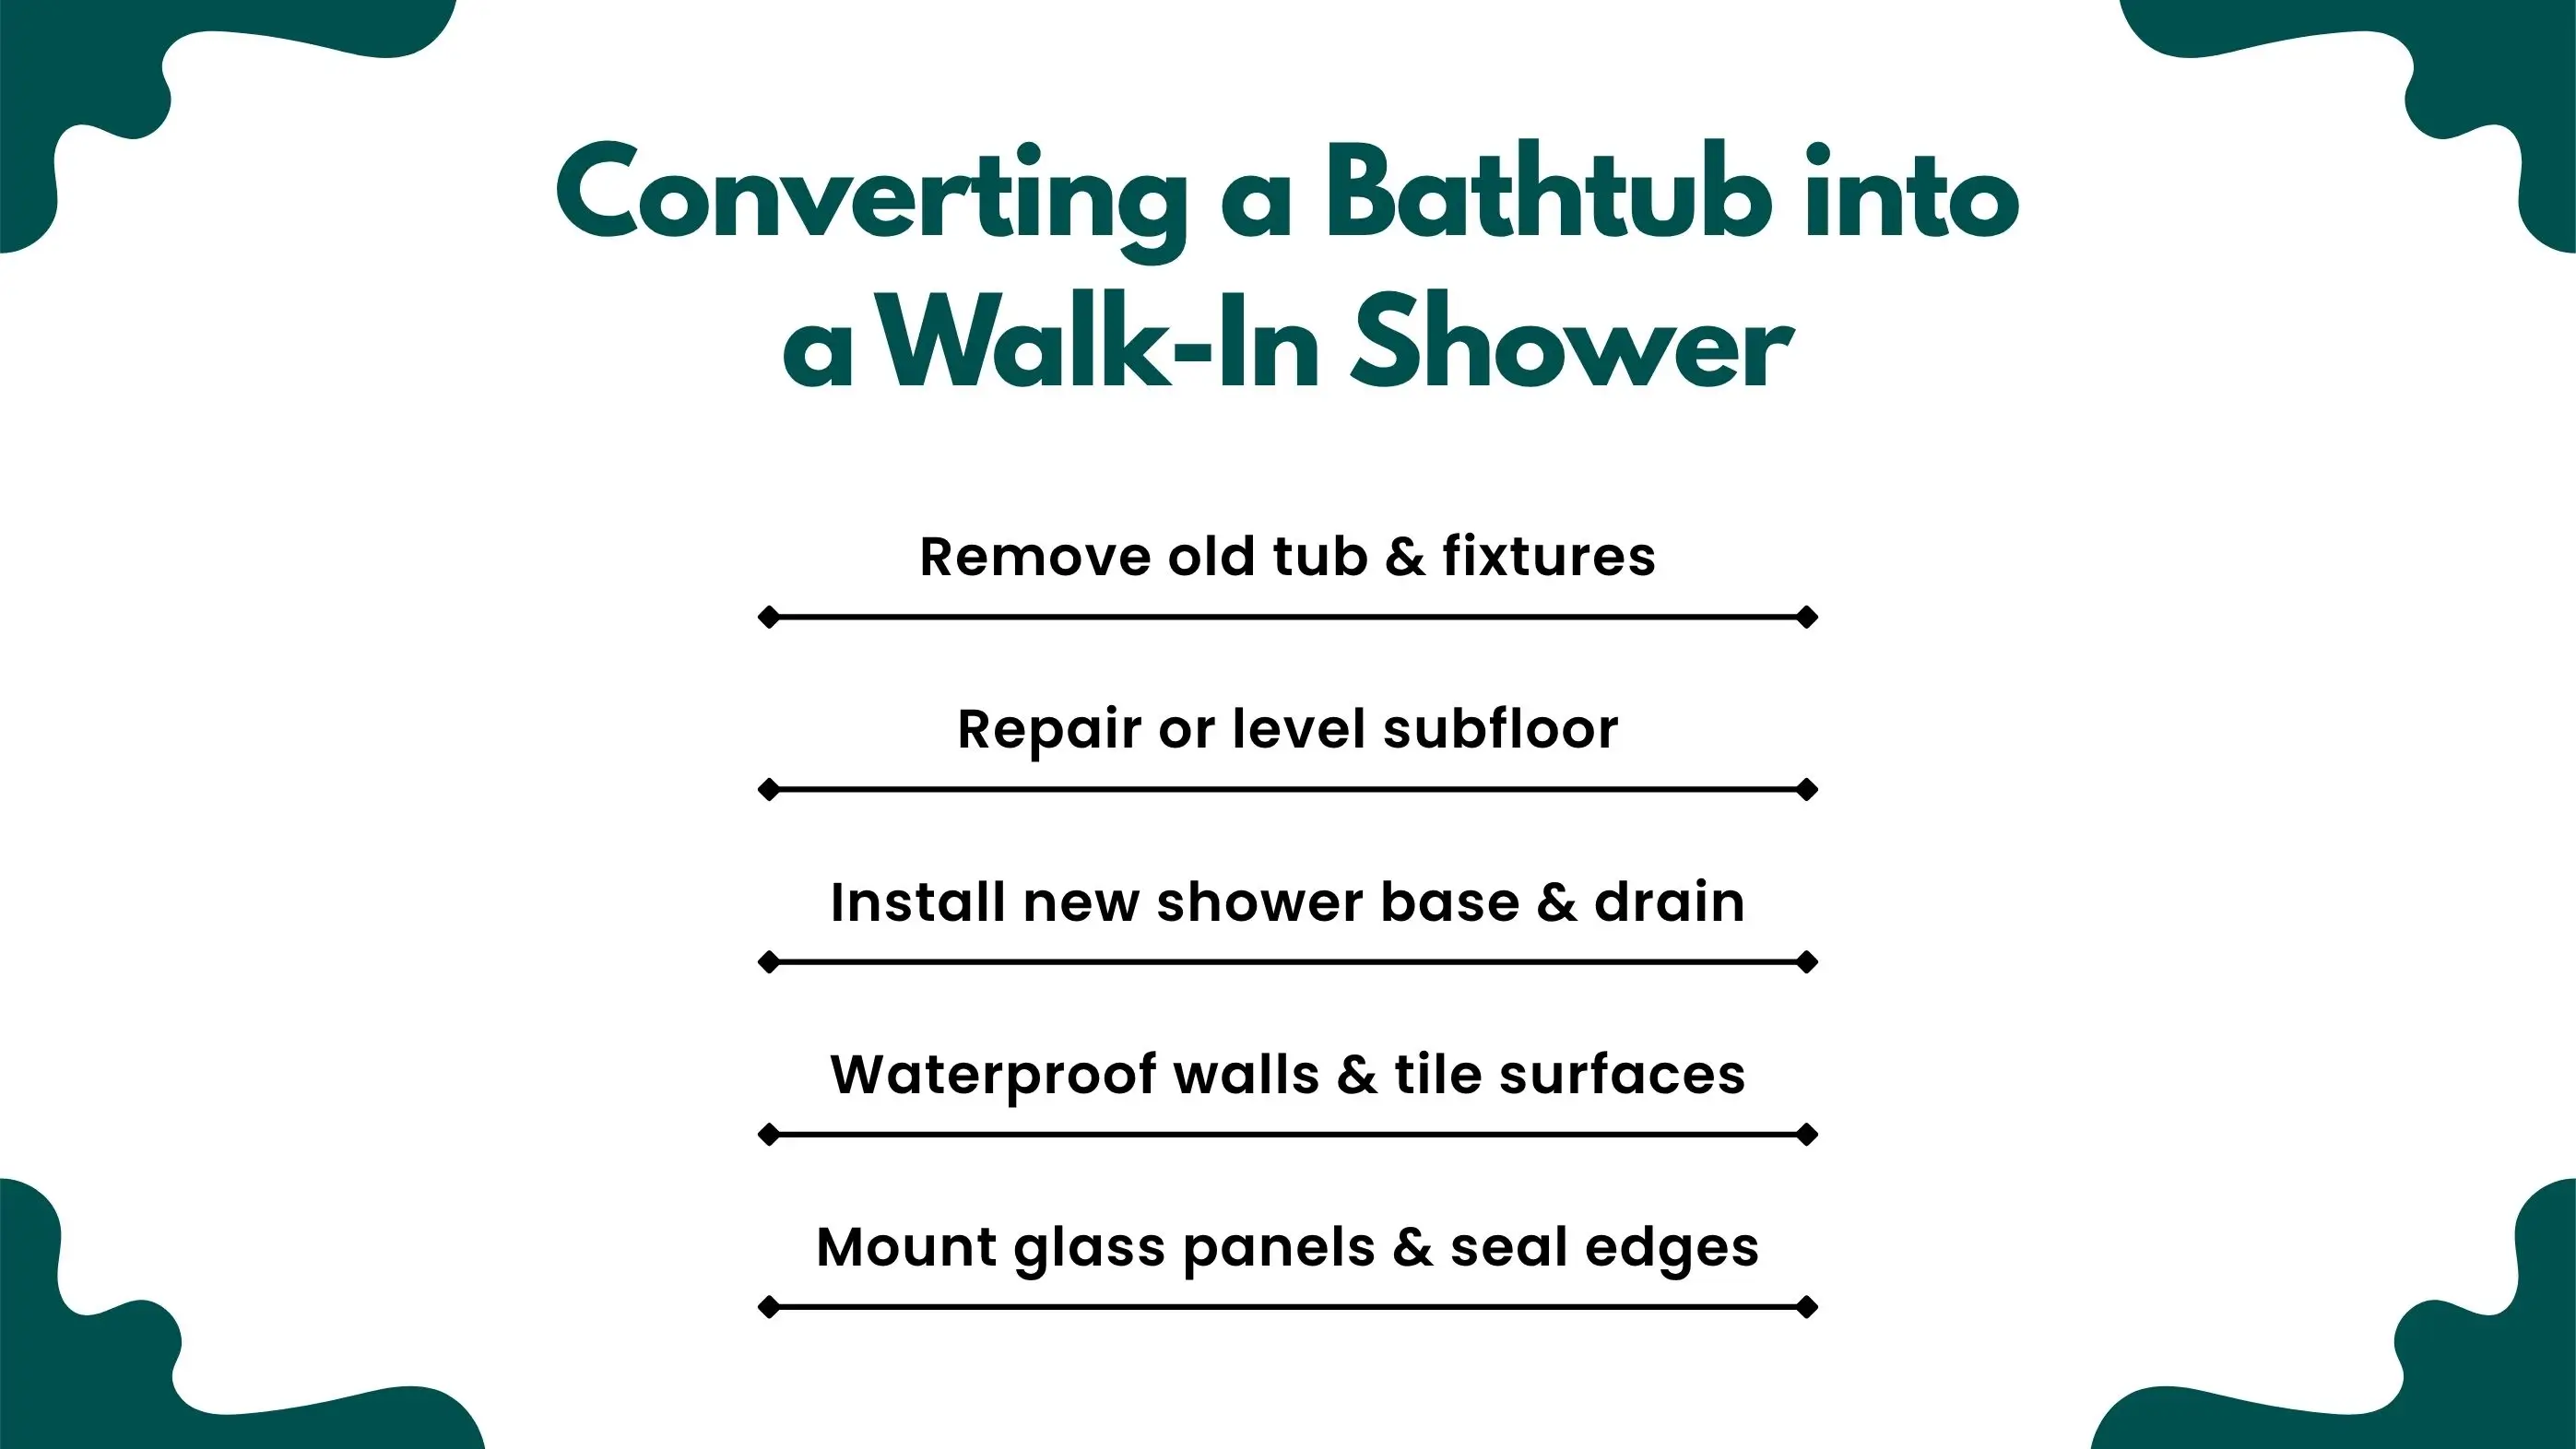
When converting a bathtub into a walk-in shower, many homeowners take the opportunity to add safety and accessibility features that make daily use easier for every age group. The goal is to future-proof your bathroom combining comfort, safety, and modern design.
Key upgrades include:
According to accessibility guidelines, at least a 36-inch-wide entry and low-threshold base (under ½ inch) are ideal for barrier-free movement. These upgrades not only improve usability but also boost resale value by making your bathroom universally accessible and modern
Replacing an outdated bathtub with a walk-in shower delivers both aesthetic and functional benefits transforming your bathroom into a more open, efficient, and inviting space.
The cost of installing a walk-in shower varies widely based on factors such as the size of the space, materials used, design complexity, and labor costs. A basic installation with standard materials might be affordable, buy custom designs, luxury fixtures, and professional labor can significantly increase the overall price.
| Item | Estimated Cost Range | Details |
|---|---|---|
| Shower Base or Pan | $200 – $1,000 | Acrylic, fiberglass, or custom stone options. |
| Frameless Glass Enclosure | $500 – $1,500 | Clear or frosted glass panels. |
| Tiles and Wall Panels | $300 – $2,000 | Ceramic, porcelain, or natural stone tiles. |
| Plumbing Installation | $100 – $500 | Relocating or adjusting plumbing lines. |
| Labor Costs | $600 – $1,500 | Professional installation fees. |
| Additional Fixtures (Showerheads, Faucets, Benches) | $100 – $1,000 | Quality fixtures, built-in benches, etc. |
| Electrical Work (Lighting, Heating) | $100 – $500 | Wiring for lighting, ventilation, and heating systems. |
The total cost for installing a walk-in shower generally ranges between $2,500 and $6,000. For a more luxurious setup with custom finishes, the cost can exceed $10,000 or more. However, basic, budget-friendly installations with standard tiles and acrylic panels can fall closer to the $2,500 range.
Walk-in showers bring comfort, style, and safety together in one design. From easy entry and elegant glass enclosures to energy-efficient plumbing, every detail enhances your bathroom’s functionality and value. Whether you’re replacing a tub or installing a new unit from scratch, a professionally installed walk-in shower offers lasting comfort, durability, and peace of mind for years to come.
Yes, if your existing tiles are stable, waterproof, and structurally sound, installers can add a shower base and waterproof wall panels over them. However, if tiles are cracked, hollow, or lifting, they must be removed to avoid hidden leaks.
Most installations take 2–5 days, depending on demolition needs, plumbing adjustments, waterproofing, and tile curing time. Custom tile designs or relocating plumbing can extend the timeline to 7–10 days.
No, a walk-in shower is not more prone to leaking if the waterproofing membrane, slope, and drain system are installed correctly. Leaks usually come from poor sealing—not from the walk-in design itself.
The smallest functional walk-in shower size is 32" x 32", but 36" x 48" is more comfortable. With linear drains, even small bathrooms can support open layouts without splashing.
Using a sloped floor (¼ inch per foot), a linear drain, and a fixed glass panel minimizes splash. Wider panels, rain showerheads, and recessed floor zones also keep water inside the shower area.
Join our mailing list for exclusive updates, expert tips, and special offers tailored to your needs. Be the first to know about the latest in home services.

Renovize Home is a platform that supports homeowners from planning to renovation. Whether it’s Renovize AI for guidance or a one-on-one call with Pro Finder, we understand your project and match you with local contractors tailored to your needs.
Who We Are
About Renovize HomeGet in TouchHomeownwer Support:
Coming Soon!
General Inquiries:
support@renovizehome.com
Head Office:
24 Greenway Plaza, STE 1800M, Houston, TX 77046.